How to Host a Webinar Using TrueConf Server?
With TrueConf Server you can hold webinars for up to 1500 participants. Webinar scheduling is available both for a TrueConf Server administrator via the control panel and for ordinary users via the conference scheduler in their client applications.
Webinars can be joined from TrueConf client applications (both desktop and mobile) or from any browser via our WebRTC application which doesn’t require installation.
Step 1: Setting up TrueConf Server
Before organizing the webinar, make sure your TrueConf Server is properly configured.
- Open the control panel, go to the Dashboard → Summary, and check the number of available guest connections.
If you are using TrueConf Server Free, you can create public conferences with one guest connection. If you need to increase the number of guest connections, contact our sales team to purchase this extension or request a free trial for up to 3 weeks.
- Set up an HTTPS connection in TrueConf Server and open ports to enable WebRTC participants to join webinars. When using a self-signed HTTPS certificate, each WebRTC participant will need to manually add it to the list of trusted certificates on their system. That’s why we recommend issuing or purchasing a full SSL certificate for a domain or IP address which grants access to the TrueConf Server guest page.
- Make sure that Send invitations to participants of the group conference box is checked in the Network → SMTP section of the control panel.
- Configure settings for on-demand video recording (has to be set up for each conference individually or for all conferences without any exception). By default, conference recordings are saved in the mkv and mp4 formats on the server side. If you want to start video recording right in the TrueConf Server control panel, select the mp4 format. To view conference recordings, use the media players that provide built-in support for the VP8 video codec. (e.g., VLC).
- To stream webinars to popular third-party services, you will need to purchase the Streaming extension, and configure settings for the corresponding streaming platform.
The following steps can be performed either in the Group conferences → Conferences section of the TrueConf Server control panel and in the scheduler of TrueConf client application.
Step 2: Create a webinar
Go to the Group Conferences → Conferences section of the TrueConf Server control panel and click Create. Alternatively, you can go to the Scheduled conferences menu in the Conferences section and click Create a conference. Next, select Public conference (webinar). It is also possible to enable the simultaneous interpretation mode which will allow you to select and appoint simultaneous interpreters among participants. This option is helpful if you are organizing an international conference with presentations in different languages. Click Continue and configure the following settings.
General settings
Configure the following settings on the General tab:
- Webinar name;
- In the Owner section, select the user who will be the conference owner (available when creating a conference in the control panel). If you create a conference in a client application, you will be the owner;
- In the Conference mode section, select Moderated role-based conference, and select the number of presenters.
In the moderated role-based conference mode you can engage your audience and bring interactive elements to your webinar thanks to different user roles (speakers, attendees and moderators). If necessary, you can select the smart meeting mode so that attendees could take the podium automatically. However, in this case, it will be more difficult to manage the flow of the conference manually. To learn more about the logic underlying the smart meeting mode check our documentation for TrueConf client application. Please note that simultaneous interpretation is available only in a webinar held in moderated role-based conference mode.
- Webinar date, start time (in your time zone) and duration (Date and Time section).
To make sure that the webinar does not end unexpectedly, in the conference control menu, check the box Remind me XX min before the conference ends (time XX parameter can be adjusted) and Enable conference time extension.
Interpretation tab
In interpreter channels, participants will hear the original audio track in the background. By default, the volume of the original audio track will be set at 30%. but you can adjust the volume level as you like.
Simultaneous interpreters are selected among the participants who were previously added to the meeting. Just click the Add interpreter button and select the language pair that the interpreter will translate. For example, it is possible to select such pairs as Russian-English and Russian-French for two interpreters. During the conference, an interpreter can change the direction of translation.
Webinar registration
When scheduling a webinar, you can make it possible for participants to sign up right on the web page of this event. This feature will help you restrict the list of participants and save you the necessity to invite guests manually. Besides, you will be able to collect plenty of helpful information about users and check data in the analytics section in the personal area and in the client application.
In order to do it, go to the Registration tab, check the box Enable conference registration and specify the following parameters:
- In the Close registration section you can:
- Select when the conference should be locked for new participants
- Choose if it is necessary to close the registration automatically when the maximum number of participants is reached (you set this limit when selecting the conference mode).
- Enable the users registered on your TrueConf Server instance to join the webinar (this feature may be needed if you did not invite them to this event).
- In the Registration form settings, select the types of data that guests should provide when filling out the webinar registration form. You can also add custom fields in addition to standard ones. It is also possible to specify which of these fields should be required (only name and email are required by default).
Additional settings
Enter the following parameters on the Advanced tab:
- Come up with a short and clear Conference ID used for joining the conference (applicable for any participants, including SIP/H.323 devices). Unlike the conference name, the conference ID has to be unique within one server.
- If registration is not configured, we recommend using PIN that users will have to enter to join your webinar. This will help you protect this event from unwanted connections. If registration is enabled, it will be impossible to use PIN. Check this article to learn more about holding secure meetings.
- Enable the waiting room, and in this case, participants will be able to join the webinar only after the approval by the owner or moderator.
- You can disable audio replies to make sure that participants can speak only when they are invited to the podium by a moderator. This will help you ensure that the moderator is not “interrupted” and make the event more organized.
- Check boxes to allow guests to send audio, video and messages during the webinar.
- Enable streaming to widen your audience. You can use popular streaming services.
Please note that this feature is available only if RTSP Streaming is included in your license.
- Enable sending automatic email invitations to your webinar. Email invitation will allow participants to proceed to the webinar page and add this event to their Google Calendar or any other calendar with support for data import from ics files, e.g. Microsoft Outlook.
- If all conferences are not recorded on the server side, check the box Enable conference recording.
When all parameters are entered, click Create.
Step 3: Invite users to your webinar
Via a link to the webinar page
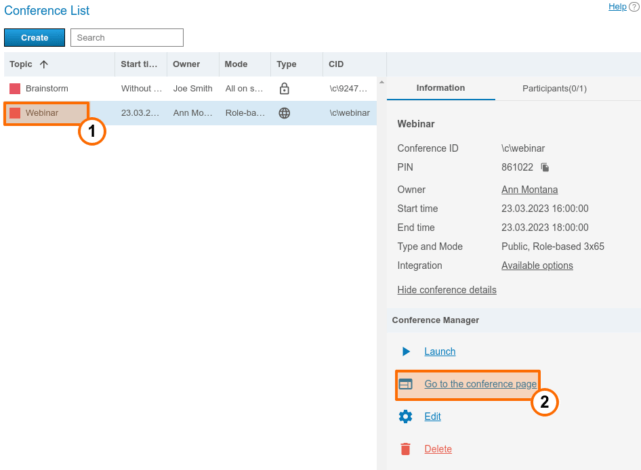
In the Conference List section of the TrueConf Server control panel, select the webinar; then in the sidebar section, you can find a link to its web page. Go to this page and copy the link from the browser search bar. You can share this link with webinar guests in any way you find convenient (e.g., you can add this link to your newsletter or post it in your news blog).
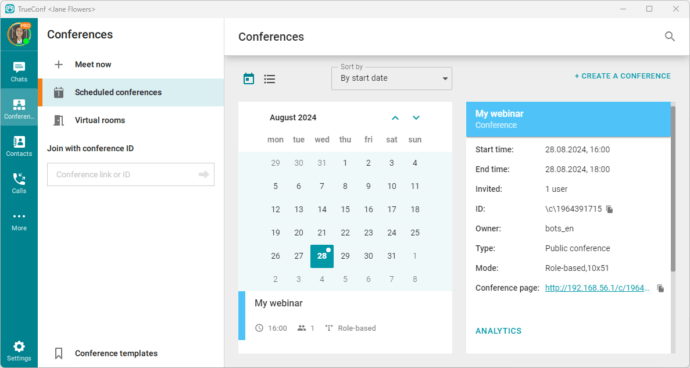
Alternatively, you can go to the scheduler of the client application and select a conference in the list of events. When you click on a conference, you will see a conference card. To copy this link, click on this icon ![]() which is next to the Conference page subheading.
which is next to the Conference page subheading.
Editing the list of webinar participants on TrueConf Server
Go back to the editing menu and click on the Participants tab in the TrueConf Server control panel or in the scheduler of the client application. You can invite previously appointed speakers and select moderators among the users of your server. Each of them will receive an invitation call when the webinar is started (providing that they are online in their TrueConf client applications) Additional moderators will be able to control the webinar in case the owner fails to join the meeting at the set time.
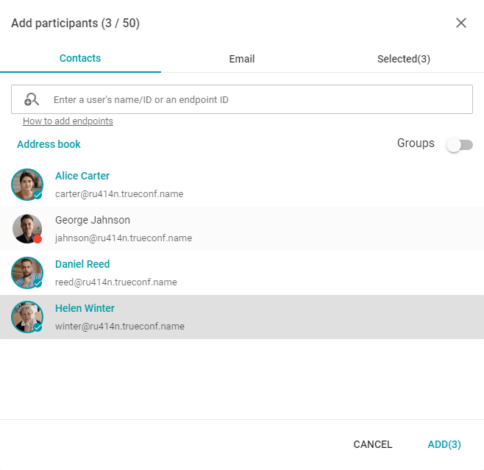
If participants cannot sign up for the webinar, open E-mail tab to add guests.
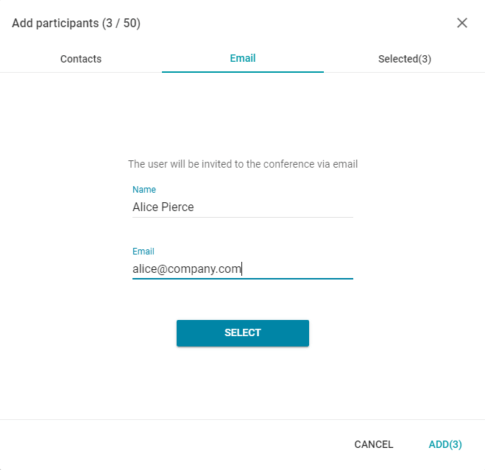
Click Add and then Save to apply changes.
Step 4. How to join the webinar
For the moderators
Moderators need to join webinars via TrueConf client applications to be able to manage the conference and control audio and video devices of the conference participants.
With their client applications, the moderators can manage video layouts for:
- All participants
- SIP/H.323 devices and guests who have joined the webinar from a browser
- Each individual participant.
Those attendees who joined the webinar via TrueConf client application are able to select their own video layout if you have enabled this option in the real-time meeting management tool.
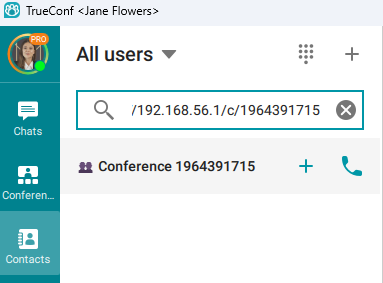
The owner can join the webinar before it starts to check their equipment. To join the webinar, enter the webinar link into the search field in your client application and make a call.
For guests
Invited participants can join the webinar by following the link you’ve shared. If you have configured mandatory registration for the webinar, a participant will have to sign up for this event; otherwise, this person will only have to enter his/her name. After that various ways to join the webinar will be suggested to them depending on their operating system and browser.
Your webinar can be joined from any SIP or H.323 endpoints; besides it is possible to connect IP cameras via RTSP (this may be needed if you want to send video from these cameras in real time). The only requirement is to purchase TrueConf Server SIP/H.323 gateway extension and have open ports responsible for establishing and registering connection between the server where webinar is hosted and the endpoints.
Please note that to join a PIN-protected conference from SIP/H.323 devices, a participant has to specify PIN in the call string. You can also connect SIP/H.323/RTSP devices on your own by adding such devices to the list of participants or by inviting them during a conference.
Step 5: Communication among webinar participants
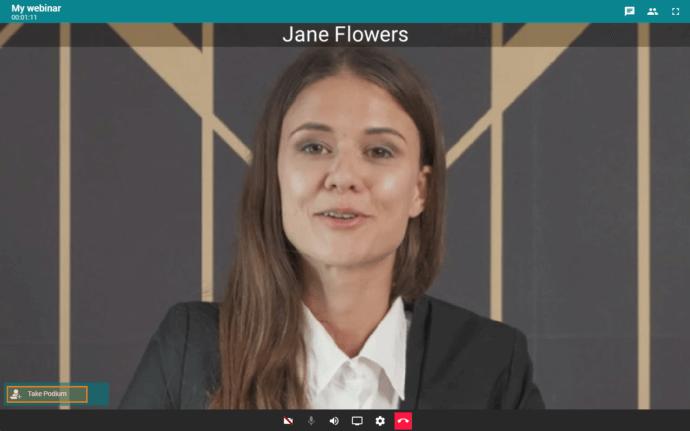
During the webinar, any attendee can become a speaker by taking the podium. To do it, this user needs to send a corresponding request to the moderator by clicking on the button ![]() in the TrueConf client application application or by clicking on the Take podium button
in the TrueConf client application application or by clicking on the Take podium button ![]() in the WebRTC application.
in the WebRTC application.
Webinar participants can send text messages both in group and personal chat. Chat allows moderators to receive feedback from the audience without interfering with the webinar. To learn more about these features, read our article about moderated role-based conferences.
During a webinar, presenters and moderators can show slides and share content when connected via TrueConf client application. To share presentations in ppt (pptx) format in TrueConf for Windows, you need to install and set up Microsoft PowerPoint in advance. To import slideshows in the .odp format, users need to install LibreOffice on their computers. If you are using Windows, Linux or macOS, you will be able to import PDF files.
Step 7: Process a Webinar Recording
When the webinar is over, you can download its video recording in the control panel or in the client application scheduler. Then, you can upload it on any video hosting service, like YouTube. In this way, you can make sure that this event can be watched by everyone, including the participants who missed this event due to some reason.

