How to Generate a Self-Signed Certificate
We’ve already told you how to generate a Let’s Encrypt SSL certificate on Windows and Linux. These are full-fledged certificates for use in operational environments. However, for testing purposes you may need to create a number of certificates, while verifying multiple Let’s Encrypt certificates may be inconvenient. Self-signed certificates are more suitable for mass generation.
TrueConf Server enables users to generate self-signed certificates right in the TrueConf Server control panel. If this option doesn’t suit you for some reason, or you need to generate a self-signed certificate for other TrueConf products, e.g., TrueConf Group, you can opt for the OpenSSL cryptographic library.
Installing OpenSSL and generating a certificate on Windows
- Visit the OpenSSL download page, download the installer for the Light version, depending on the bitness of your operating system and start the process.
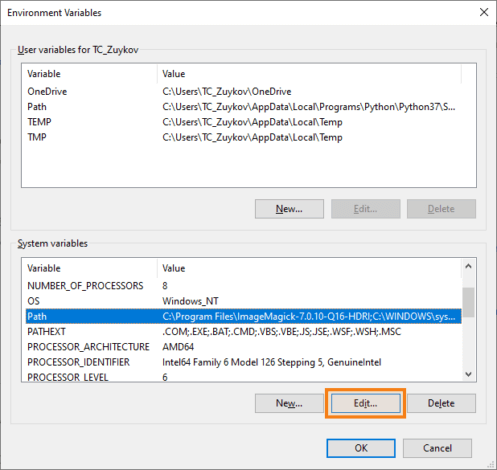
- Once installation is complete, you need to add the path to the program as a system variable. To this end, go to Control Panel → System → Advanced System Settings → Environment Variables.

In System Variables, select the Path variable and click Edit. In the pop-up window, click New and enter the path to the bin folder of your app (C:\Program Files\OpenSSL-Win64\binby default). Click OK.You may need to restart your computer to apply the settings.
- Create a folder where you want to save the generated certificates, e.g.,
C:\cert. - Open a command prompt (cmd) as an administrator and navigate to the previously created folder (
cd /d C:\cert). - Execute the following command:
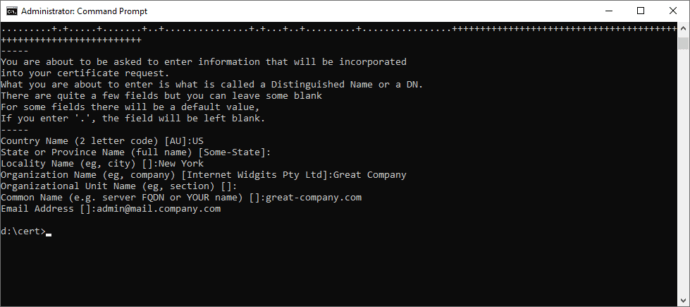
1openssl req -x509 -sha256 -nodes -days 365 -newkey rsa:2048 -keyout privateKey.key -out certificate.crt, where:
-x509confirms that you need a self-signed certificate
-newkeycreates a certificate key automatically
-dayssets the certificate validity period in days
-keyoutis a path (if specified) and key file name
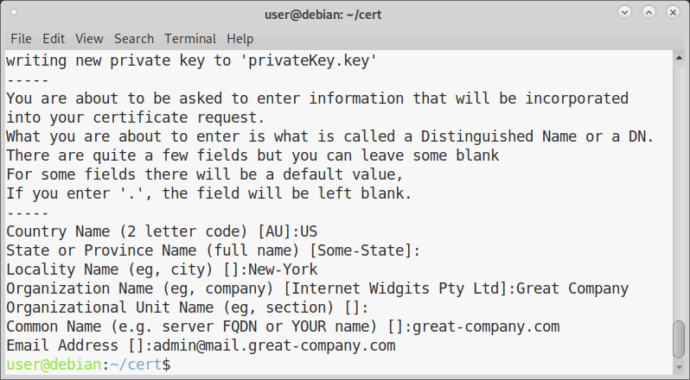
-outis a path (if specified) and certificate file name. - Enter your country code, its name, city, company name, department name, server FQDN or your name and email.

- There will be two files in
C:\cеrt:- certificate.crt (your certificate)
- privateKey.key (key file).
Installing OpenSSL and generating a certificate on Linux
Let’s take a look at how to generate a self-signed certificate on Debian 10.
To execute the below commands, the operating system must have the sudo program with the user being in the corresponding group. Your Debian may not have sudo by default, but you can check for it with sudo -V command and then install if necessary using apt install sudo command (executed as root). To add a user with the login user to the sudo group, you can use sudo usermod -a -G sudo user.
Some Linux distributions come with the openssl package. To check if you have this package installed, you need to execute the openssl version command from the terminal. If you see a response like OpenSSL 1.1.0l 10 Sep 2019, you should go to Step 3.
- Update the packages in the system by using the console command:
1sudo apt update && sudo apt -y upgrade - Install OpenSSL by entering the following command:
1sudo apt install openssl - Create a directory where you want to save the generated certificates using mkdir command, e.g.,
mkdir /home/$USER/cert$USERis an environment variable in Linux distributions; when used in commands, it’s automatically replaced with the current user’s login in the system. - Go to the previously created directory by using cd command, e.g.,
cd /home/$USER/cert. - Follow Steps 5–6 given in the section for generating certificates on Windows.

- There will be two files in
/home/user_name/cert:- certificate.crt (your certificate)
- privateKey.key (key file).

