How to create a TrueConf meeting for an Outlook event
TrueConf developed the Outlook add-on which makes it possible to create conferences right in the mail client UI. There are desktop and web-based versions of this add-on. They differ in terms of their features, UI, and installation method. The desktop version offers more features and unlike the web version, it enables users to:
- Create conferences of any start type while the web version allows users to create only virtual rooms.
- Create conferences with waiting rooms.
To learn about the installation of each add-on, read the related article in our knowledge base. This guide will show how to use these add-ons.
First of all, you will need:
- Personal or corporate-based Outlook user account.
- Account on TrueConf Server (TrueConf Online cloud service is not supported).
This add-in is compatible with Outlook 2016 (or above) and with the web version of Outlook 365.
Using the desktop version of the add-on
Creating a conference
To create a conference for an Outlook event, take these steps:
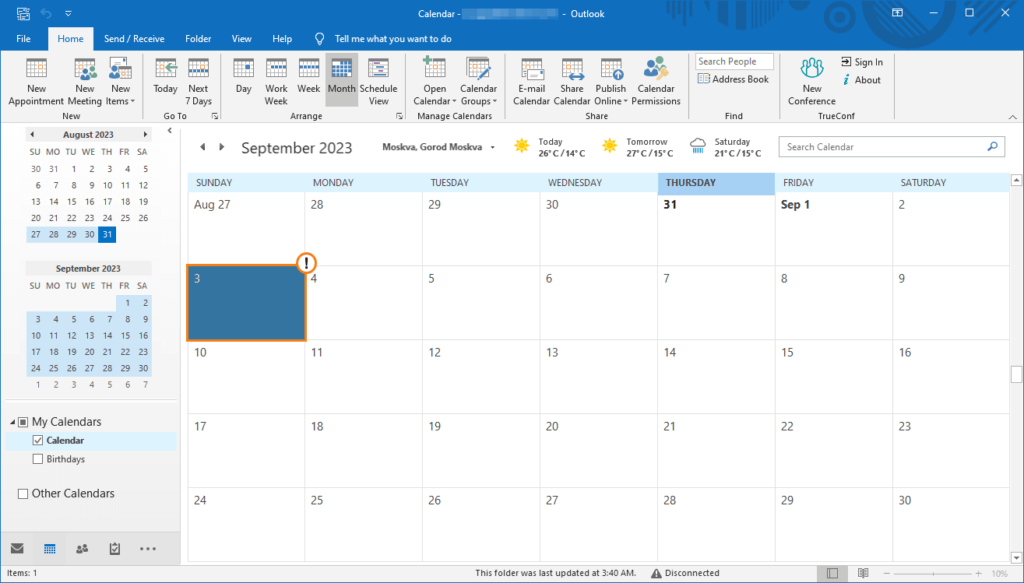
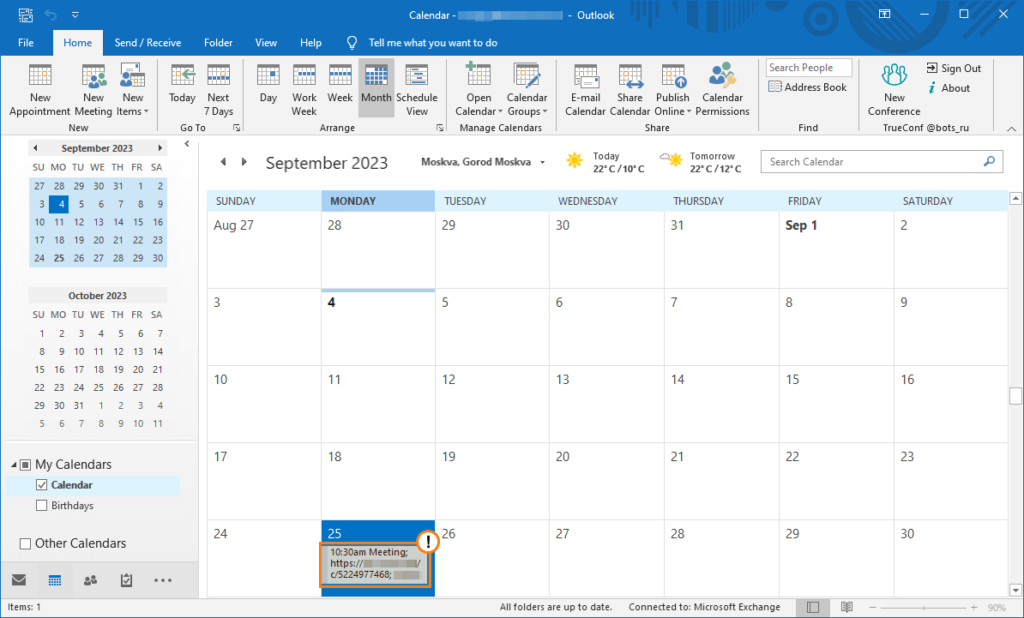
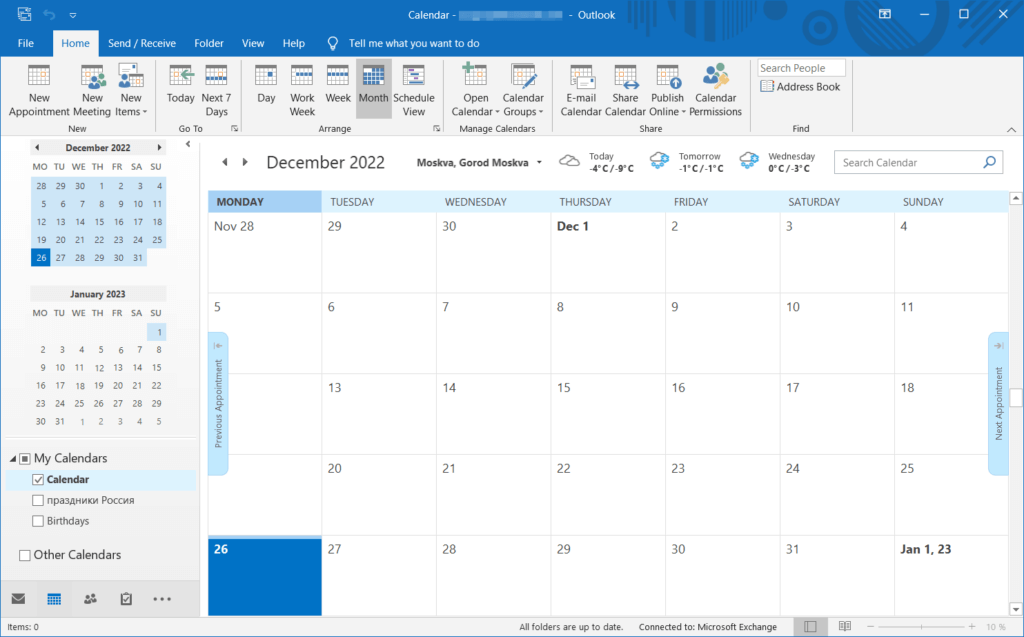
- Go to the Outlook calendar and double-click on a day to schedule an event:
-
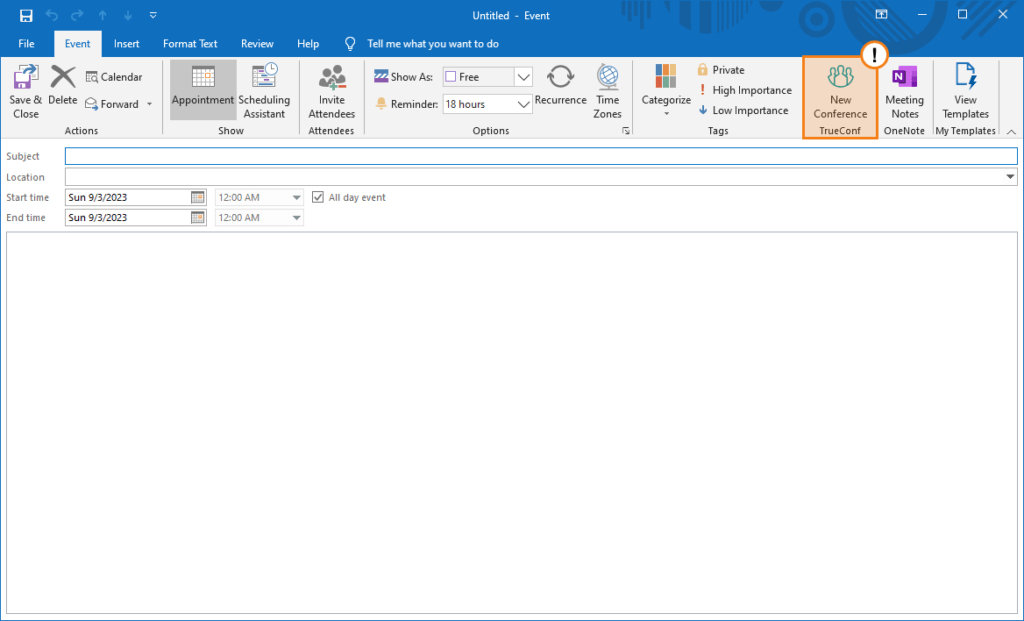
You will see the menu where an event can be created. Click on the New conference button in the control panel:
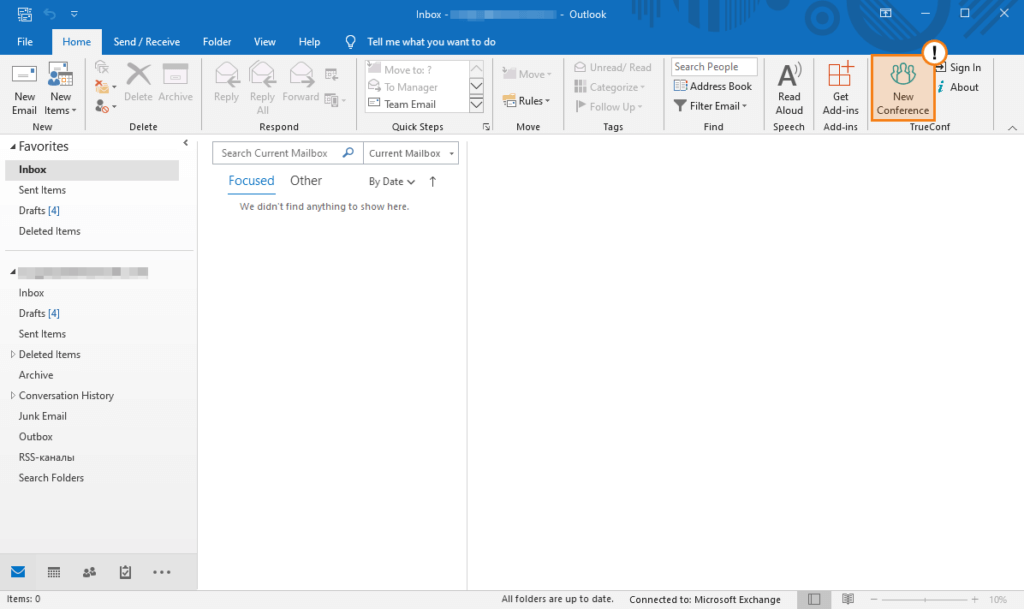
There is also a quick way of creating an event and the corresponding conference for the present day: you will not have to go to the calendar. In this case just click on the New conference button on the Outlook main screen:
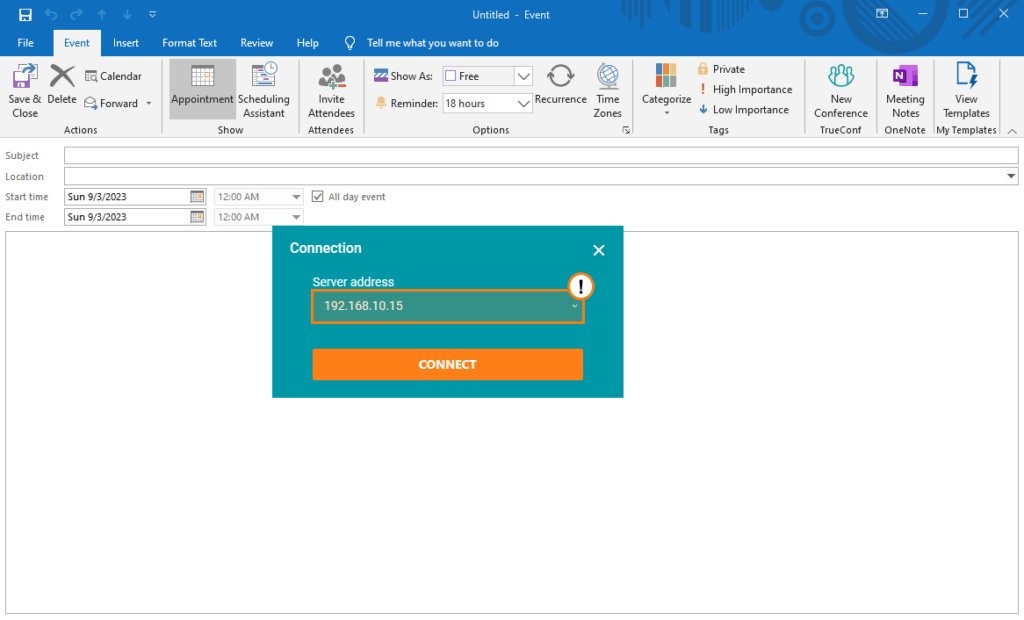
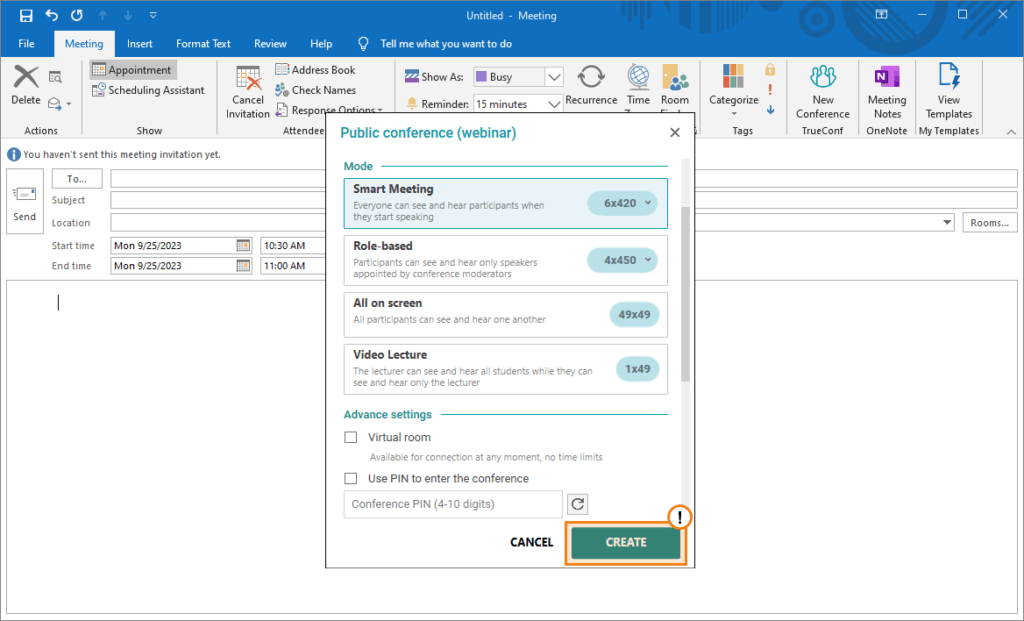
- The menu for creating an Outlook event will open, and the add-on pop-up will be displayed in the center of the screen. If the add-on is used for the first time, it will be necessary to connect to your TrueConf Server. Enter the server address and click Connect:
-
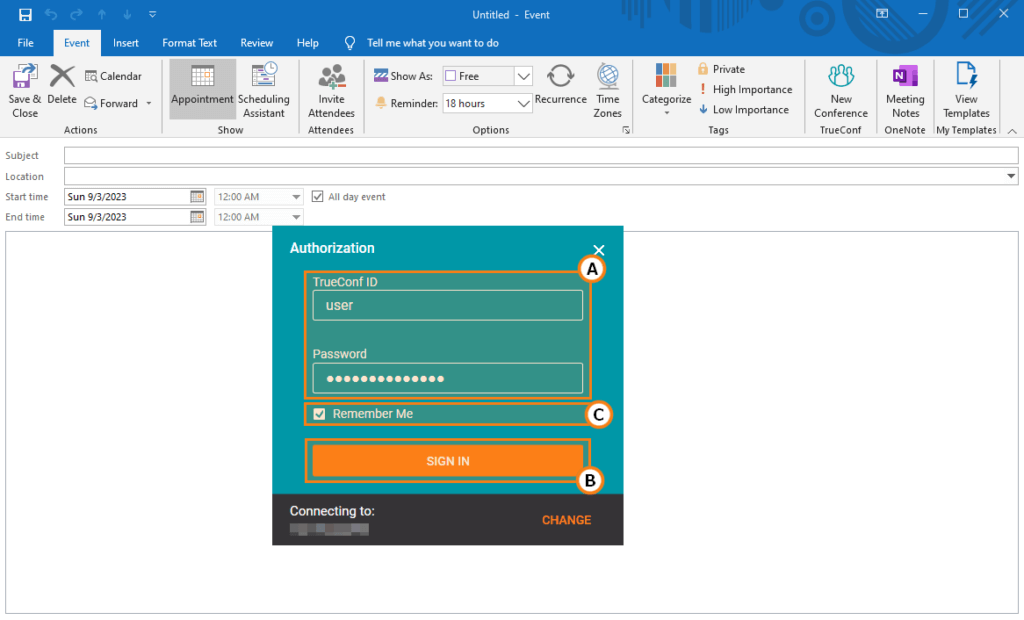
Sign in on TrueConf Server. There are multiple authorization options and the required authorization method depends on the server settings. We will describe authorization with the login and password.
Enter your login information and click Sign in. If you check the Remember me box, you will not have to sign in each time when using the add-on.
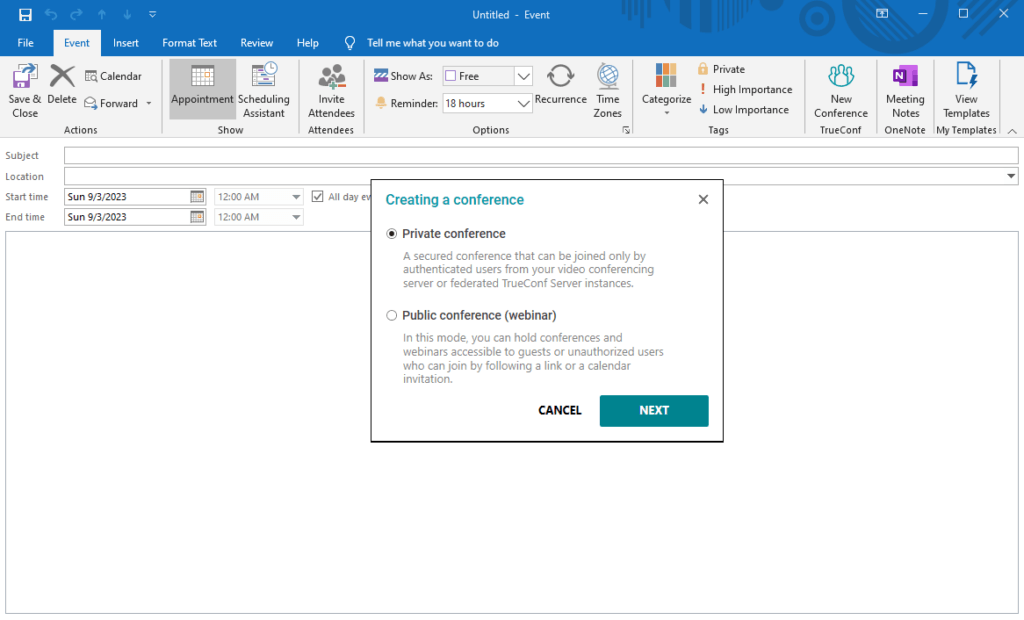
- Select the type of a conference and click Next:
-
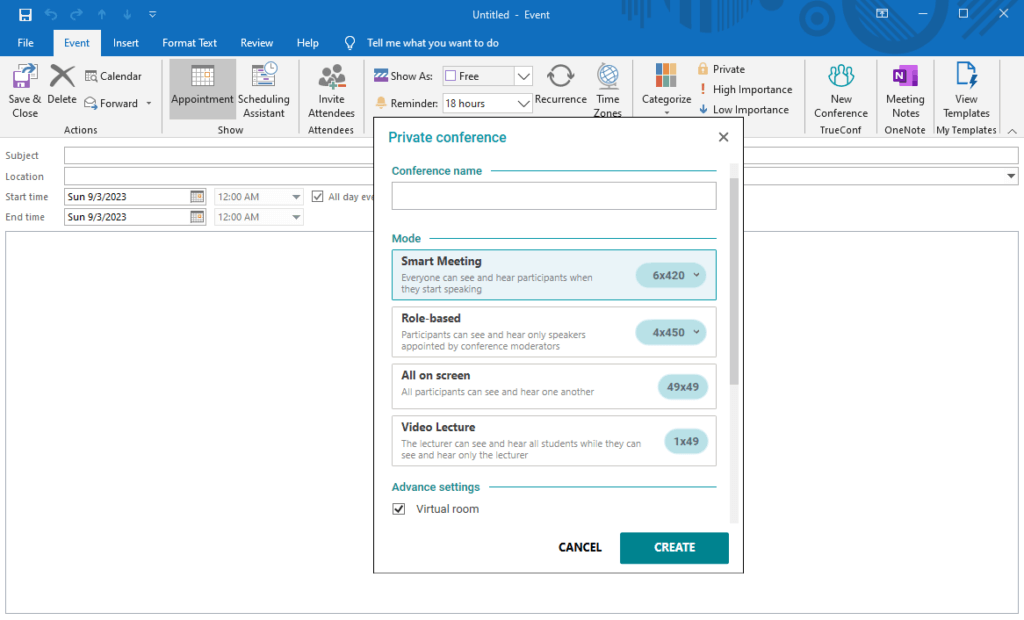
The conference settings menu will open. Here, you can:
- Specify the conference name and select its mode.
- Choose the start type of a conference (by default a virtual room is created).
- Set the conference PIN.
- Configure the waiting room for a conference (participants may be automatically directed to the waiting room when joining the meeting).
- Activate video recording of a conference on the server side.
- Choose if it is necessary to automatically turn off participants’ microphones and cameras when they join a conference.
- Configure guest permissions for a public conference (webinar).
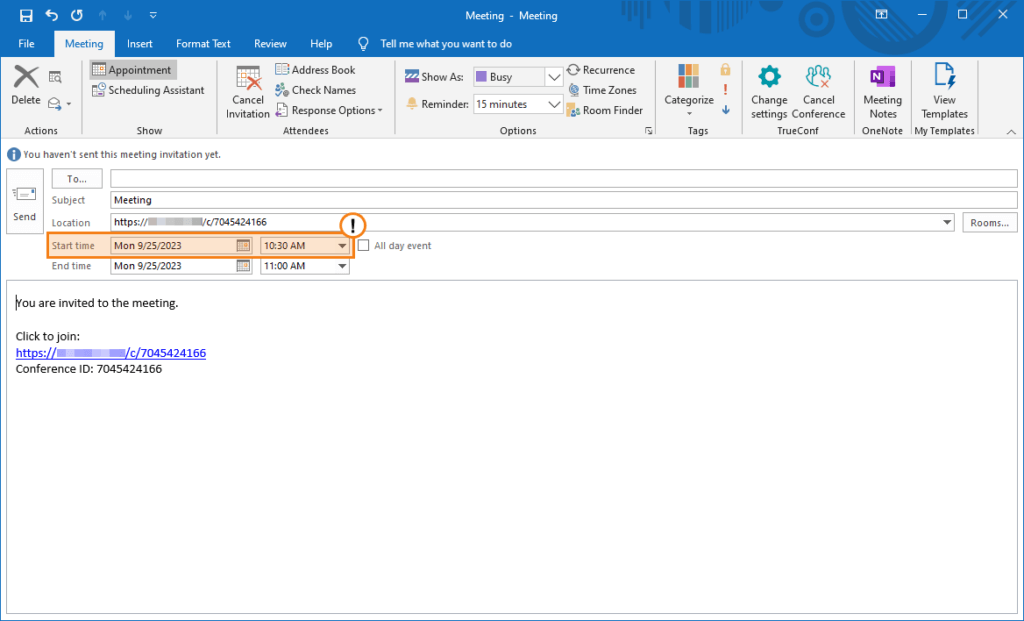
The start type of a conference should be discussed in more detail. The box Virtual room is needed for selecting the type of start. If it is checked, the application will create a conference that will be available at any moment: you can join such a meeting whenever you want. If this box is not checked, the application will create a scheduled conference and its start time will be taken from the corresponding field which is filled when creating an Outlook event (see the screenshot below):
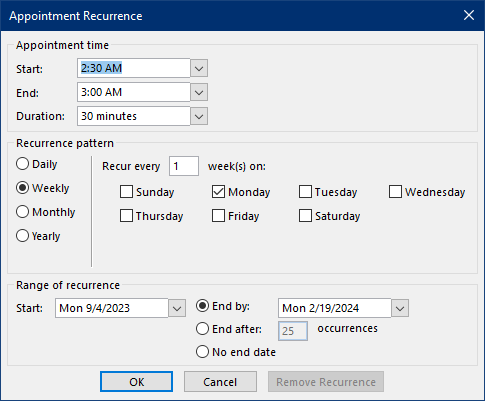
You can configure the repetition schedule for this event. To do it, click on the button
 in the control panel. You will open the pop-up window where you can specify the repetition pattern of an event, its start/end time, and its duration:
If you specify the subject of the event, it will become the conference name. Otherwise, the conference name will be used as the subject of the event.
- When you have configured the conference settings, click Create:
-
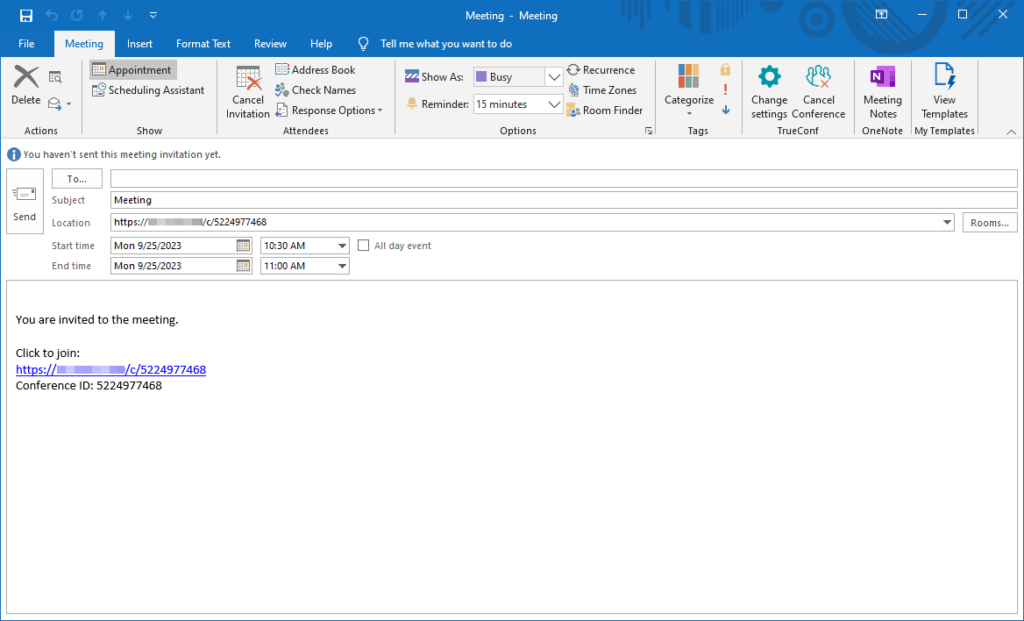
Your conference will be created and information about it will be added to the Outlook event right after the description that had been previously added:
In the TrueConf section of the event control panel, you will find the buttons for editing and deleting a conference.
- When a conference is created, the Outlook event will be saved automatically. So, you can close the settings menu when all the parameters are configured.
Conference editing
After creating a conference, you will be able to edit it if necessary. To do it, take the following steps:
- Go to the Outlook calendar and double-click on an event linked to the selected conference.
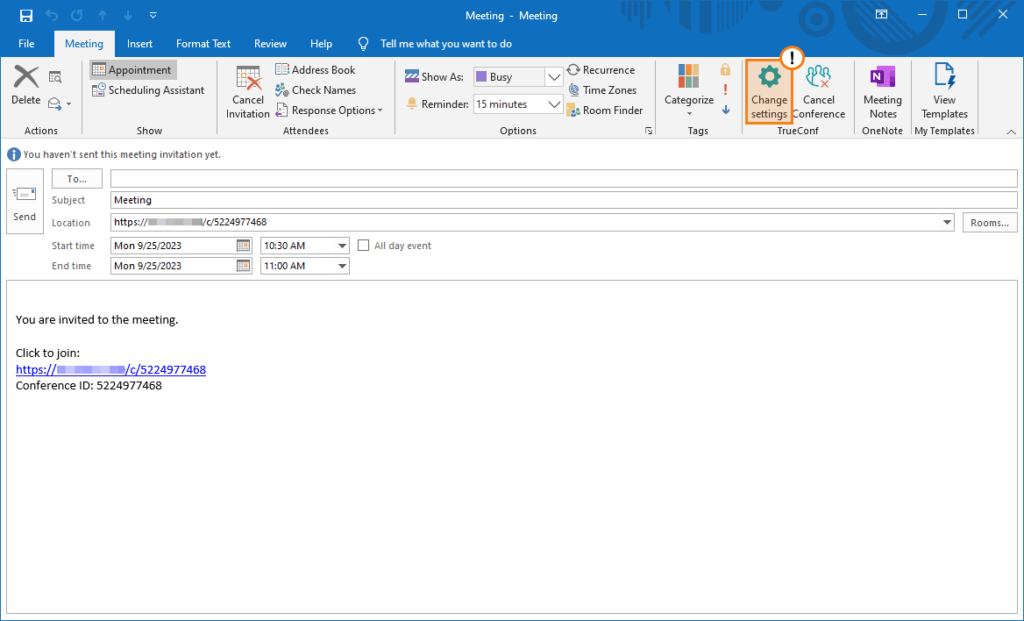
- Click on the Change settings button in the event control panel.
-
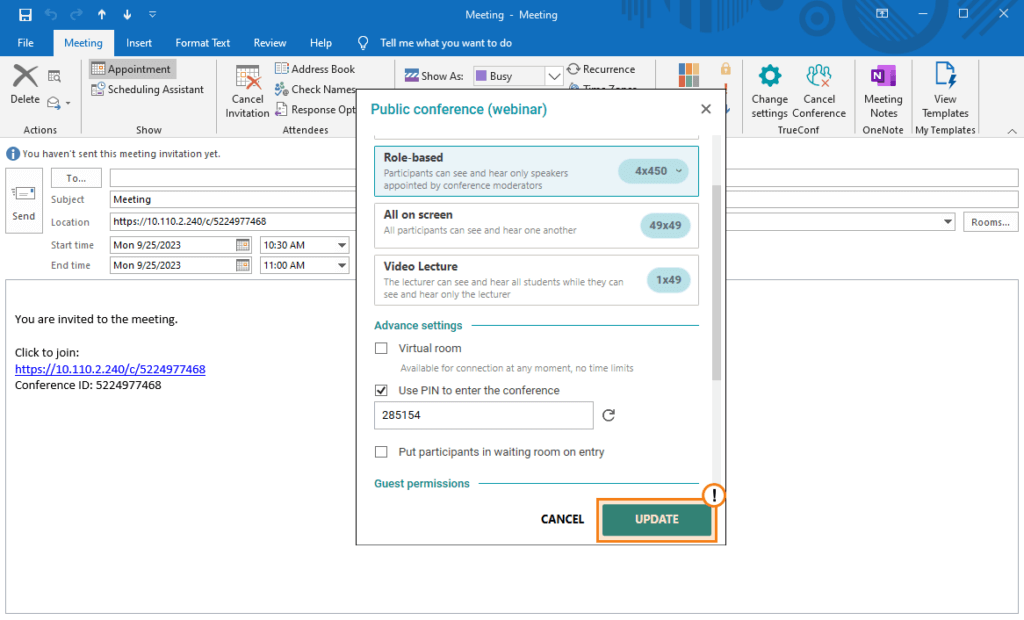
The add-on pop-up will be displayed. Here, you can edit a conference. Once you have made all the changes, click Update.
Some of the conference parameters cannot be edited via the add-on. As it has been said earlier the subject of an event will become the name of the corresponding conference. So, to edit the conference name, one should first edit the subject of the event. Similarly, to change the start time of a scheduled conference, one has to change the value of the Start time field in the settings of an Outlook event.
However, one should keep in mind that if the start time is changed to a past date, it will be saved only for an Outlook event, but not for a TrueConf conference. The conference start time will remain the same since a scheduled conference cannot start on a past date.
-
When you have done editing of the event, save your changes in any convenient way. For example, you can press Ctrl + S on your keyboard. Then, close the settings window of the Outlook event.
Please note that if you add, change, or remove PIN when editing the conference, these changes will be reflected in the description of the event.
Deleting a conference
The conference you created can also be deleted. To do it, take the following steps:
- Go to the event settings window as it has been shown in step 1 from the previous subsection.
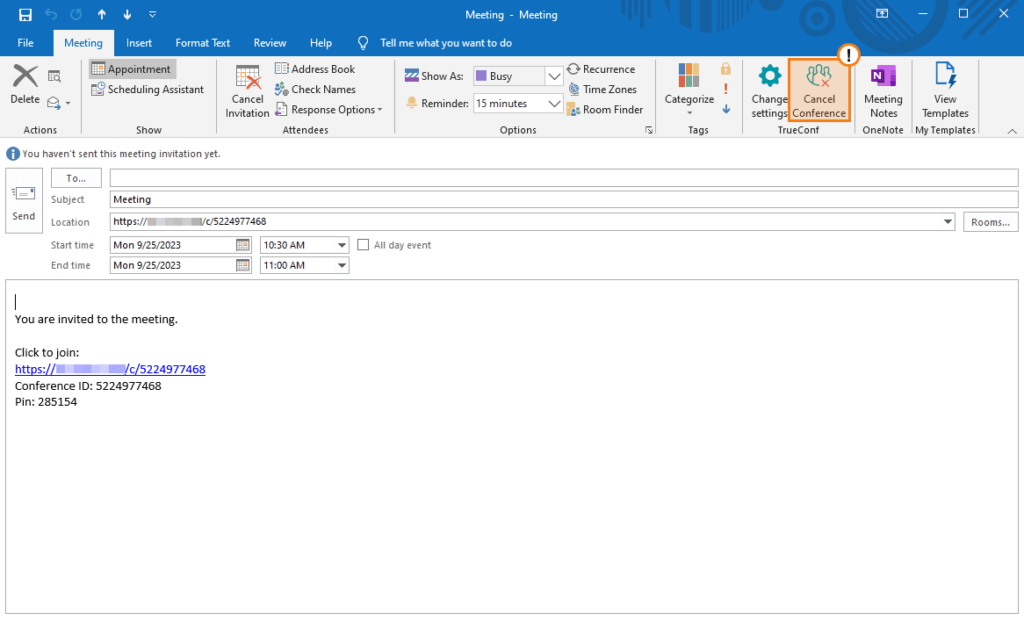
- Click the Cancel conference button in the event control panel:
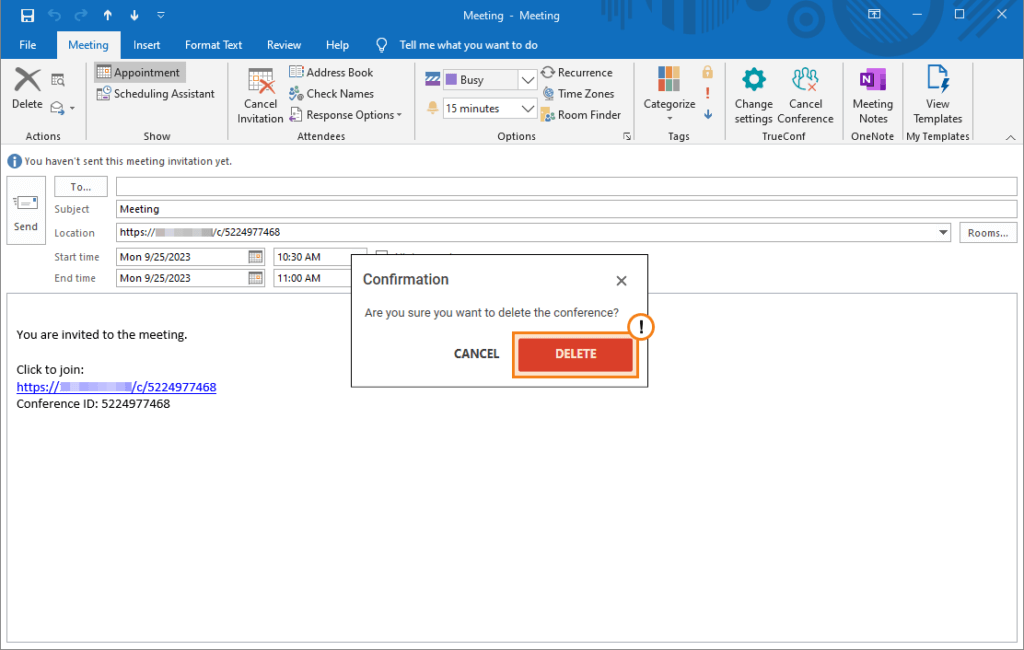
- Click Delete in the confirmation pop-up:
Your conference will be fully deleted from the event and from the video conferencing server. The invitation to a conference will be deleted from the event description (the rest of the text will remain unchained).
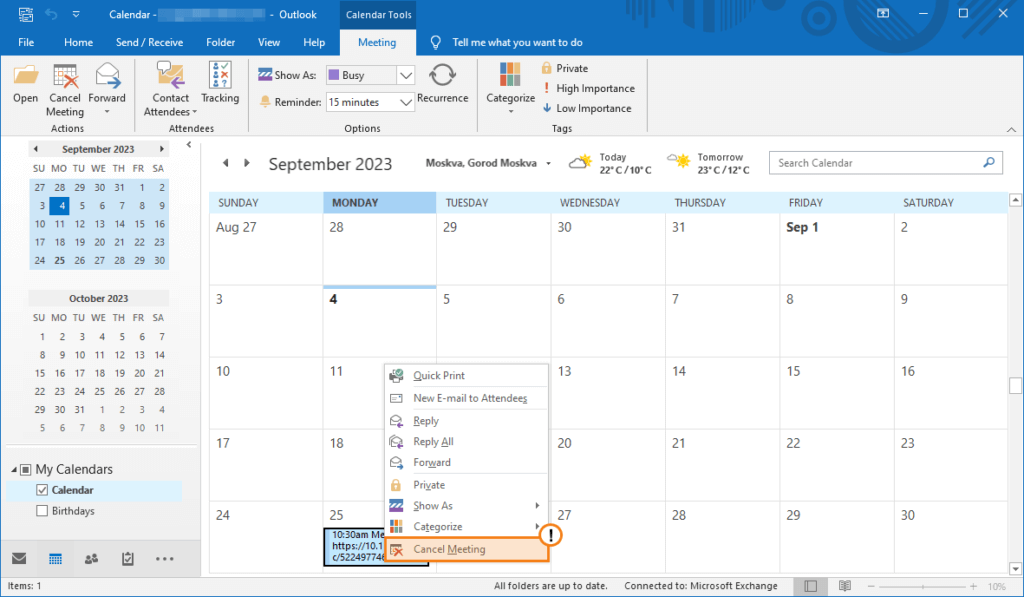
If you need to delete a conference together with the selected Outlook event, there is an easier way: go to the Outlook calendar, right-click on the event you want to delete and select Cancel meeting in the pop-up menu.
Additional features
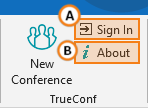
When the add-on is installed, the TrueConf section will be displayed on the Home tab in the Outlook control panel. In addition to the button for creating a conference, there will be buttons enabling users to:
- Sign in on TrueConf Server (if you authorize beforehand, you will not have to do it when using the add-on).
- Get information about the add-on.
Using the web version of the add-on
Create a conference
To create a conference for an Outlook event, take these steps:
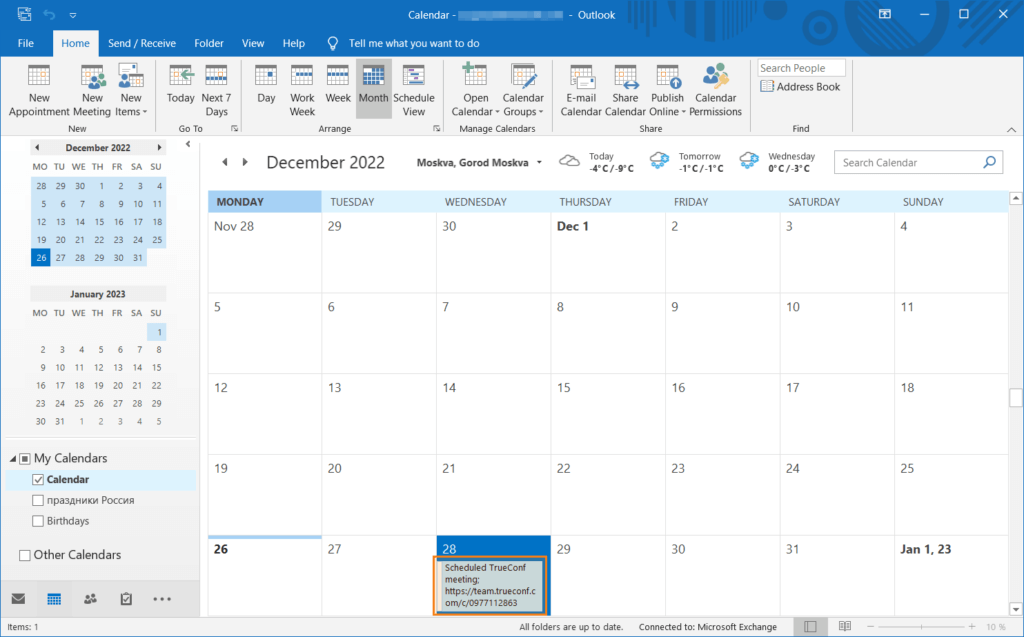
- Go to the Outlook calendar.
- Select the day for your event. To do it, double click on the chosen date.
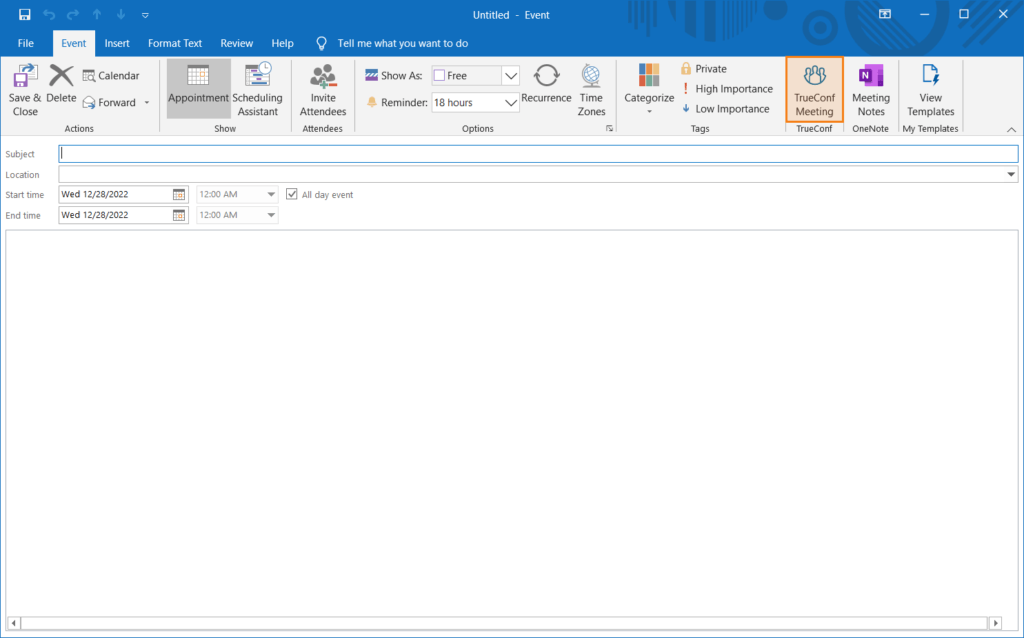
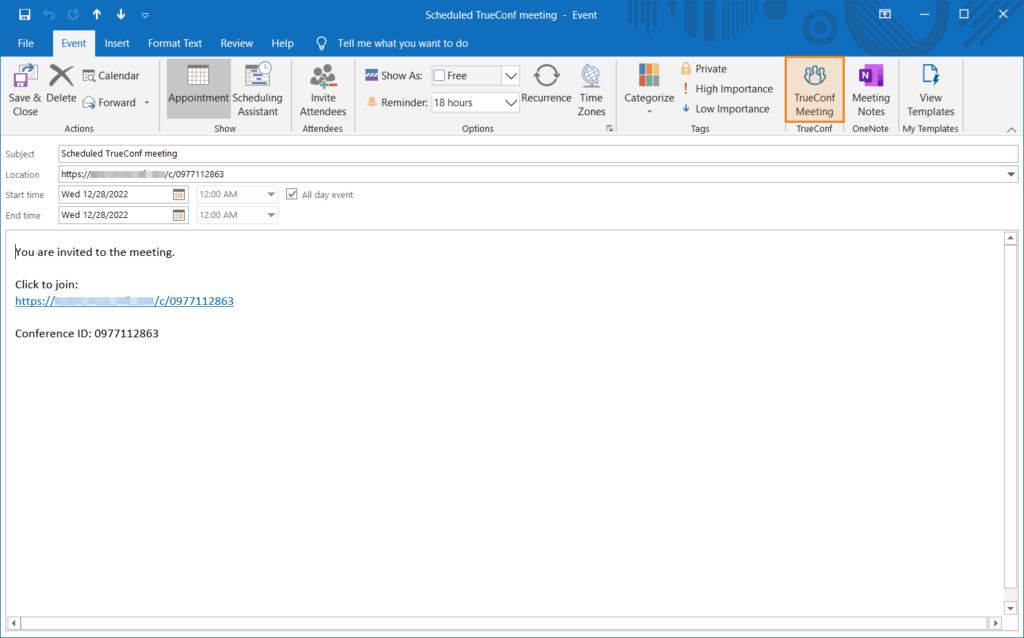
- You will see a window for adding an event. Click on the TrueConf Meeting button in the settings menu. If the button is not displayed, check the add-on installation guide.
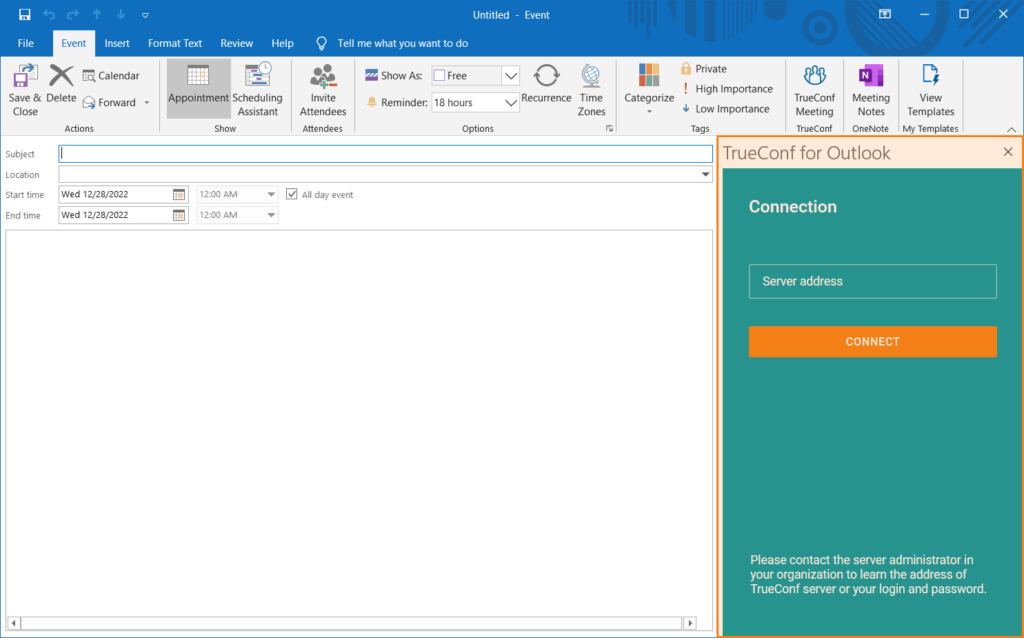
- On the right side, you will see the TrueConf add-on panel. You will need to enter the address of your TrueConf Server if you are using the add-on for the first time.
-
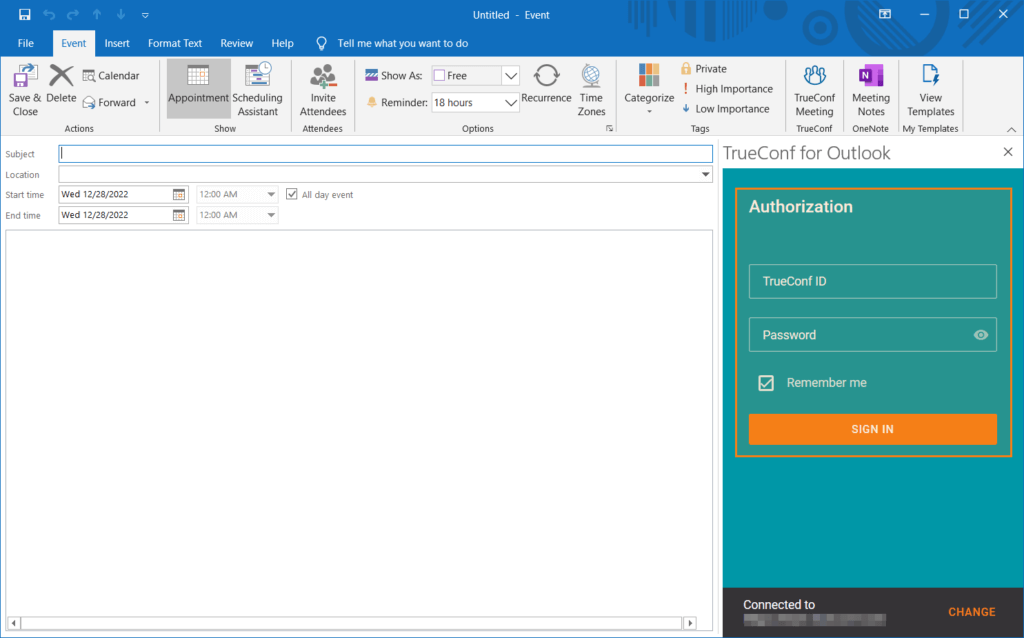
Next, sign in with your user account.
As it has been said before, the authorization of users will depend on the server settings. However, at present the web version of the add-on supports only authorization with a login and password.
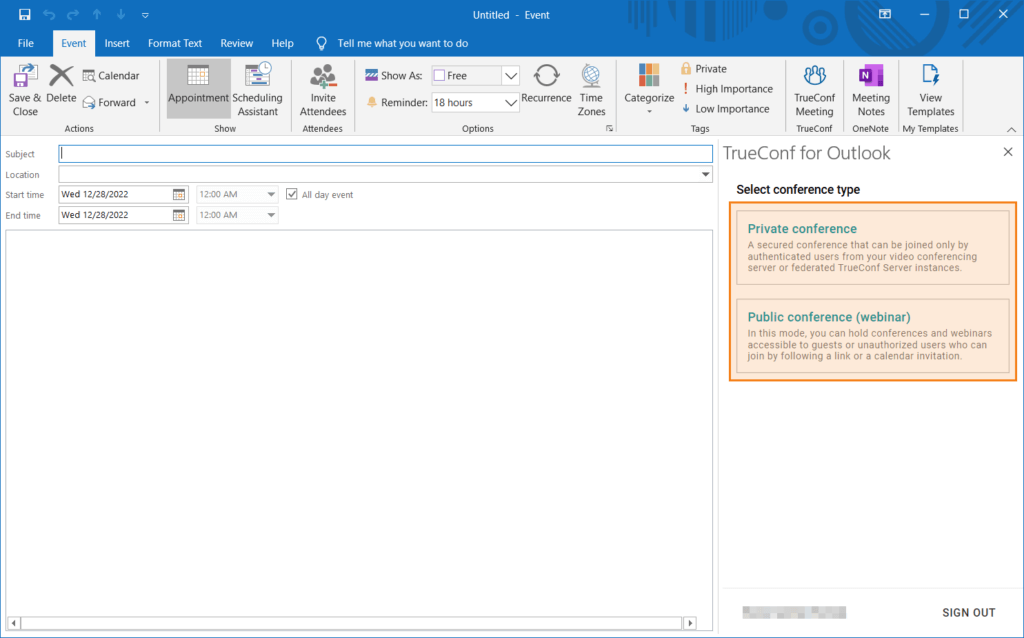
- Select the type of a conference.
-
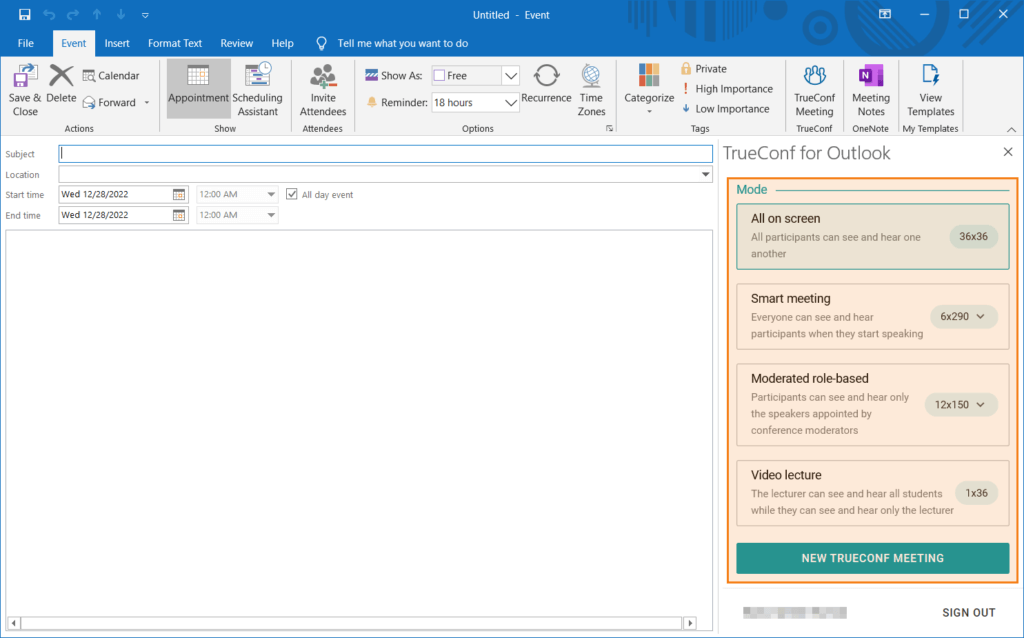
The settings menu will open here, you will be able to:
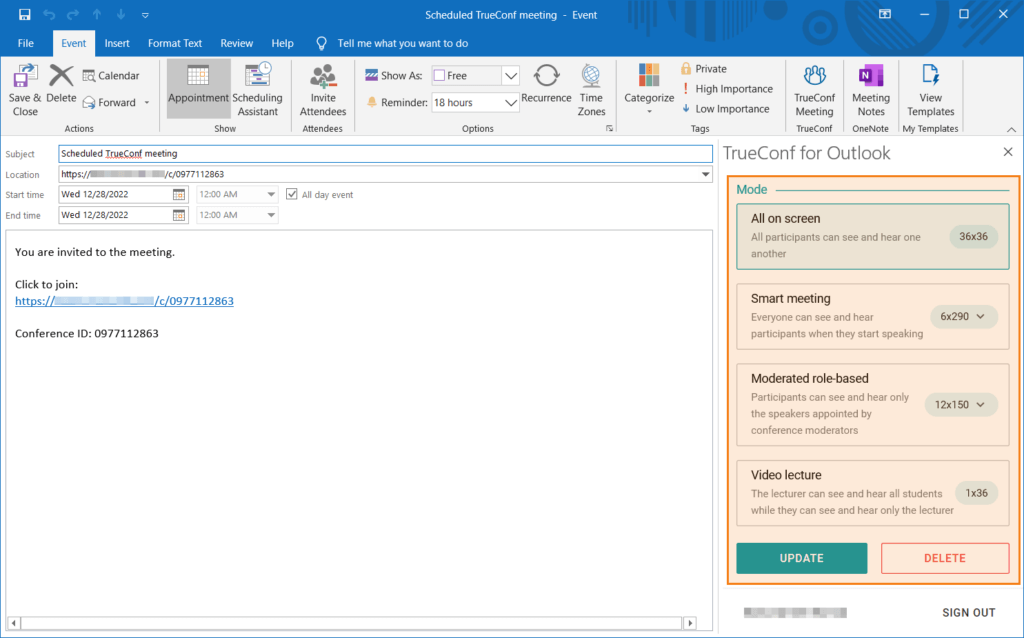
- Select the conference mode.
- Set a PIN for your conference.
- Turn on conference recording.
- Adjust connection and device settings for conference participants.
- Set guest permissions (when creating a public conference).
In comparison with the desktop version, the web-based add-on offers fewer features. So, here, you will not be able to:- Configure the use of waiting rooms for the participants who will join the meeting.
- Select the start type of a conference (in the web version, a virtual room will be always created).
-
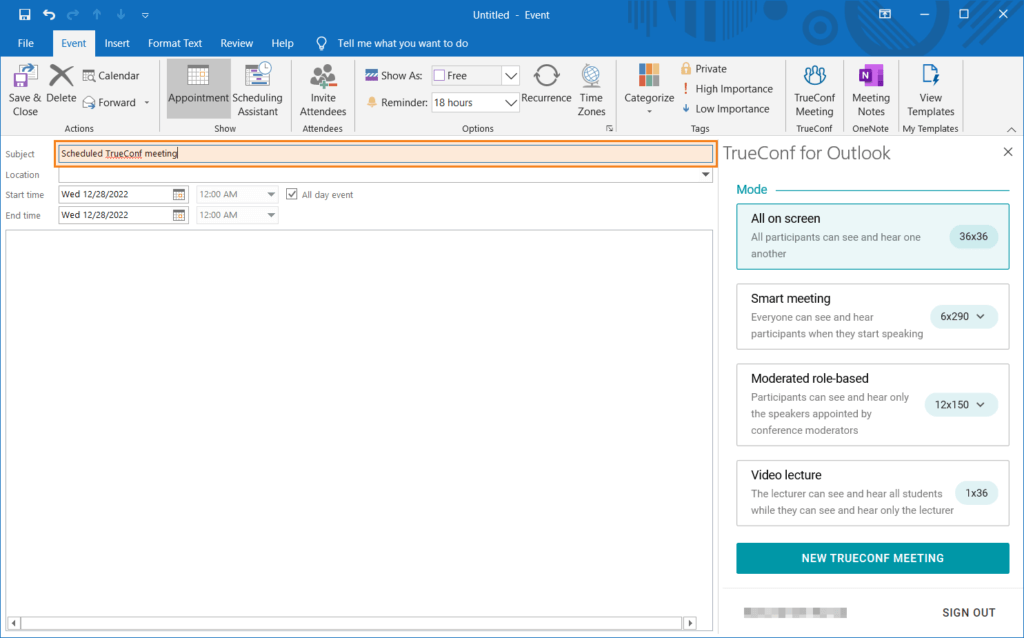
Enter the subject of the event.
The subject of the event has to be specified; otherwise, a conference cannot be created for the event.
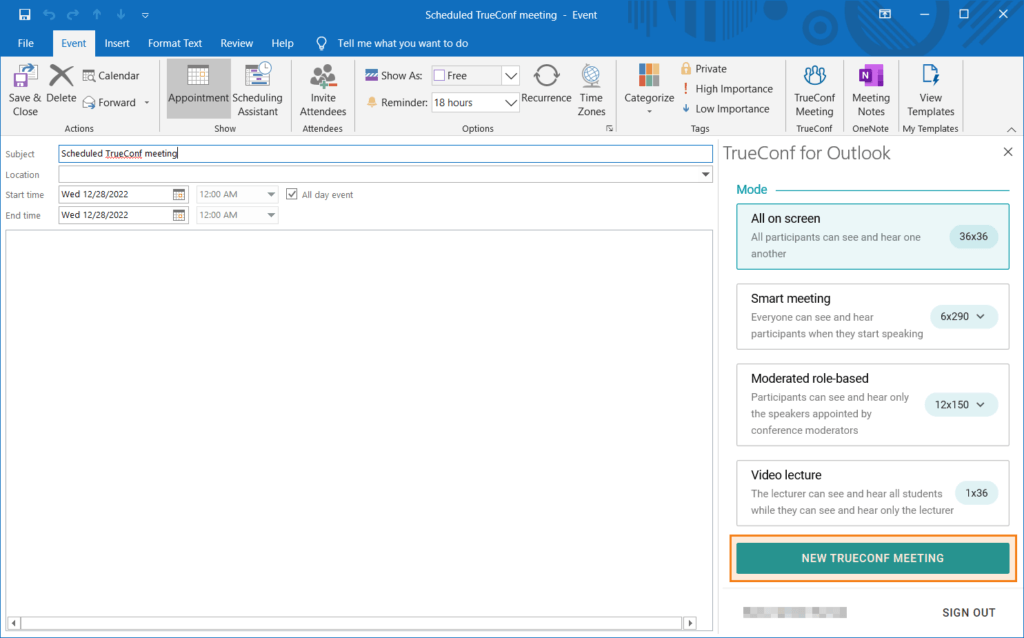
- To save changes, click on New TrueConf Meeting.
-
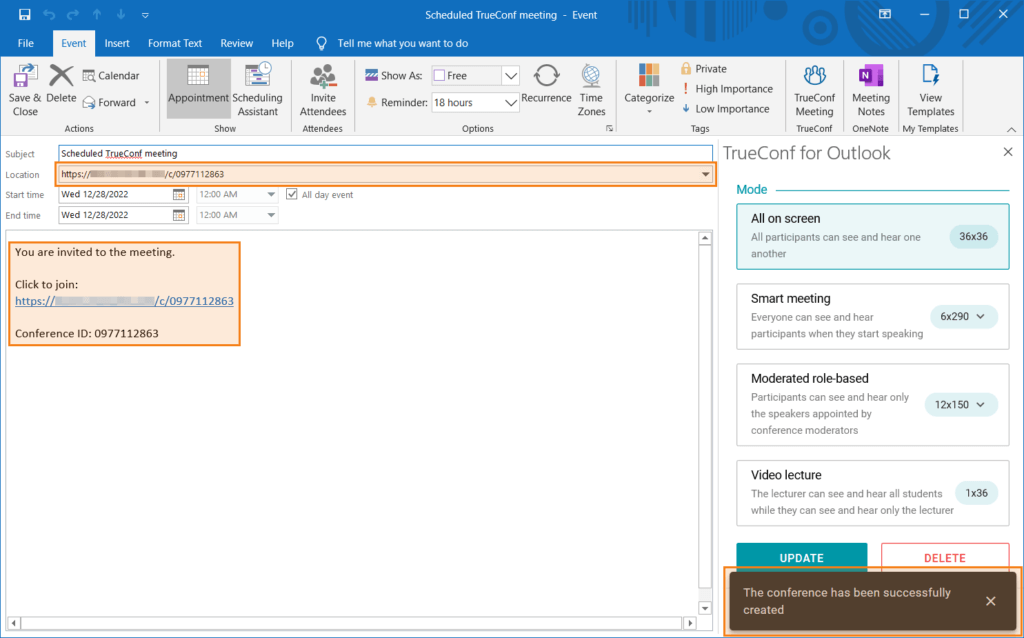
Your TrueConf conference will be created and information about it will be added to the Outlook event.
The description of an event will be fully re-written when a conference is edited/created. As a result, the text provided in the description will be lost. So, the description of an event should be provided when the conference has already been edited/created.
After creating a TrueConf meeting, you will see two buttons for editing or deleting the conference in the add-in menu.
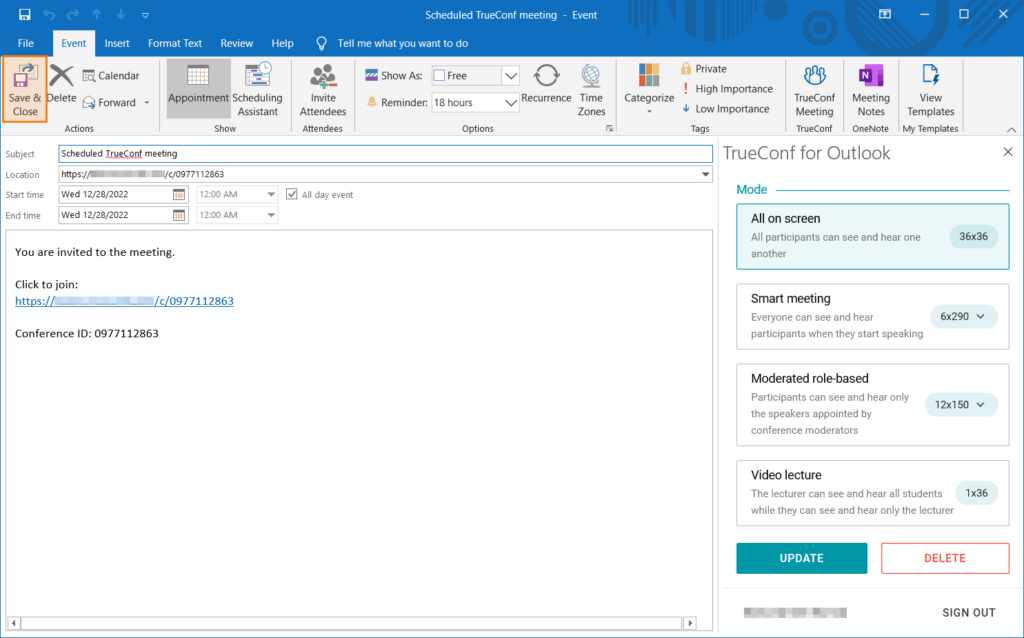
- Click Save & Close to save the event in the Outlook calendar.
Conference editing
After creating a conference, you will be able to edit it if necessary. To do it, take these steps:
- Go to the Outlook calendar and double-click on the event with the conference you want to edit.
- Click on the TrueConf Meeting button in the settings window.
- On the right side, you will see the TrueConf add-on panel. When login information is requested, sign in with your TrueConf Server account.
- The conference settings menu will open; here, you can change the required parameters.
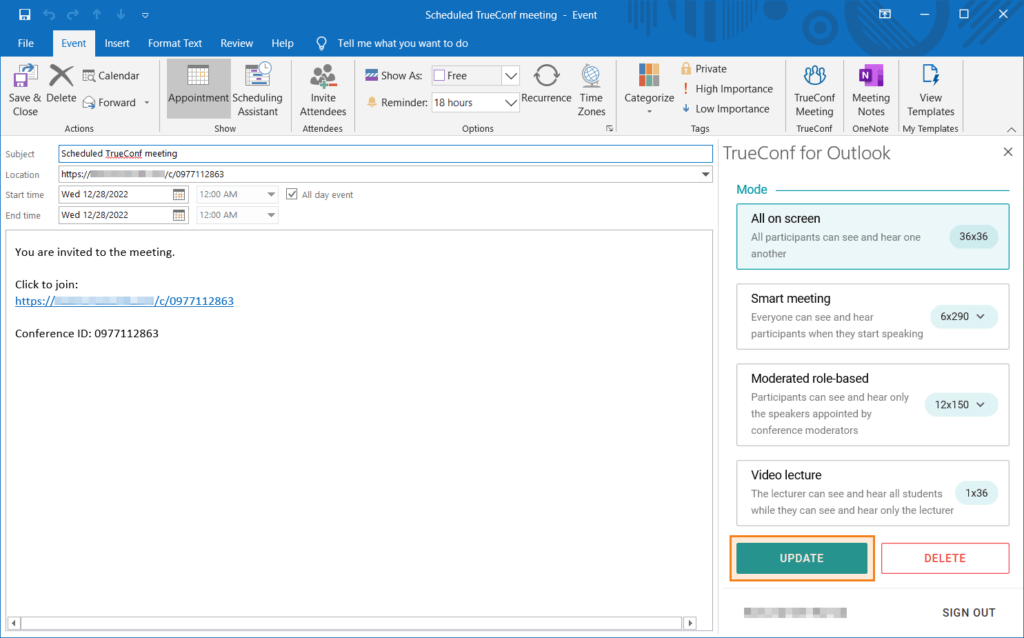
- When you have done editing the conference, click on the Update button.
- Click Save & Close to save changes in the event.
Deleting a conference
The conference you created can also be deleted. To do it, take the following steps:
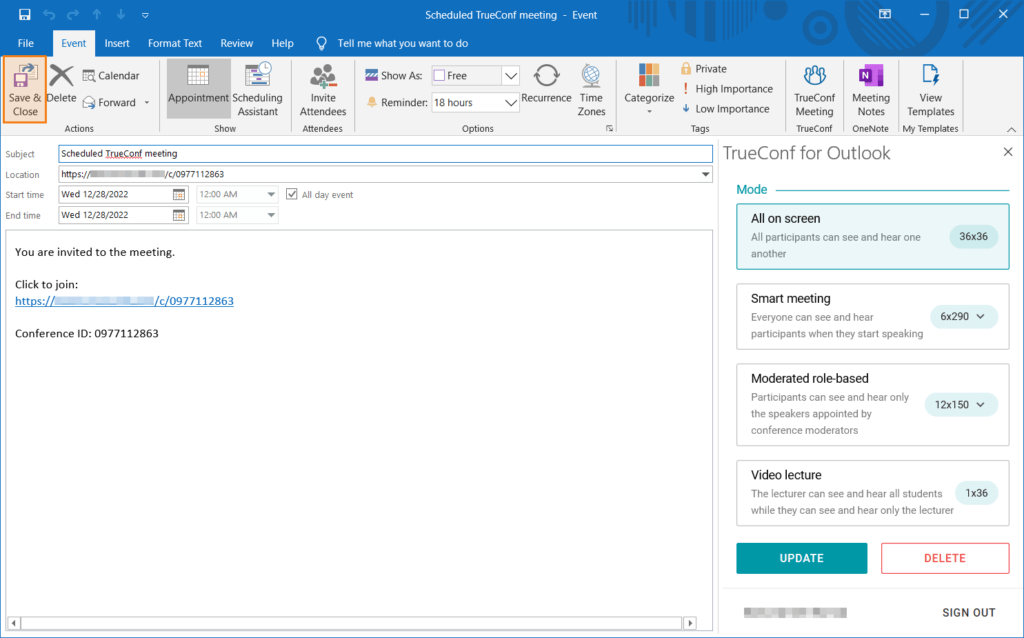
- Go to the conference in the selected event as it is described in the 1-3 steps for editing the event.
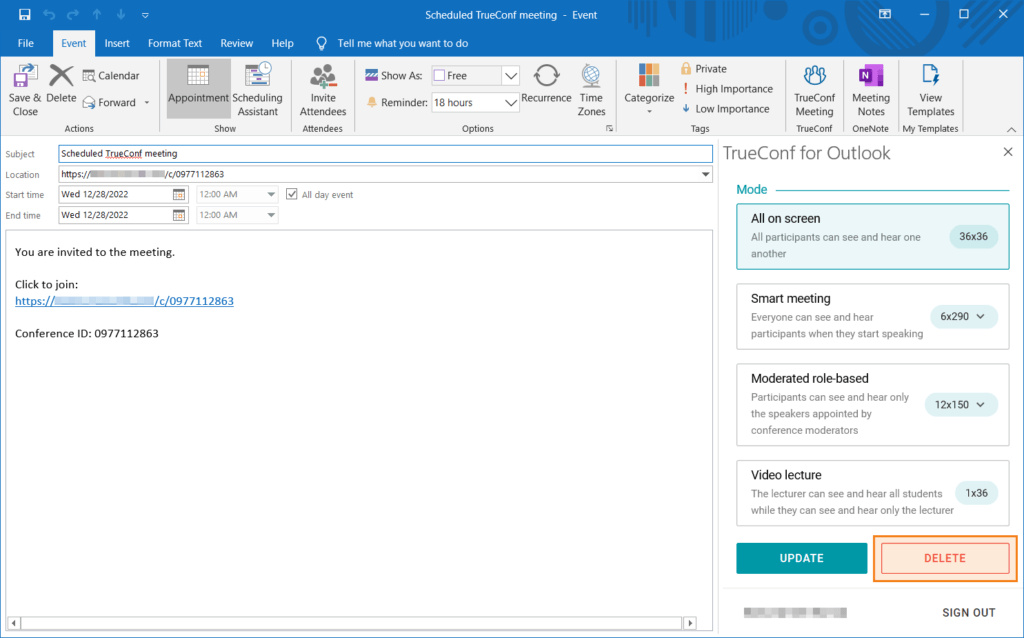
- Click on the Delete button in the add-on menu.
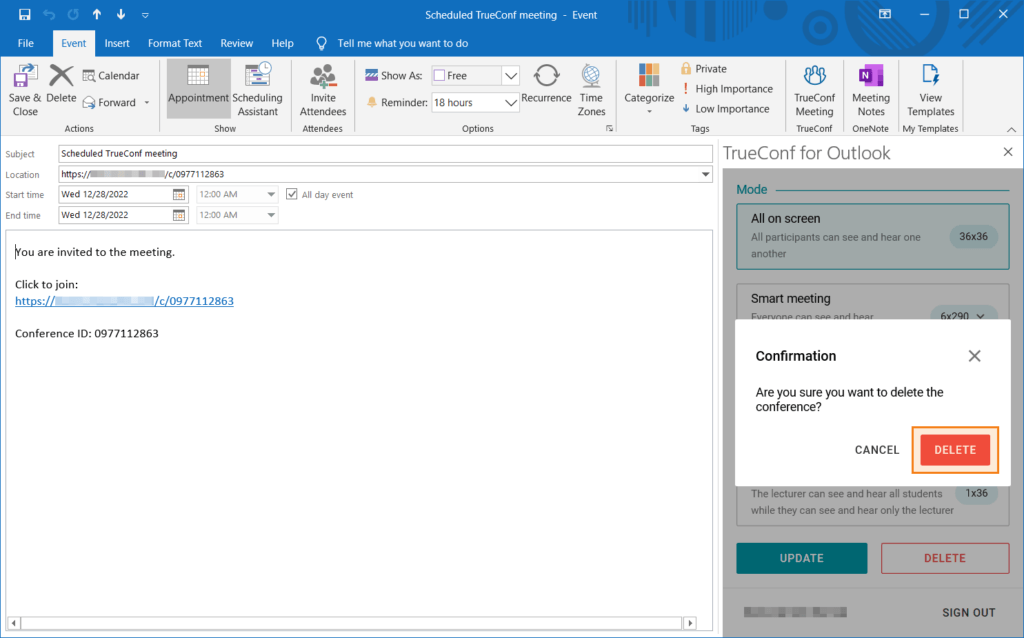
- Click on the Delete button in the dialogue window.
-
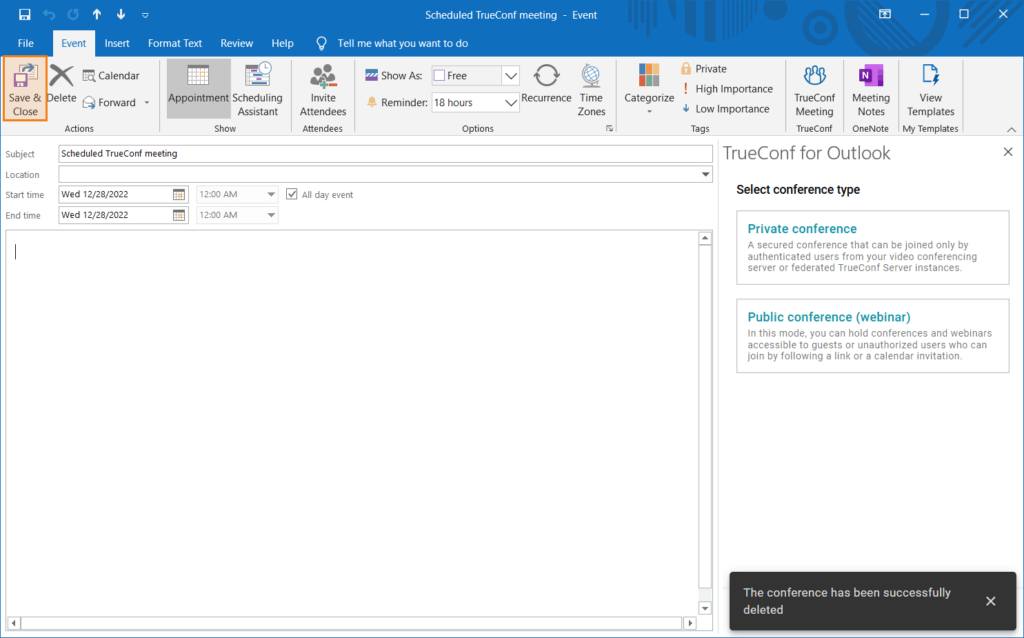
Your conference will be deleted from the event and from the video conferencing server.
If a conference is deleted, the description of an Outlook event will be fully cleared.
- Click Save & Close, to exit.

