How to use Dante-enabled audio devices in TrueConf video conferencing
With TrueConf desktop client applications for Windows and macOS, you can use high-quality Dante-enabled audio equipment. This protocol allows transferring audio in an Ethernet local network in digital form, preventing sound interference and signal degradation.
Connecting the Dante devices
Step 1. Installing Dante software
- In order to use Dante devices, you need to install Audinate software:
- Dante Via – for creating a virtual audio card. This software enables Dante protocol.
- Dante Controller – for routing the audio signal.
- Reboot your computer to apply changes.
Step 2. Setting up Dante devices
- Run Dante Via.
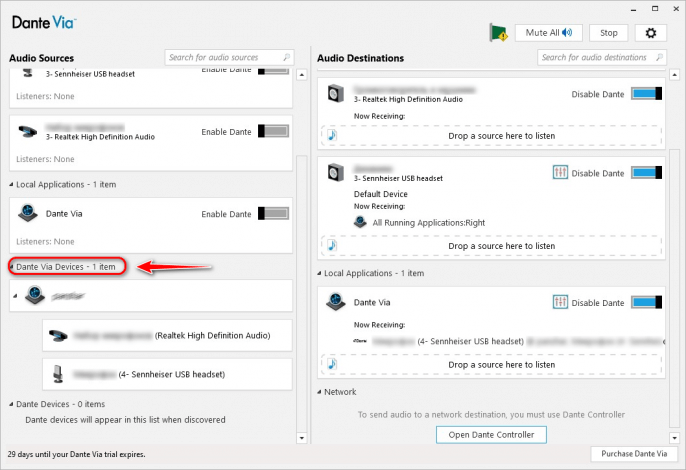
- Audio Sources and Audio Destinations panel will open. All available devices will appear in Dante Devices or Dante Via Devices section.
- Press Open Dante Controller.
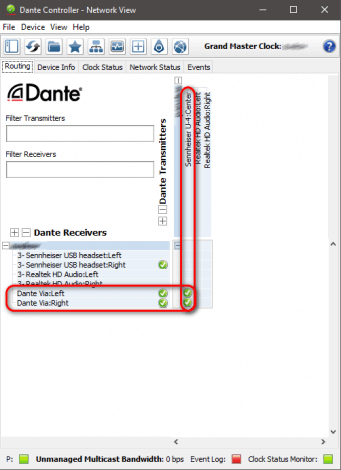
- Dante Controller application will open.
- Check the box at the intersection of the Dante Via Left/Right devices line and the necessary sound source column.
Broadcasting sound from Dante devices to the video conference
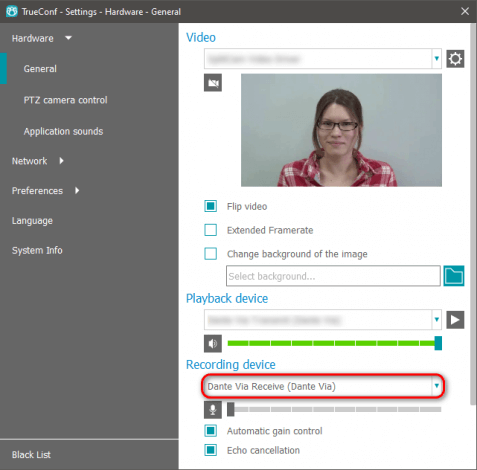
Conference attendees will hear the sound from Dante devices once you’ve chosen Dante Via Receive as the microphone in TrueConf client application:
- Before video conference – proceed to Settings → Hardware → General and select Dante Via Receive in Recording device box.
- During a conference – select Dante Via Receive in the toolbar in the application window.


