How to Improve TrueConf Communication Quality Using QoS
To ensure high quality communication in video conferencing, the TrueConf client application for Windows requires high-priority access to network resources. In the case when the internet channel is idle and not busy, this is usually not a problem. But if it is used intensively (e.g. when downloading files from several resources simultaneously) video and audio freezes, low picture quality or periodic connection interruptions can be present in meetings.
You can improve the quality of video calls and conferences by using QoS traffic prioritization technology. The principle of its operation is quite simple: incoming and outgoing application traffic, which requires low latency and guaranteed bandwidth, is marked as priority and will be processed by the router in the first place.
This article describes how to set up QoS step by step.
How to enable the qWave component for servers running the Windows Server OS
In order to take advantage of packet classification, you need to have this feature enabled on the server where TrueConf Server is deployed. To do this, install the qWave network platform:
- Start Server Manager.
- Select Add roles and features.
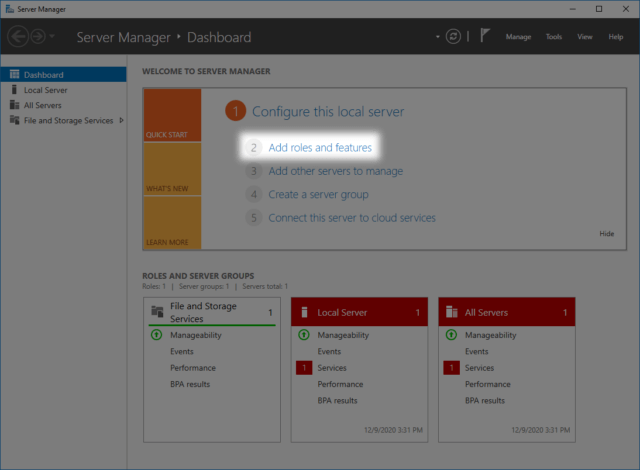
- The server and network environment information page will open. Make sure everything is prepared for the component installation and go to the next step.
- Select Role-based or feature-based installation.
- Specify the required server from the list.
- Select the required server roles, if necessary.
- In the list of features, select Quality Windows Audio Video Experience and click Next → Install.
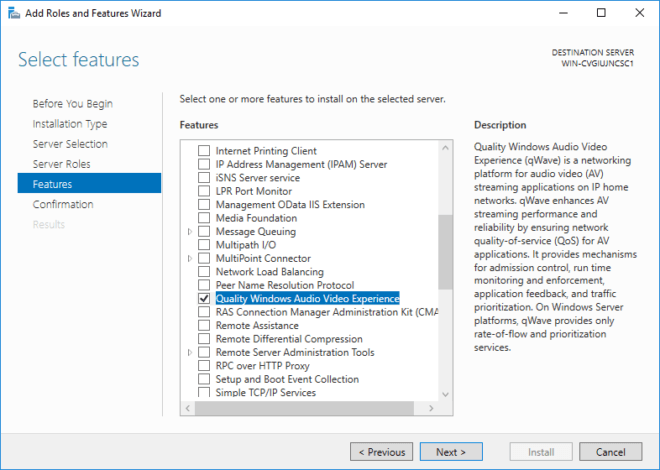
When the installation is complete, click Close. - Reboot the Windows Server for the changes to take effect.
Add-WindowsFeature, then qwave and press Enter twice.The following default values are used for DSCP marks on TrueConf Server:
- 40 (class 5) for media traffic
- 56 (class 7) for signal traffic.
To set these parameters manually, please contact our technical support.
How to enable QoS on a user’s computer
Step 1: Preparing to Set QoS Permissions
- Press Win+R and enter regedit in a window that opens. The registry editor will open.

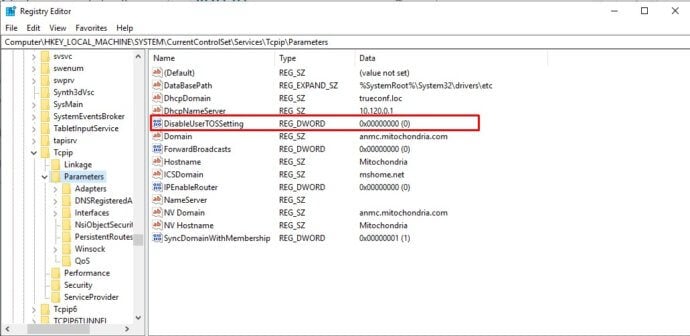
- Open the following folder: HKEY_LOCAL_MACHINE → SYSTEM → CurrentControlSet → Services → Tcpip → Parameters.
- Set DisableUserTOSSetting to 0.
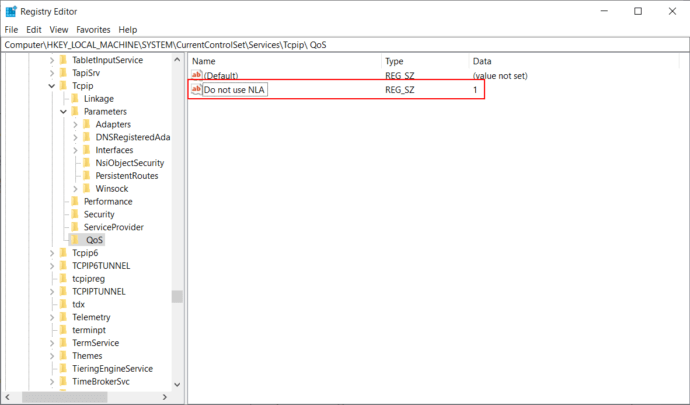
- Open the following registry folder: HKEY_LOCAL_MACHINE > SYSTEM > CurrentControlSet > Services > Tcpip > QoS.
- Create a string parameter Do not use NLA and set it to 1.
Step 2: Setting QoS Permissions
- Click Win+R and enter gpedit.msc in a window that opens. The local group policy editor will open.
- In the left sidebar, go to Computer Configuration → Windows Settings. Right-click on Policy-based QoS and select Advanced QoS Settings….
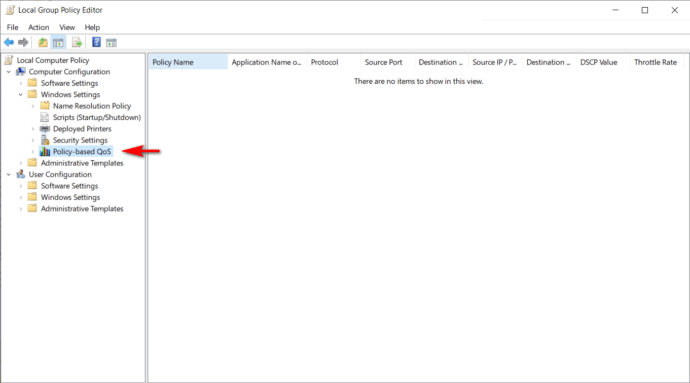
- In the window that opens, click the DSCP marking override tab. Set the following settings:
Click ОК to save these settings.
Step 3: Creating Policy-Based QoS
- Right-click Policy-based QoS and select Create new policy… in the context menu.
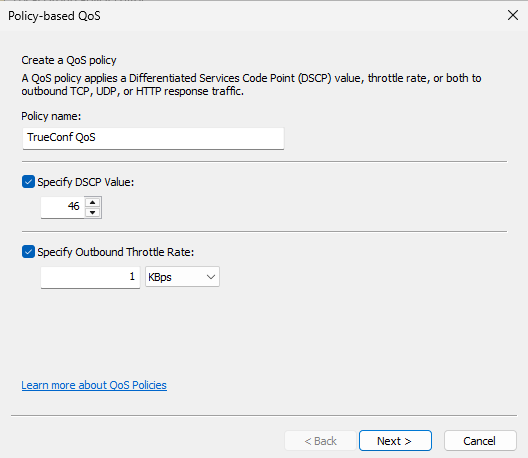
- Set up QoS rule parameters by specifying:
- Name in Policy name
- Traffic class value equal to 46 in Specify DSCP Value. Also, make sure to check the Specify Outbound Throttle Rate box (it is not necessary to enter your own speed value; you can leave it set to default).
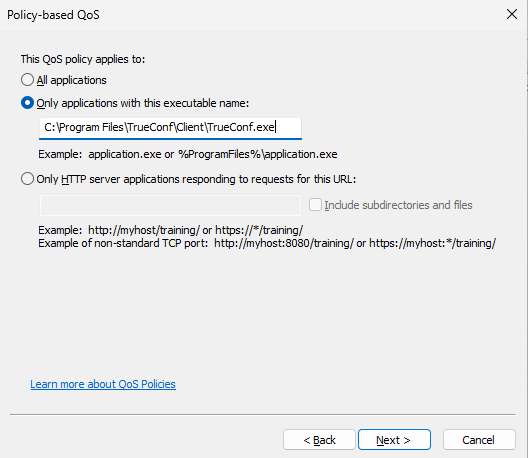
- Path to TrueConf.exe file in the TrueConf client application installation folder in the Only application with this executable name field.
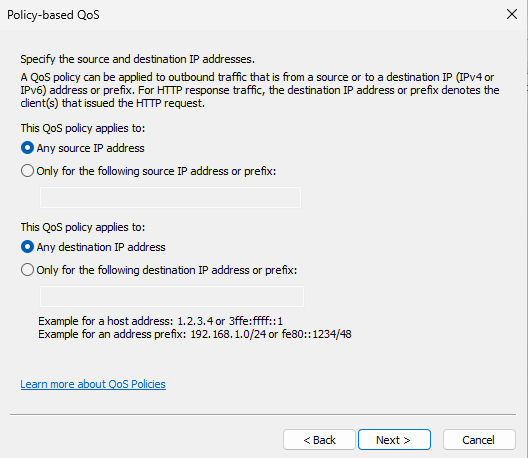
- Applying QoS policy to any source and any destination IP address.
- Select the TCP and UDP protocol.

Click Finish to save these settings.
If you need to set up a QoS rule for computers that are on the same domain as yours, follow the instructions on how to distribute TrueConf client application configuration using group policies.

