How to set up telephony: TrueConf Server and Asterisk integration
You can integrate your corporate SIP PBX into TrueConf Server via the built-in multi-protocol gateway. This guide will show you how to connect TrueConf Server with an Asterisk PBX (FreePBX 15 GUI).
Step 1: Create a SIP Trunk on the Asterisk Side
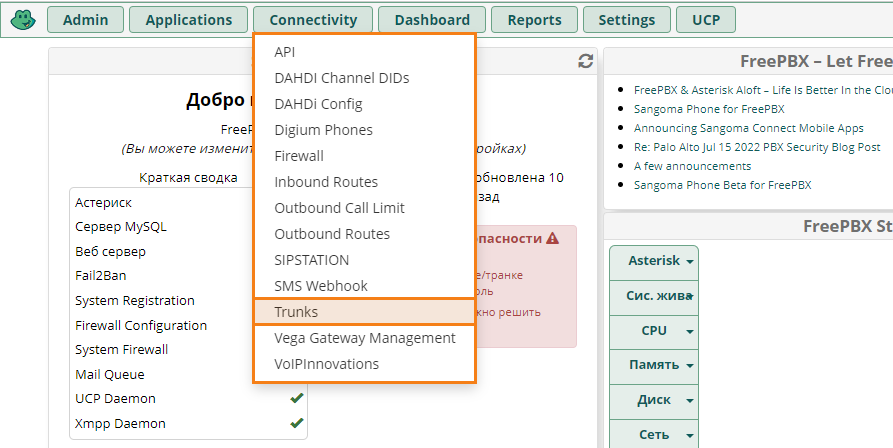
- In the PBX control panel, go to Connectivity → Trunks.
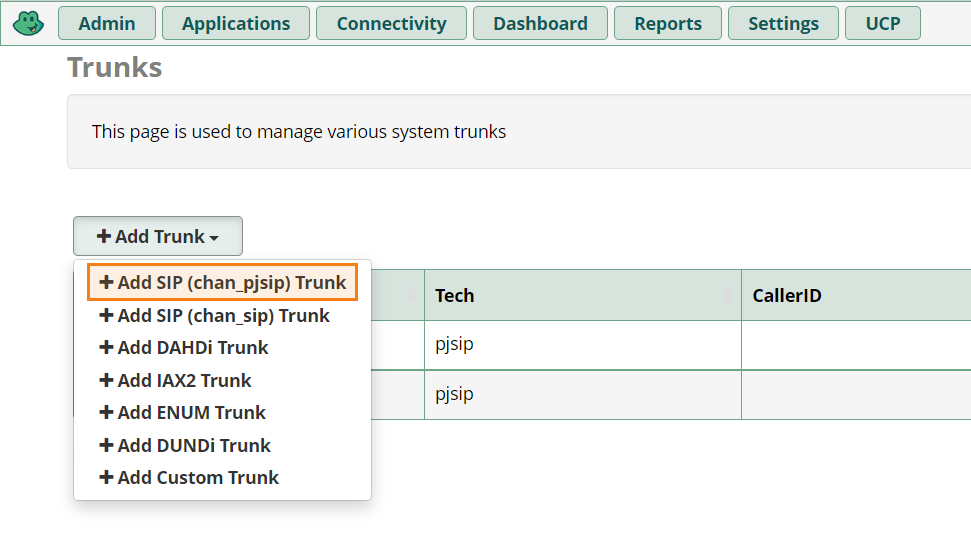
- In the opened window, choose Add SIP (chan_pjsip) Trunk in the Add Trunk drop-down list:
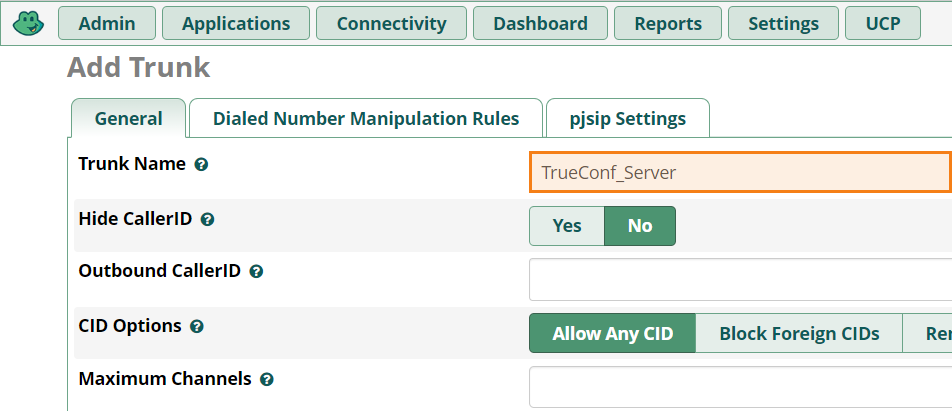
- On the General tab, fill out the Trunk Name field (this information will be used as a username and login).
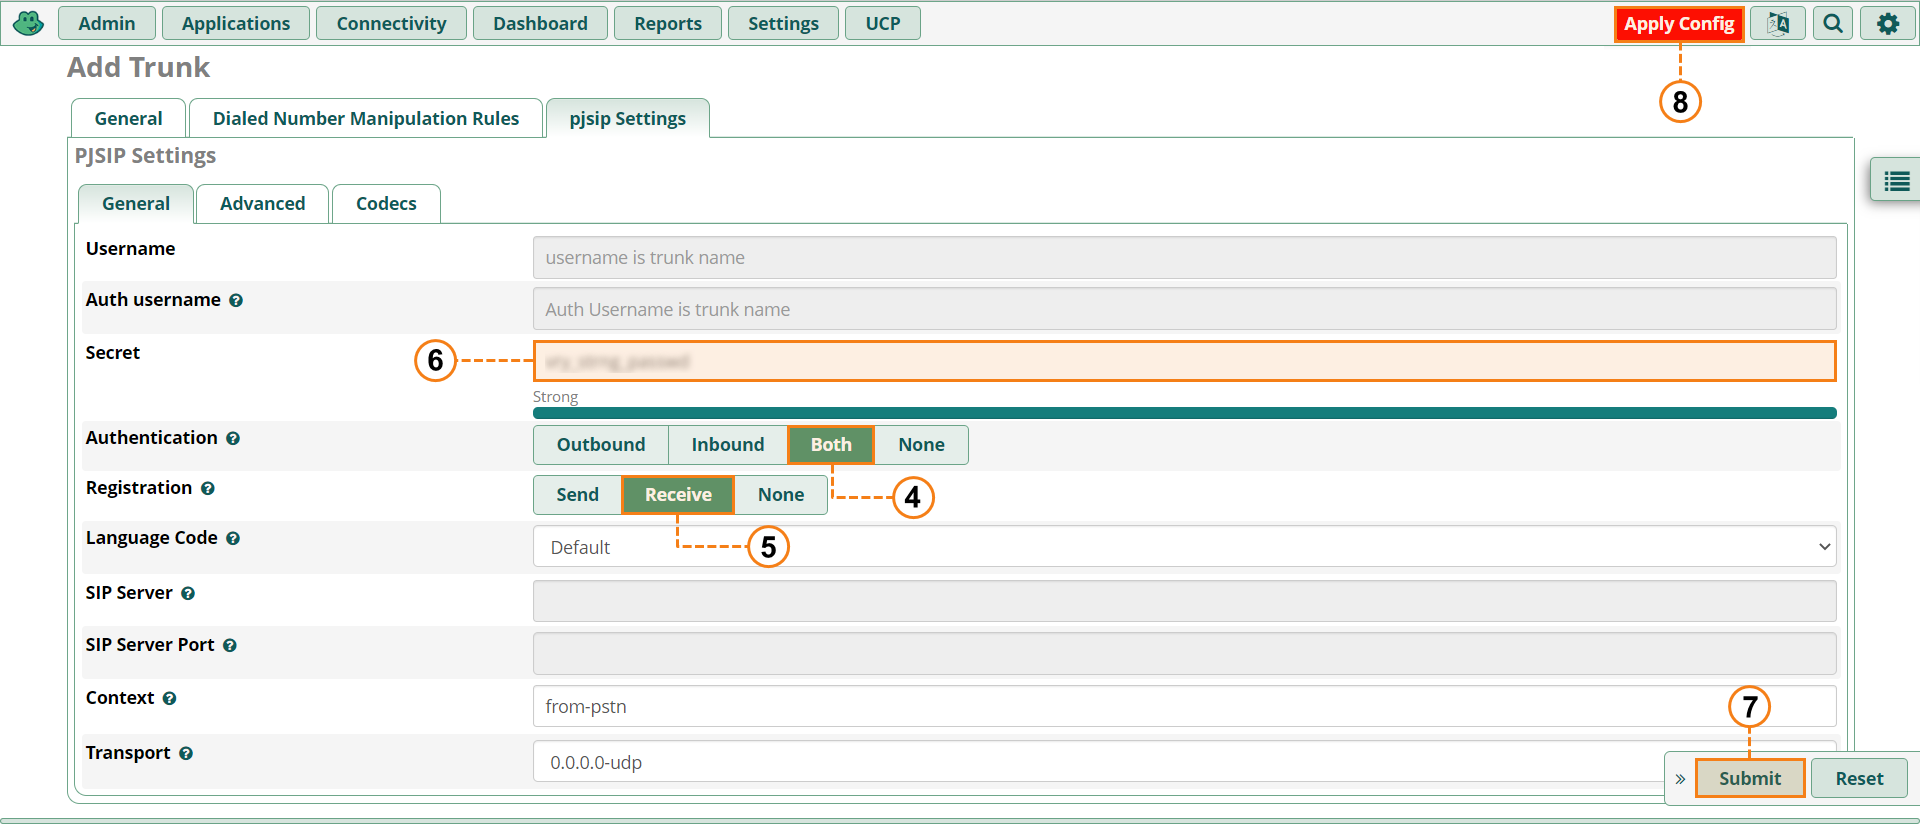
- Go to the pjsip Settings tab and select Both in the Authentication section.
- Select Receive in the Registration section.
- Enter the password that will be used for authorization in the Secret field.
- Click on the Submit button in the lower right corner.
- To save changes, click on the red button Apply Config.
Step 2: Set up TrueConf Server
- Go to the TrueConf Server control panel.
- In the Gateways→ SIP section, click Add Configuration.
- Choose manual configuration of SIP connection and click Create.
- To add a PBX connection rule fill in the form by entering:
- Asterisk PBX address (e.g. asterisk.company.com) and its port in the Host and Port fields
- Trunk Name and Secret (password) from Step 1 in the Login and Password fields
- Select the permanent option in the Registration list
- Check Default SIP trunk and Default VoIP server boxes in the Role category.
Step 3: Call a PBX from TrueConf Client Application
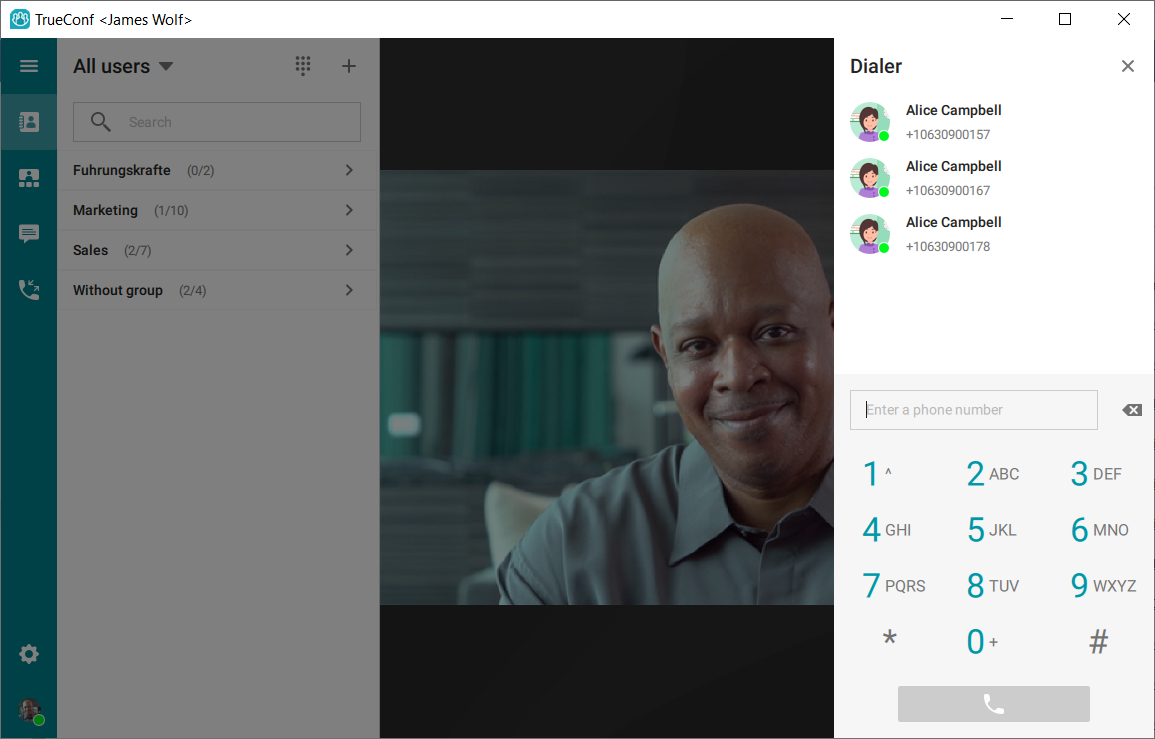
By now, setup is complete, and you can call PBX subscribers using the dialer in our application or by finding a subscriber’s number in the address book. Use the call string with #sip: and #tel: prefixes to identify PBX subscribers when administering the server (creating aliases, requesting API, compiling the address book, etc.).
PBX subscribers can call back, if the server connection rule was added to PBX settings.

