
Conferences
Conferences
To learn more about the features available to the users and conference guests in the “User roles” section.
Conferences with simultaneous interpretation can be created only in the scheduler, but not in the quick conference menu.
Connecting to a conference
You can join an existing video conference using one of the following methods:
- call the moderator;
call the conference by its ID;
In the scheduler, select the conference and click the button.
- join the conference via its web page;
go to the conference page using its ID from the server guest page;
access the conference page from your personal area (only if you are the moderator);
In the search field, enter the web page address of the conference.
Ability to join conferences depends on separate PRO licenses. This feature may be unavailable due to license restrictions on the video conferencing server. In this case you will see the corresponding message.
How to create a conference in one click
For the sake of convenience, the application enables users to create a conference with pre-defined settings almost in a single click. Additionally, thanks to multiple login, you can start several quick conferences as the owner (for example, if you launch multiple instances of the application or create an event from your phone and then from your laptop).
When creating a conference, you will have two options: a quick conference or scheduling an event. To start a conference "with one click," you need to go to section Conferences, then navigate to block Meet now. In this block, you will see two buttons: Start now and  .
.
Click Start now to instantly start an event with default settings.
Please note: a conference started this way will default to Smart meeting mode. However, you can change the quick conference template as shown here.
In the initiated conference, there will be no participants; you will need to add them manually or provide them with the conference link. To add participants manually, click  above the Participants list on the right side of the screen and add users from your contact list.
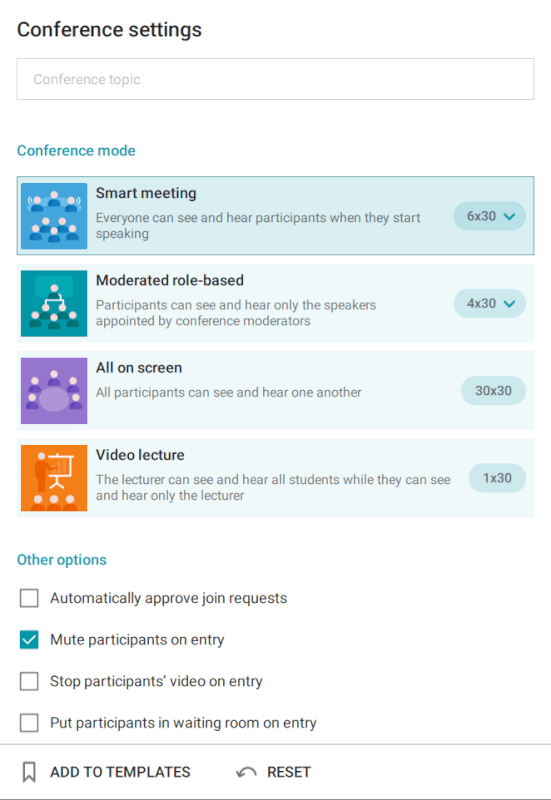
To quickly start a conference using a different mode and other basic settings (such as immediately adding participants or activating a waiting room), use the button. When you press the button, you will have two options to choose from: Configure and Start and Change default settings.
To change the default settings before starting the conference, click Configure and Start.
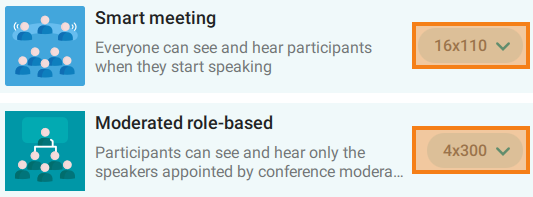
When selecting the Smart meeting and Moderated role-based modes, you can set the maximum number of conference participants and speakers on the podium. To do this, click the dropdown menu showing the current number of participants, located on the right side of the block with the desired mode:
Among other available settings, you will find these checkboxes:
- Automatically approve join requestsBy default, when connecting to a conference by calling its owner, the owner receives a request. Selecting this checkbox will change the default behavior – a user wishing to join the conference will automatically connect to it when calling the owner.
- Mute participants on entry. Select the appropriate checkbox to ensure participants join the conference with their devices turned off. When the Smart meeting mode is selected, the Mute participants on entry checkbox will be checked by default. For more information on the logic of filling seats in the smart meeting, refer to the relevant section.
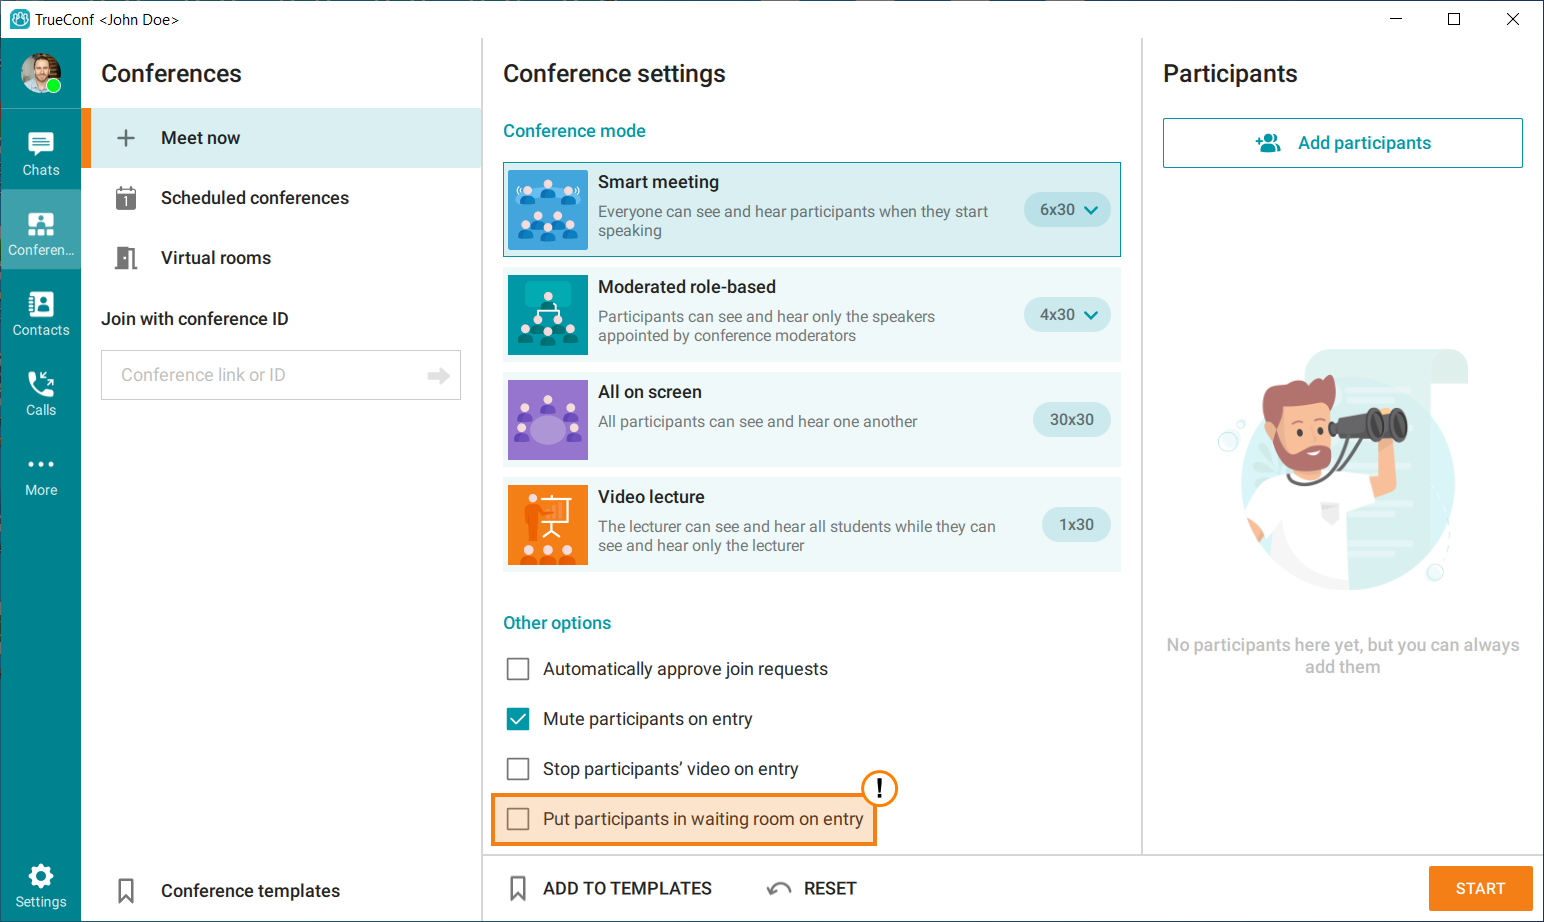
- Put participants in waiting room on entry. If this checkbox is selected, all users joining the conference will be redirected to a waiting room where they will await connection approval from the conference owner. The options selected in the Default settings menu will be applied each time the quick meeting feature is used. If you wish to reset the previously selected options, press Restore default settings.
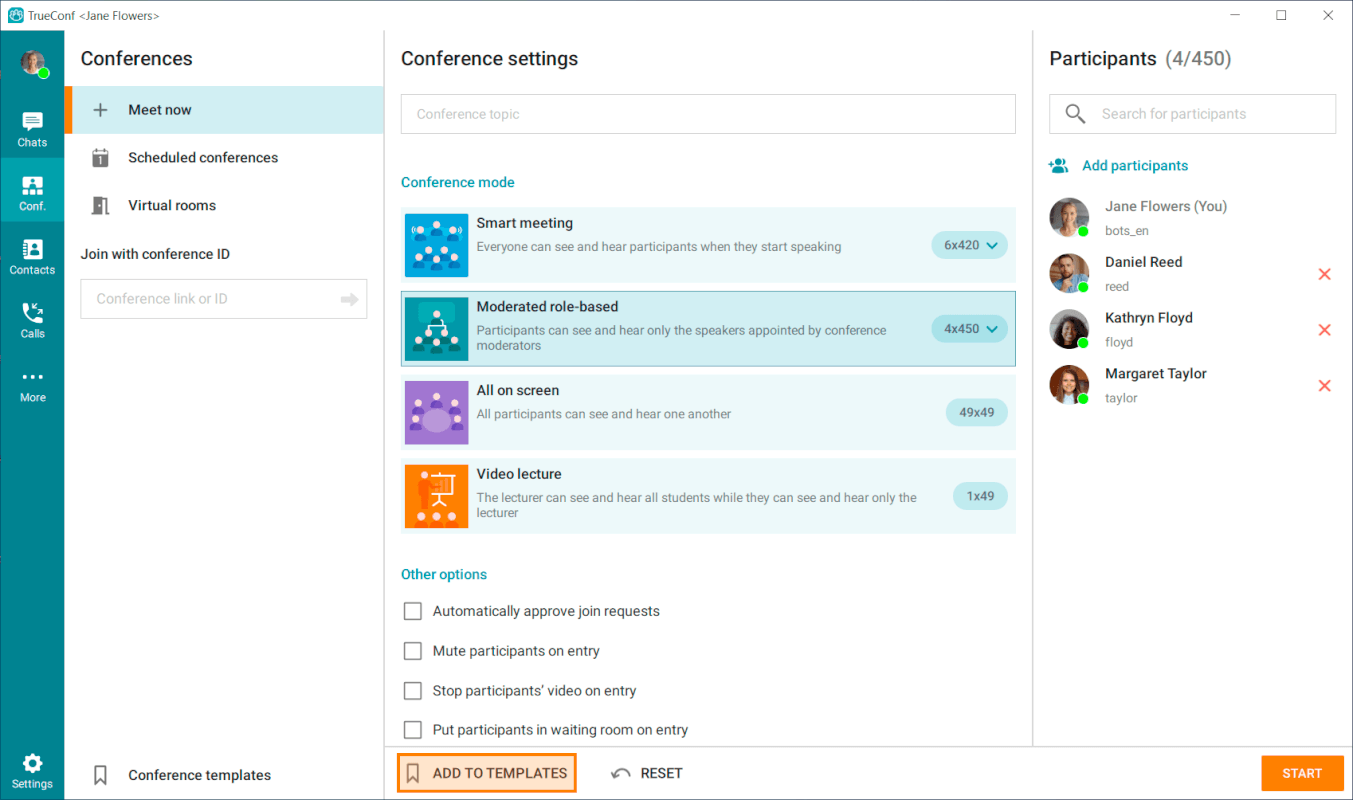
The second option available after clicking the button is Configure and Start. By selecting this option, you will be taken to the Conference settings window. Here, just like in the menu described above, you will have access to choosing the mode and a list of additional options. To discard all changes, click the Reset button.
To reuse selected settings many times, you can save them as a template by clicking the corresponding button:
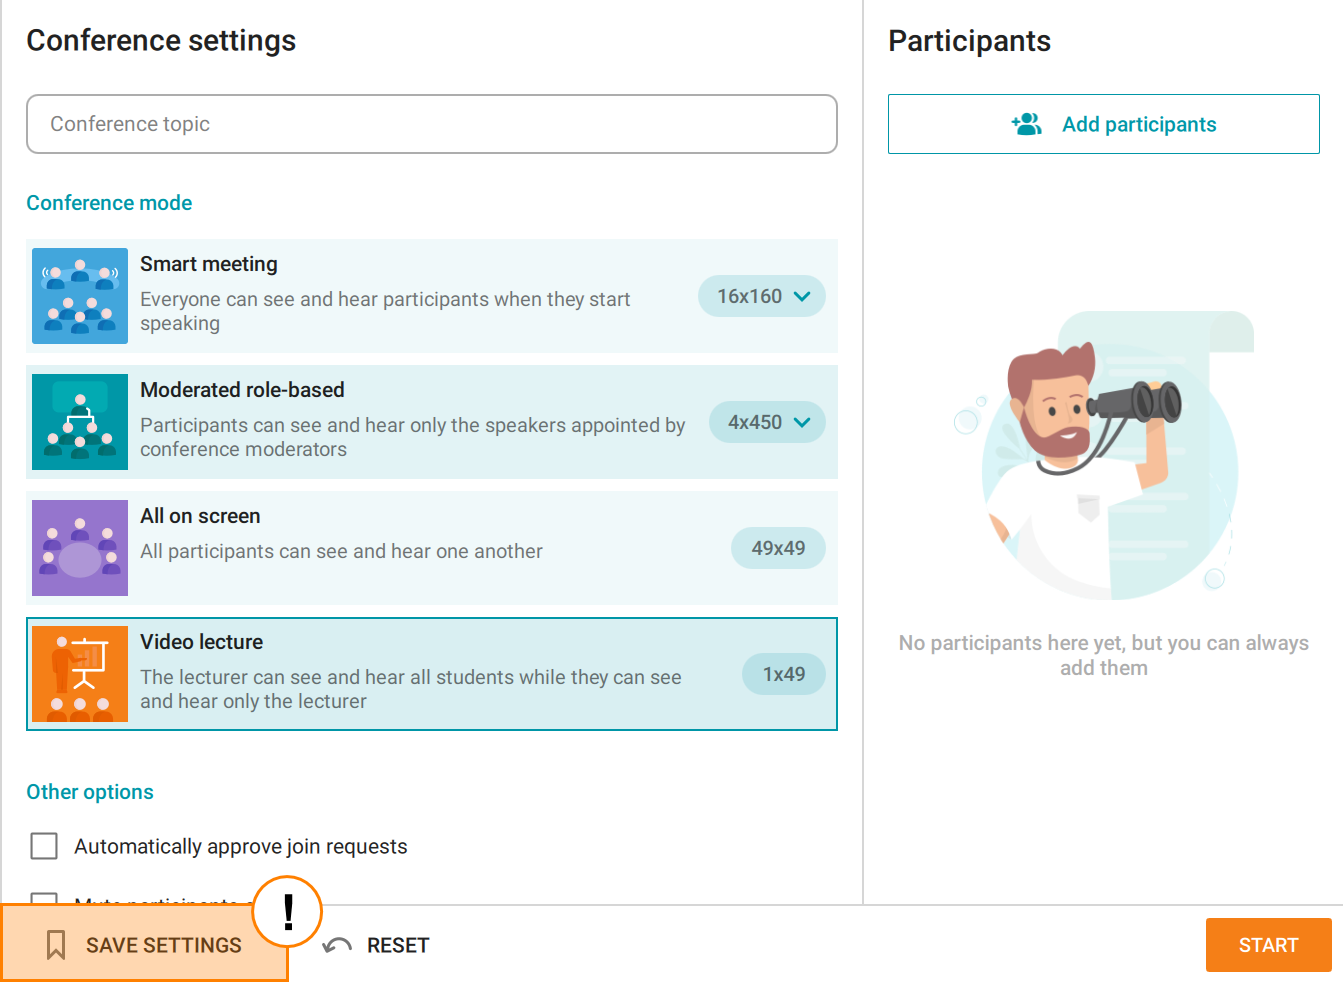
There can be multiple templates, and they do not affect default settings.
Select the participants you want to invite to the conference, and then click Add participant:
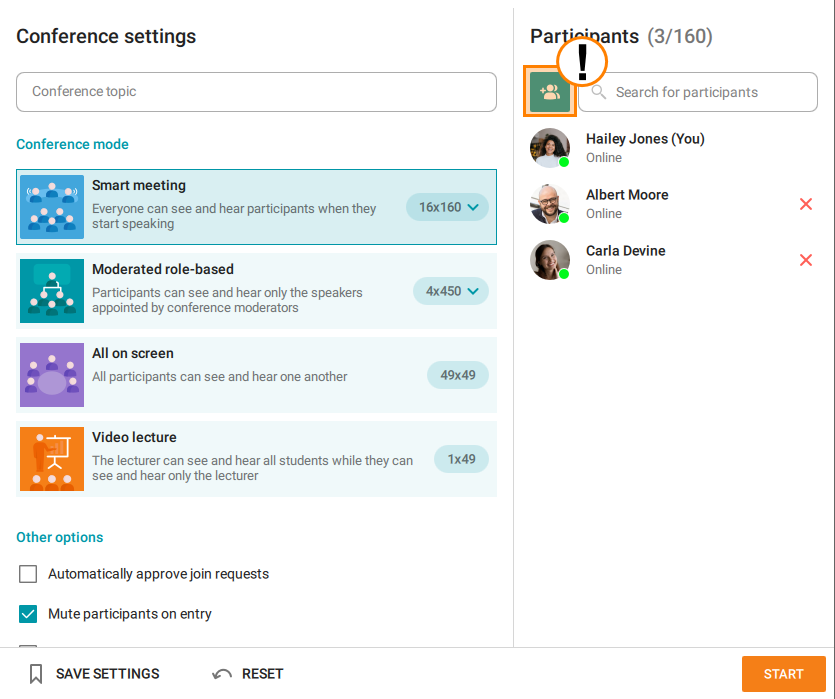
After selecting all the necessary options and adding participants, click Start to proceed to the call.
Click Change default srttings to set the mode and additional settings that will be applied when starting a smart meeting.
Quick conference template
You can use templates to start conferences with pre-defined settings.
All conference templates are locally stored on the user's computer and are not synchronized with other devices.
Click the Save settings button to add a template with the conference name to the Conferences → Scheduled conferences → Conference templates block, allowing you to quickly access it later.
When selecting a template, you can start and delete a conference, change its name, mode and number of participants. You can undo all unsaved edits by clicking on the corresponding button. Once you have made the changes, you can save your template.
You cannot restore the deleted template.
Waiting rooms
When creating a conference (of any type), you can check the box Put participants in waiting room on entry. As a result, all participants, except for moderators, will be sent directly to the waiting room as soon as they join the conference. While in the waiting room, a user will not see or hear the conference participants (and vice versa) and will not have access to the chat and other collaboration tools. Only moderators, including the owner, can move participants to the waiting room and back to the conference.
The functionality for waiting rooms will be available immediately after the start of the conference only if you check the box Put participants in waiting room on entry during its creation. You can also activate the waiting room on the fly for an ongoing event in its information window. Waiting room management is available to all moderators.
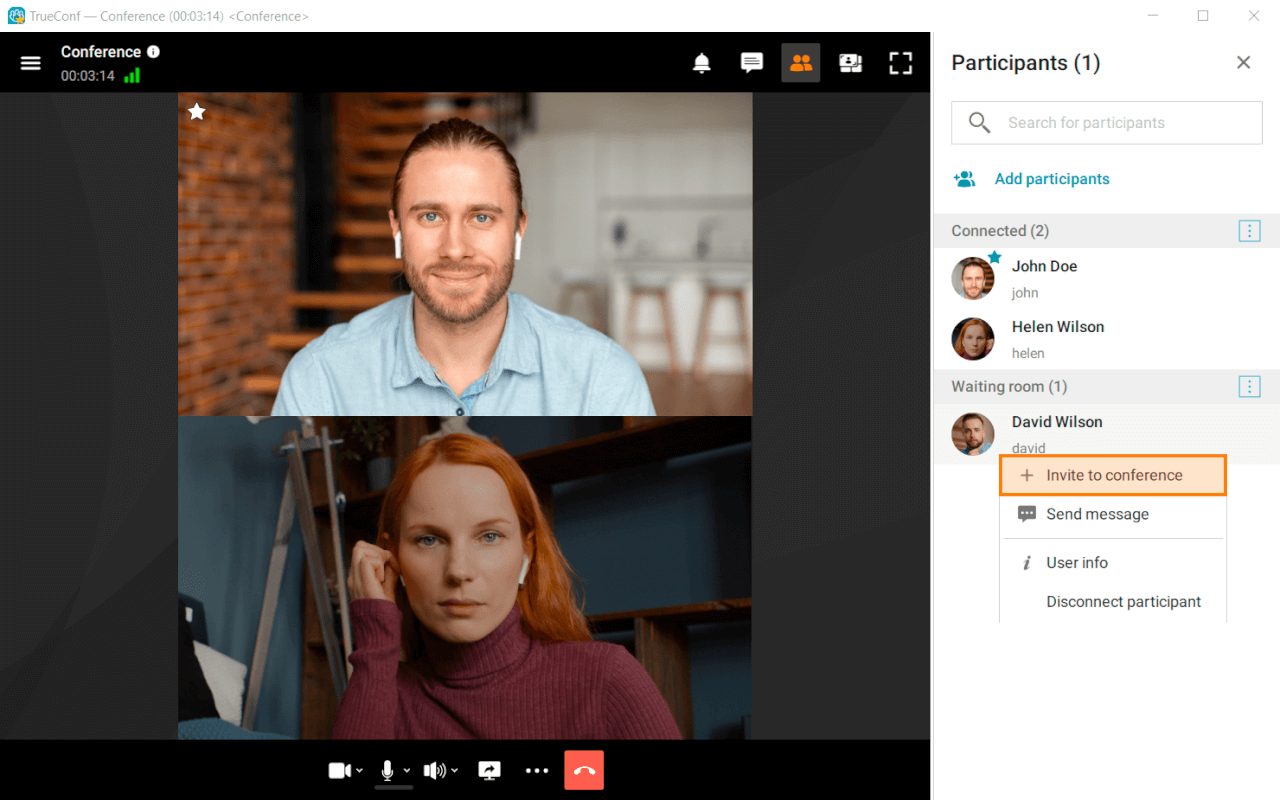
With the help of waiting rooms, you can flexibly manage access to the meeting. To move a participant from the waiting room back to the conference:
Click the
 button in the upper right corner of the conference window.
In the opened participant list, you will see the Waiting room section. Right-click on the desired user and select Invite to conference.
In a similar way, you can send a participant to the waiting room during the conference: right-click on the desired user in the participant list and select the Put in the waiting room option.
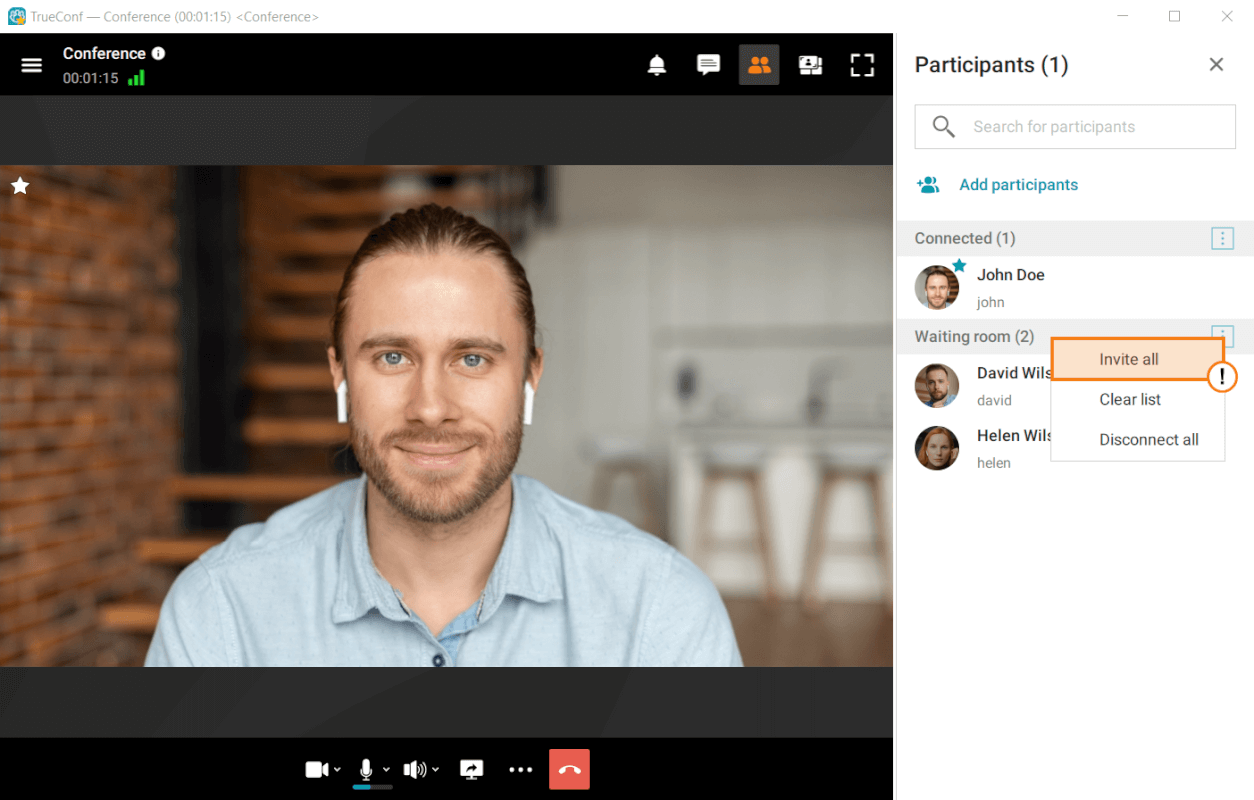
You can also invite all participants who are currently in the waiting room. Click on the button which is near the list heading and select the Invite all option in the context menu.
Creating a conference from a group chat
To call all participants of a group chat, click on the  in the upper right corner. The button will open the menu for [starting an instant meeting] (#create-conference). All chat participants will be automatically invited to the new conference.
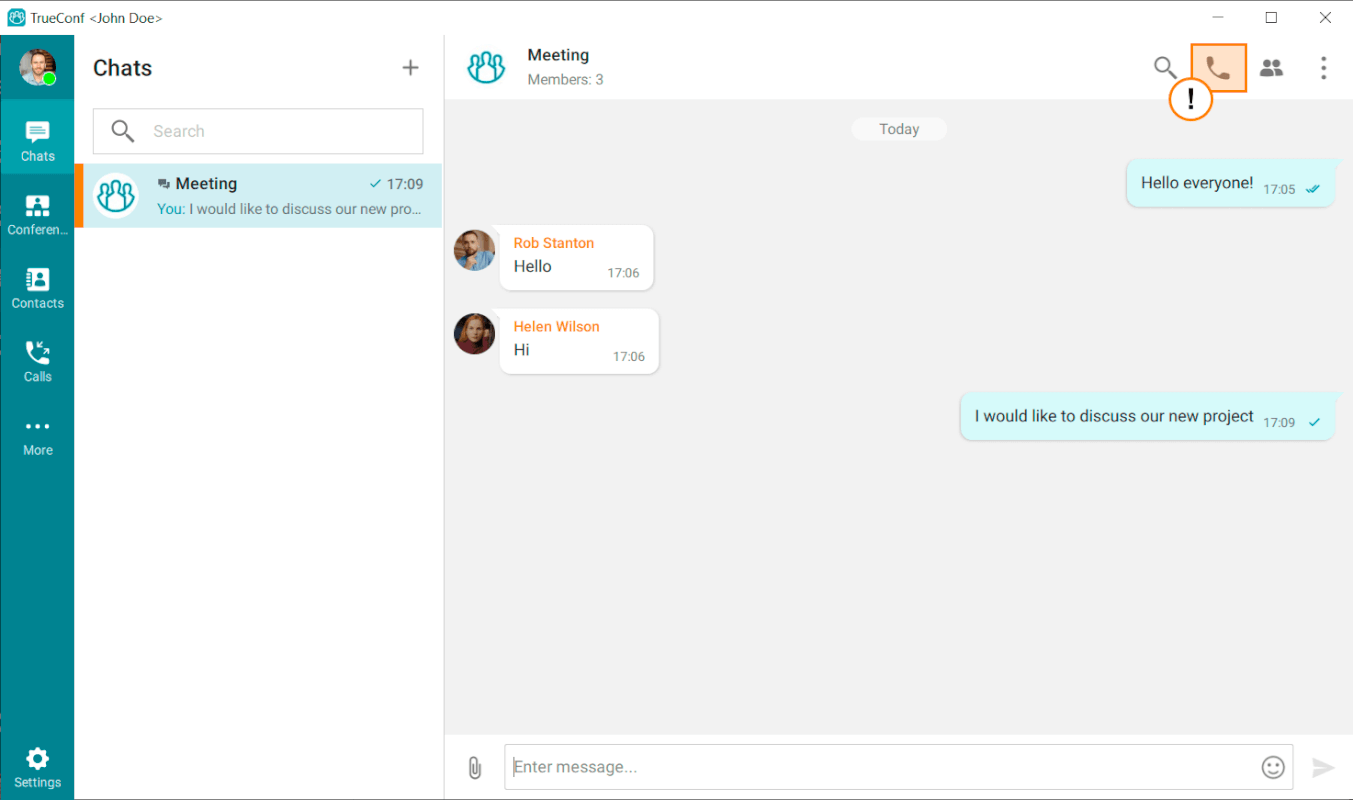
The group chat on which a conference is based is linked to it by default. This means a new chat for the event is not created, and the conversation remains in a single thread. You can break this link using the  button located at the top of the Conference settings section.
In the confirmation window that appears, click the Unlink button. A new chat will now be created for this conference.
Call-to-conference escalation
Sometimes, it may be necessary to involve additional participants into a discussion. TrueConf for Windows client application allows you to quickly transform your video call into a group conference in "all on screen" mode and connect new participants. There is no need to interrupt a call and start a new video conference.
To add a new participant to a conversation:
In the main menu located on the left side of the application, navigate to section Contacts.
Choose a participant you would like to invite and call this user in the way described in the corresponding section of this guide.
In the same way, you can connect an IP camera or another device to the call using the call string format.
You can invite users to an ongoing call in a different way:
Click the
 button in the upper right corner of the video call window.
Add participants from the list of contacts or search for them by entering their names (here you can also connect a device by entering a call string).
When a video call is escalated into a conference, a group chat will be automatically created for this conference. This chat will be available to all conference participants. However, it will not include the messages from the private chat with the user participating in the initial video call.