
Content Sharing
Content sharing
Slideshows
During video conferences, participants can not only hear and see each other, but also share content or show slides.
If a participant permits video recording in the application settings, his/her slideshow will also be recorded.
Importing slideshows from ppt and pptx files is available only in TrueConf for Windows and requires Microsoft PowerPoint preinstalled on your computer.
Mobile app users on TrueConf for Android and iOS have access to the content sharing feature.
Supported formats
You can import slideshows in the following formats: ppt, pptx, odp, slides and pdf file pages.
Importing presentations in the .odp format requires the installation of LibreOffice version 7.5.0.1 or later on your computer. You can verify the necessary software is installed by navigating to Settings, selecting Tools, and locating the Document management line. If the path to the editor is empty or you see an error message below, click the Construct automatically button in the Path to ODP editor line. If the path is not determined automatically, you can specify it manually.
Due to a known bug on the LibreOffice side, import does not work with versions higher than 25.2.6. So, the latest working version of LibreOffice is 25.2.6. We do not recommend updating the office suite until the problem on their side is resolved!
Below are the standard file paths for LibreOffice on Linux:
Fedora, openSUSE, CentOS:
/usr/lib64/libreoffice/programDebian, Ubuntu, Linux Mint, Arch:
/usr/lib/libreoffice/program
You can also create a presentation from individual images directly in our application or even add some images to the slide list imported from a presentation or PDF file. The supported image formats are jpeg, jpg, png, gif, jpe, jif, jfif, jfi, bmp, and webp.
Please note that when gif images are used, only the first frame will be displayed.
How to show slides
During the call, in the conference management menu, click the  button and go to the Slideshow tab in the window that opens. On this tab, you can check the Share audio checkbox, which will allow audio from your OS to be transmitted simultaneously with the presentation.
Please note that the audio will be streamed from your OS and not from the slideshow. Your presentation can be accompanied by the background audio from any other application. You can activate audio streaming when the slideshow has already started. To do it, click on the button. In the new window, check the Share audio box. Audio streaming is also available when sharing content. This feature can be enabled in the same way.
To add a new presentation, click the Create a slideshow button, enter its name, and then click the Create button. The presentation will then open in editing mode:
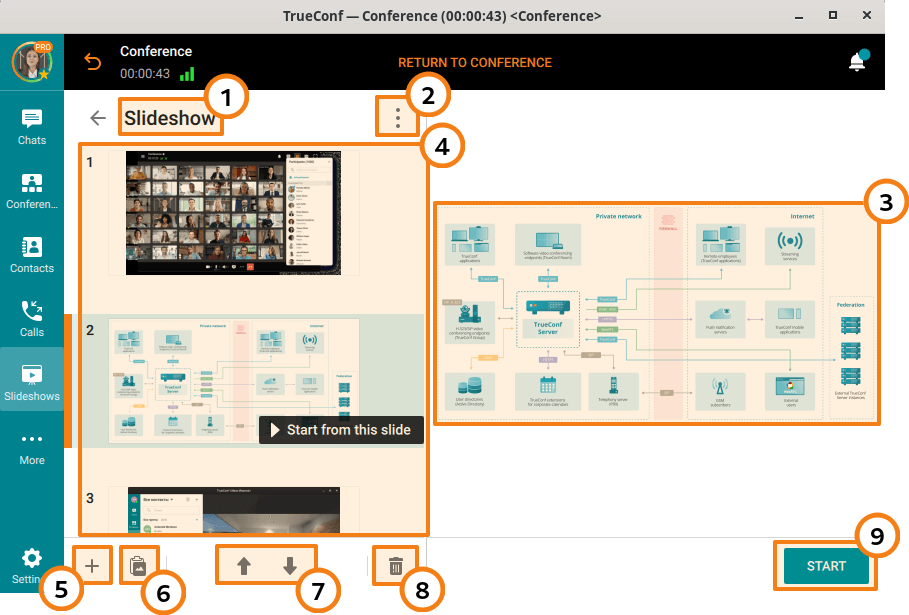
Slideshow description
In this menu, you can:
Rename the slideshow
Save the slideshow locally on your computer with .slides extension
Delete the slideshow
3. Selected slide preview
4. List of slides
5. Adding files to the list
6. Pasting a file from the clipboard
7. Moving files up and down on the list (you can drag files to change their order)
8. Removing slide
9. Starting the slideshow (available only when the conference is ongoing)
After adding images to the presentation, click Start to start broadcasting it from the first slide. To begin the presentation from any other slide, select it from the list and click the Start from this slide button on it.
To make your slides visible for SIP/H.323 endpoints, switch BFCP and H.239 protocols on the server. To learn how to do it, read our article.
You can always pause the slideshow. To do it, click on the button  which is in the slideshow control widget.
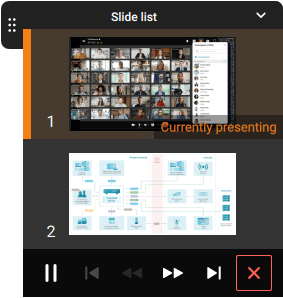
Resuming the display is done similarly: by pressing the  button.
How to upload and save a slideshow
In the application menu, select Slideshows, where you can create a new presentation, import slides from a previously saved file (in .slides format), or open a PDF file.
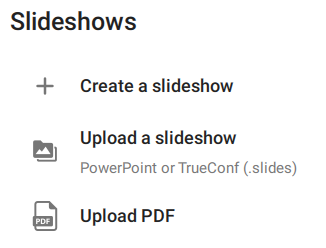
Click Create a slideshow, enter its name, and add slides to the list. The presentation is now ready to be used in the conference.
Exit the editing mode by clicking  at the top of the application. Now you have access to the list of all presentations you have uploaded:

You can edit the slides, save them locally on your device and show them during a conference.
Opening a PDF file
To import PDF file pages into a presentation, simply click the  button when creating it.
The file will be converted into a set of images from which a slideshow will be created.
Desktop sharing
During conferences and video calls, you can use a client application to share your screen or separate application windows (including browser windows).
The content will be seen by all participants connected via TrueConf client applications and browsers (via WebRTC). Besides, the content shared during a conference can be recorded (only if the participant who is presenting the content had previously given the corresponding permission in the Tools section of the application settings).
Only maximized windows are correctly displayed during content sharing. Minimized windows will not be shared.
To share content during a video call or group conference, click the button on the control panel.
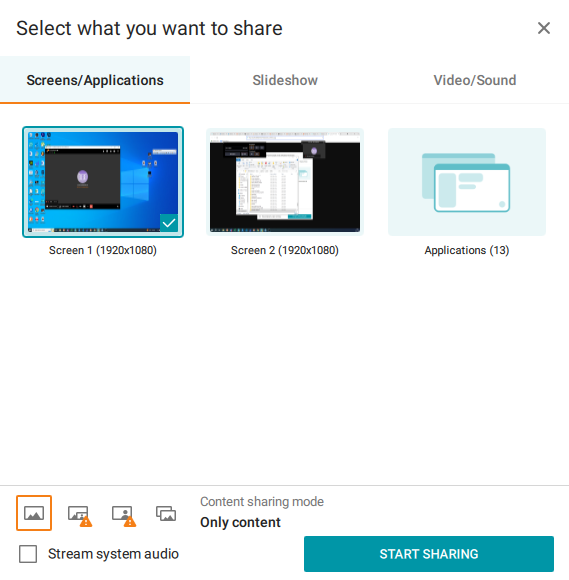
In the menu that appears, select the screen or application you want to share. If you need to transmit sound, check the box Share audio. To start the demonstration, click the button Start sharing.
When you will be sharing content, audio will be streamed from the OS and not from the selected window. As a result, the content will be accompanied by the background audio from other applications. Audio streaming can be activated when content sharing has already started. To do it, click on the button. Then, check the Share audio box. This feature is also available during a slideshow. It can be activated in the same way.
If necessary, you can also stream your video with a cut-out background simultaneously with the content. To do this, use the  button.
Then, the application window will be minimized and the stream control widget will be displayed in the upper part of the screen. It will be displayed on top of other windows all the time while the content is shared. Other meeting participants will see your self-view instead.
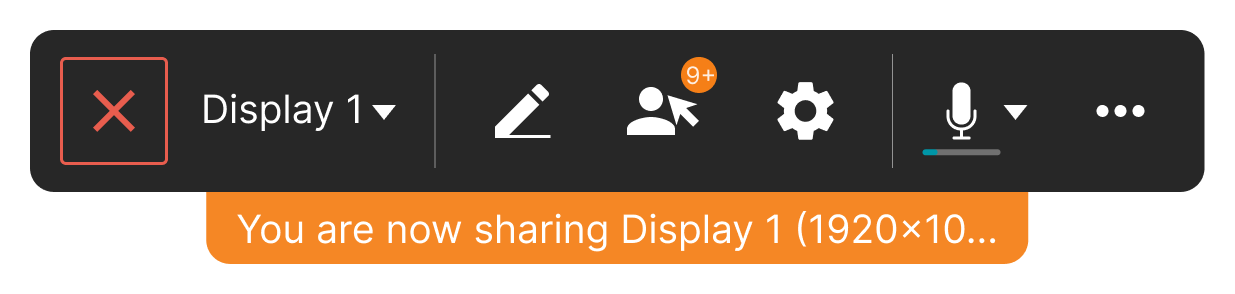
The interpretation control window contains the following elements:
The title of the shared screen/application will be displayed in the lower part of the window.
button
 to collapse/expand the widget;
content display off button
 — clicking it expands the minimized application window TrueConf;
button containing the name of the broadcast source (in the screenshot, it is
 ): select the broadcast source, enable/disable audio broadcast.
The
 button is used for drawing on broadcasted content; more details can be found in the relevant section.
The
 button allows you to view the list of participants who have been granted access to control your desktop during the conference (you can also revoke this permission here).
button
 for configuring content display (in your own video window or as a separate stream) and video area display;
You can also hide the widget's video area by hovering over it with the mouse and clicking the Hide link in the center.
button
 for selecting and setting up the microphone;
button
 for speaking (available only when the microphone is off in any conference except a smart meeting);
Button
 for accessing the additional conference management menu.
By clicking the button and selecting Show my video and content in separate windows from its menu, you can start sharing content as a separate stream with conference participants. Content shared in this way can be viewed on third-party video conferencing terminals (via BFCP/H.239 protocols).
Please note that when content is displayed in a separate window (such as an application tab or the entire screen), the video feed will be transmitted with a focus on resolution, rather than frame rate. Video will be transmitted at FullHD 1080p quality (your server administrator can contact our technical support to raise the resolution up to UltraHD 4K), but the frame rate will be 0.5 FPS (1 frame every 2 seconds). If you want to show some dynamic content, do not share it in a separate stream. When content is displayed in a participant's window, the frame rate and video quality will match those of the camera feed, without limiting fps in favor of resolution.
Streaming web camera feed when sharing desktop
During desktop sharing, you have several options for transmitting webcam images. You can find the display mode selection bar at the bottom of the Select what you want to share window.
There you will find buttons needed for selecting the mode:
button
 Only content;
button
 Camera video and content in separate windows;
Button
 Camera video overlaying content — selecting this option will bring up an additional link Configure, allowing you to choose the size and position of the overlay image from the webcam (self-view) in a separate window.
Button
 Speaker overlaying content. When this button is pressed, the user's video will be overlaid on the content without a background. You can adjust the position and size of the overlaid silhouette by clicking link Configure.
Options Camera video and content in separate windows and Camera video overlaying content will be unavailable if None is selected in your camera settings. However, if the camera is selected but turned off (indicated by a crossed-out  icon), the camera will automatically turn on when you choose these options.
Below is an example of screen sharing with an overlay of the speaker's video, with the window size adjusted and the background hidden:
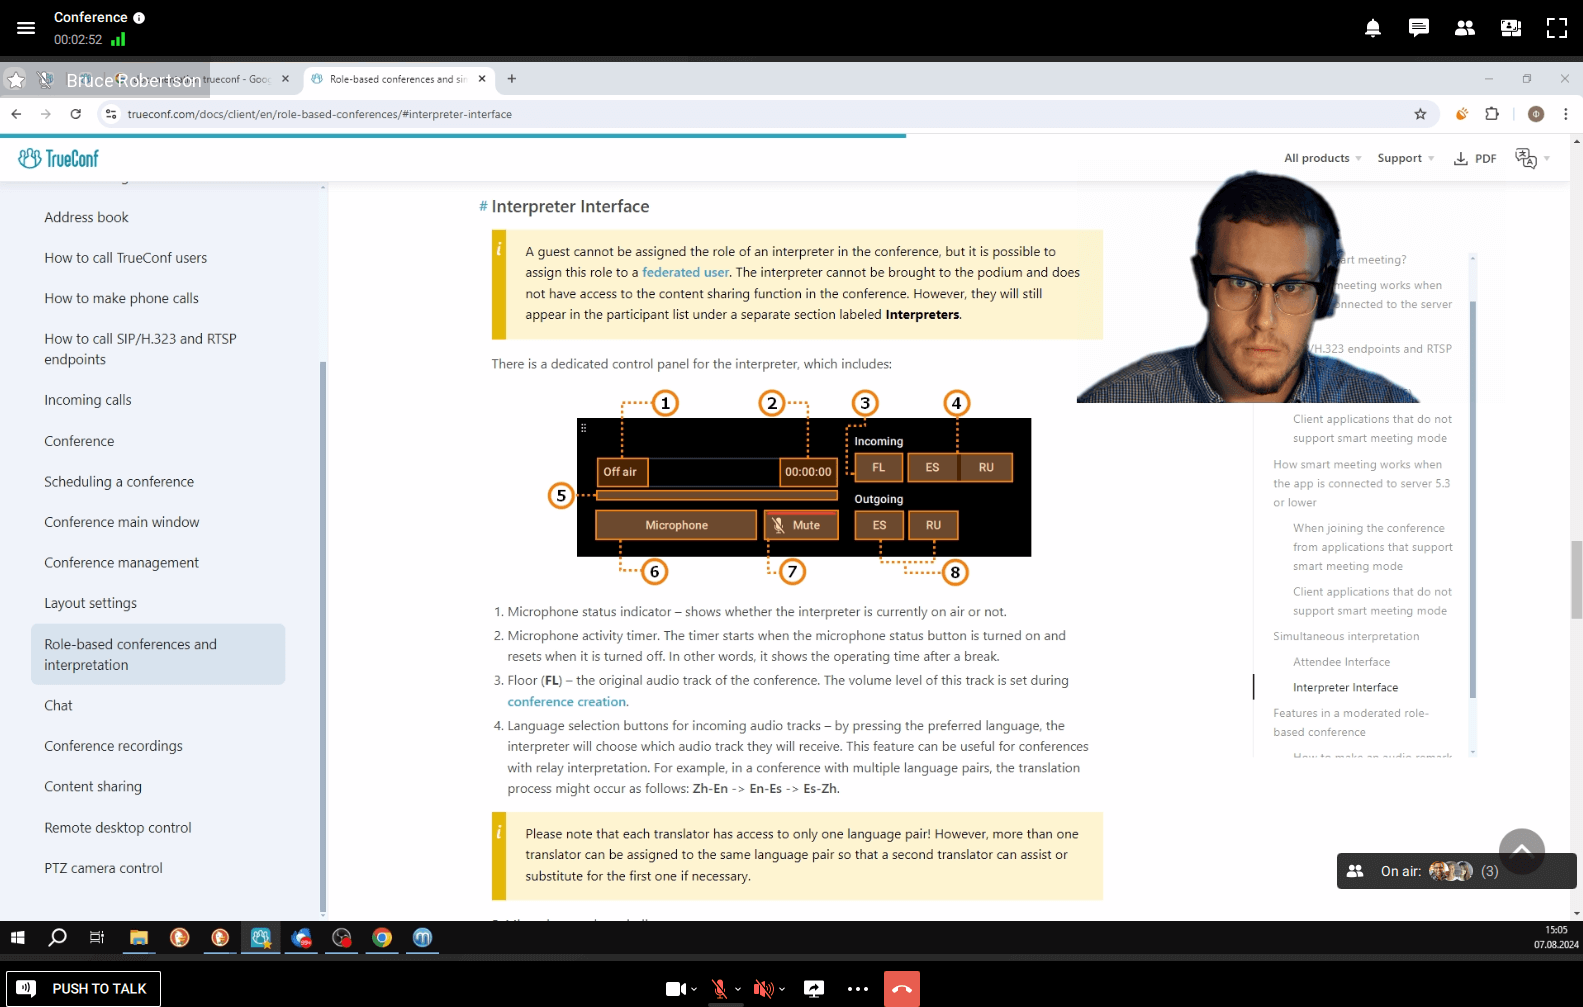
After selecting the desired streaming mode, click the Start sharing button.
Annotations over shared content
You can always make annotations over the shared content. This will make your presentation more vivid and interesting. To start annotating, click on the button in the stream control panel.
Content annotation tools can be accessed only when the entire screen (not just one of the application windows) is shared in the user’s video window. If content is shared in the separate stream, annotation tools will be unavailable.
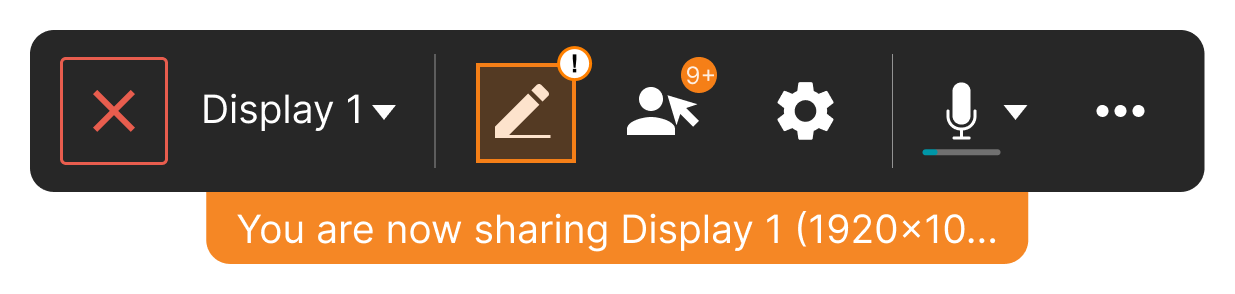
The panel with drawing tools will be displayed in the left part of your screen.

This widget includes the following buttons:
The
 button is used to switch to the OS mouse cursor (this is necessary to switch from drawing tool control to the standard OS control mode).
The
 button is used for dragging drawn objects. To do this, click the button, then grab the desired object with the mouse and move it to a new location.
The
 button is for drawing.
The
 button is used to create text boxes. To resize the text box and the font with it, click the button, highlight the desired area on the shared screen with your mouse, and type in the text.
The
 button is used to add standard shapes to the image: rectangle, circle, star.
The
 button activates the pointer, which helps to better draw the audience's attention during a presentation.
The
 button is used to select the color of the created shapes and text.
The
 and
and  buttons are used to undo the last action and redo the undone action, respectively.
The
 button is used to delete created objects. To delete an object, simply click on it with the left mouse button (after selecting the tool).
The
 button opens the menu with additional options. Here you can change the orientation of the drawing panel (vertical/horizontal), select brush thickness, delete all drawn objects, and save a screenshot of the window which is being used for content sharing.
To close the drawing panel, click the  button located at the bottom.
Sharing multiple screens
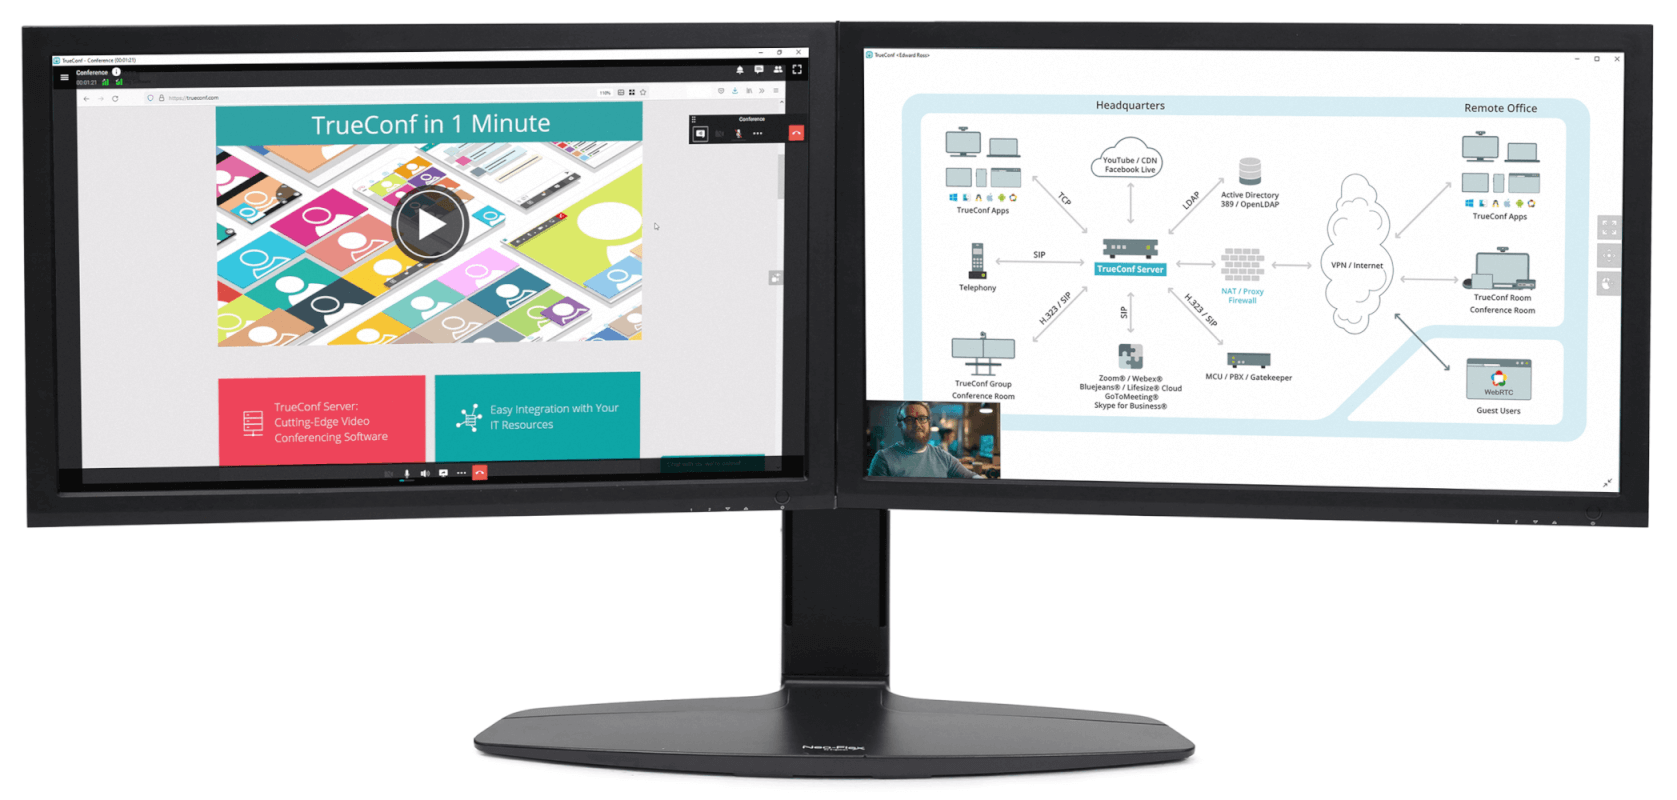
During a meeting, multiple speakers may share their screen or separate application windows. In this case, participants have a useful option to switch between the screens or move the video window to an additional monitor so that they don't miss a single detail.
How to switch between multiple contents and slideshows
If multiple participants simultaneously start content sharing or a slideshow in a separate window, you can select the stream that you want to see. To do it, take the following steps:
In the conference window, click the
Content button that appears at the bottom right (do not confuse it with the content sharing button on the conference control panel):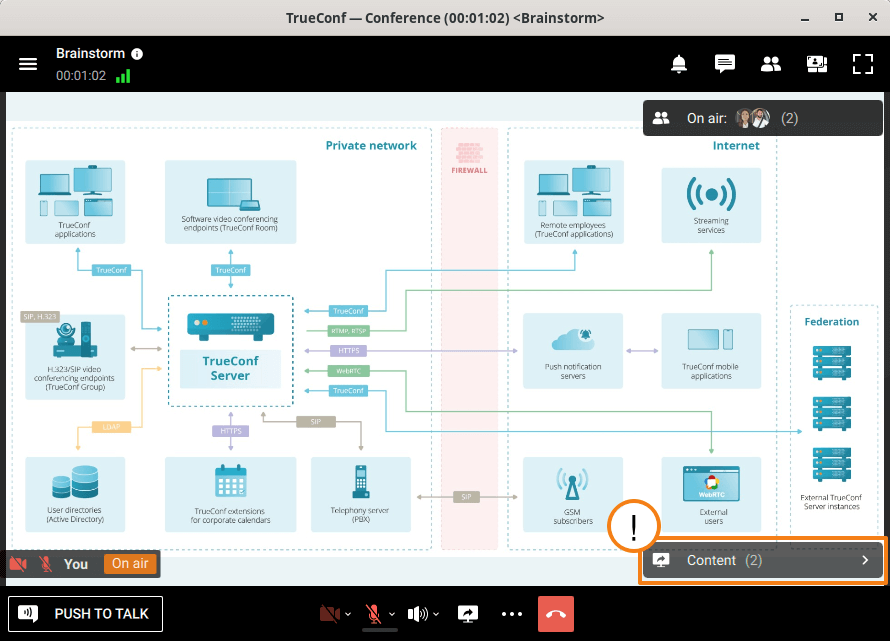
In the context menu, select the name of the user whose content you want to see.
Streaming video files
You can also stream video files during a conference. To do it, take these steps:
The following file formats can be used for streaming: avi, mkv, mp4, and webm. Video and audio streams in the file must be encoded with supported codecs.
Supported video codecs: h264, h265, vp8, h263, h263+, h263++, h261.
Supported audio codecs: pcm, opus, aac, mp3.
Press the
button on the conference control panel.In the menu that appears, navigate to the Video/Sound tab.
On the opened tab, select Video file:
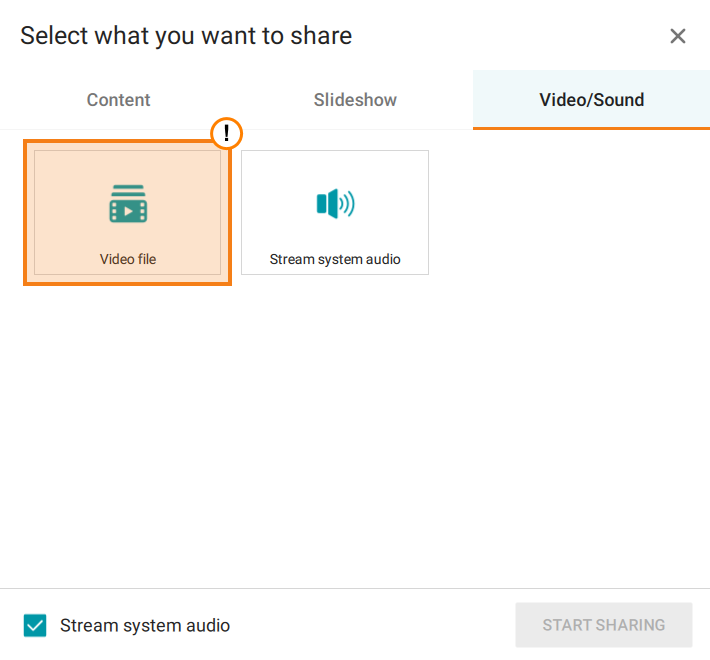
The file explorer will open on your OS; here, you need to select the file that will be streamed.
Then, in block Video file, the name of the uploaded file will be displayed, and a
 button will appear, allowing you to select another file for streaming.
The checkbox Stream system audio will be selected by default. If you disable it, your interlocutors will not hear the audio track of the video file being streamed.
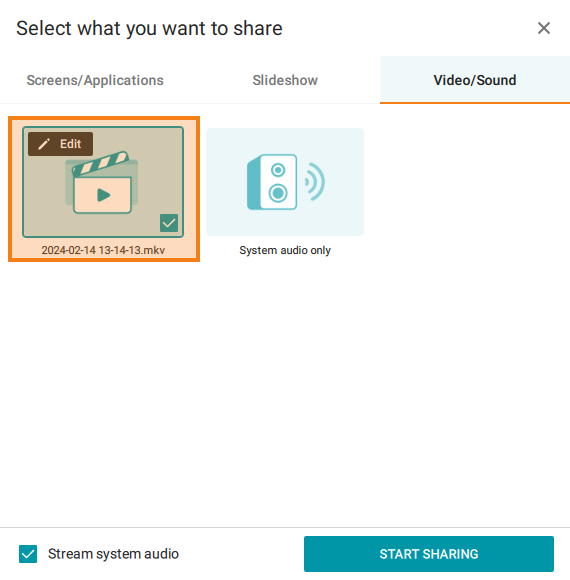
6. Click the Start sharing button.
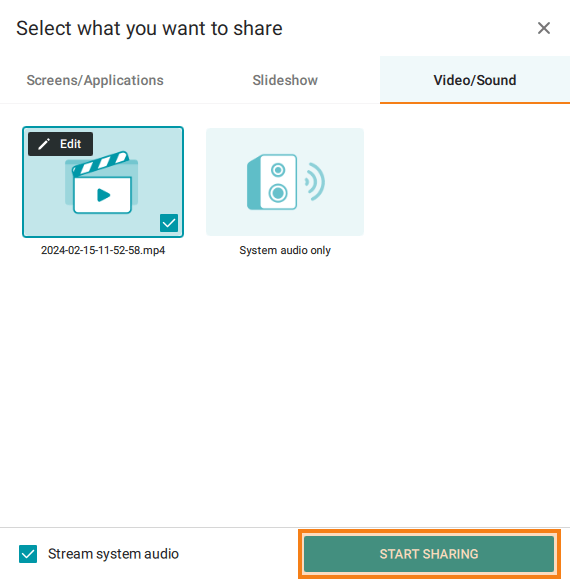
Video file streaming will begin. There will be a separate window for managing this stream. When the video is over, it will be replayed.
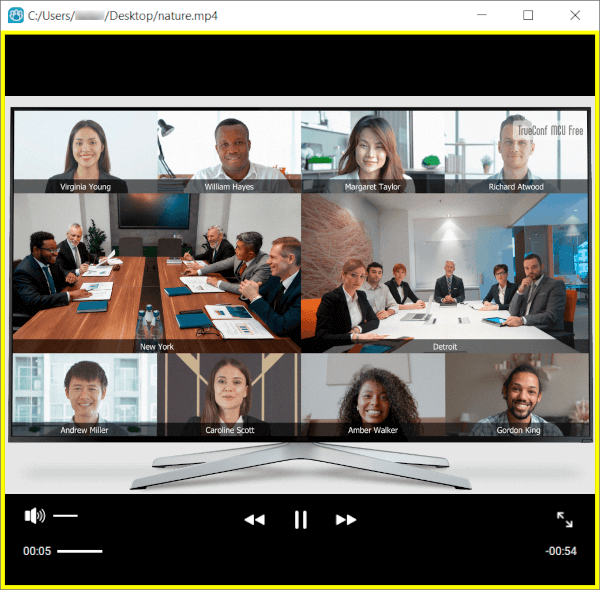
To end streaming, close the stream management window.
You can also start streaming right in your private messages. To do it:
During a conference, go to the chat with the file that you want to stream.
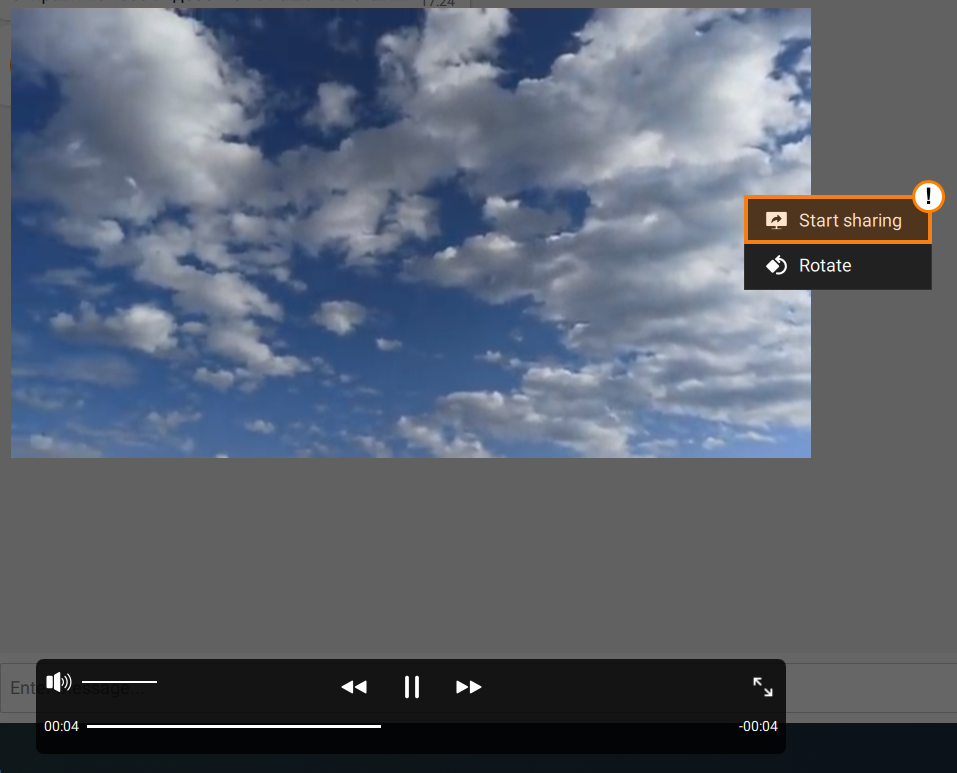
Click on a file to open the video with the built-in media player.
Right-click on the video area and select the Start sharing option from the menu that appears.
Similarly to video files, you can start streaming any conference recording that had been saved previously (go to the Recordings section of the main application menu).
Streaming system audio
You can stream the audio from your operating system without sharing video. For example, you can play a sound track in the media player for your colleagues. To do it:
Press the
button on the conference control panel.In the menu that appears, navigate to the Video/Sound tab.
In the opened tab, select System audio only.
Each of the conference participants will hear all sounds played at the system level, including audio from media players, browsers, etc.