Creating a conference
Creating a conference
To create a meeting in section Conference, click the  button. A window will open with the newly added conference, such as
 Conf_397062486, with settings conveniently divided into tabs. Each tab is described in detail below.

In the settings "header", above the tabs, there are buttons that allow you to:
activate voice activity detection mode;
and other features available during an active conference.
To clone a conference with all its settings, click the  button and select Copy a conference.
Information
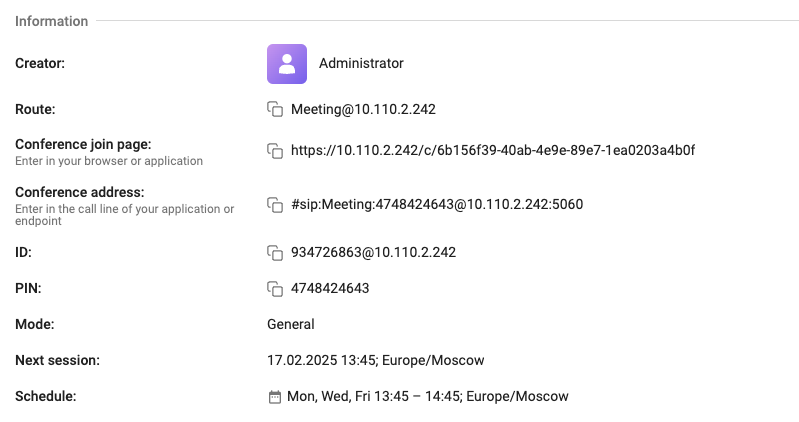
The Info tab contains the main event settings, a list of media files, and participants.
Participants
At the bottom of the Info tab, there is a list of participants.
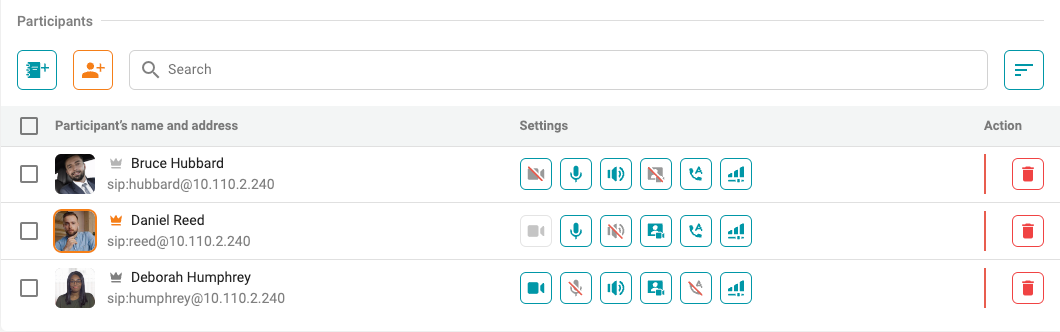
In this section, you can add new participants and configure the equipment before starting the conference. The following actions are available for each added participant:
 and
and  — show/hide participant in an enlarged window.
 and
and  — enable/disable participant's camera.
 and
and  — microphone on/off.
 and
and  — enable/disable speakers.
 and
and  — enable/disable sending video to a participant from the conference.
 — open additional settings where you can:
Set up the video layout for a specific participant;
Move participant to another conference;
Adjust participant volume;
Use DTMF dialing for SIP and H.323 devices;
Open the detailed user menu;
Hide participant's name in the video layout.
To change the sorting order of the participant list, press button  .
.
Adding participants
To add participants from the address book, click the  button.
To connect a user via address, click the  button. A window will open with settings for data transfer protocol, participant's address and signature, equipment (including noise suppression and AGC), as well as configuration for conference cascading mode.
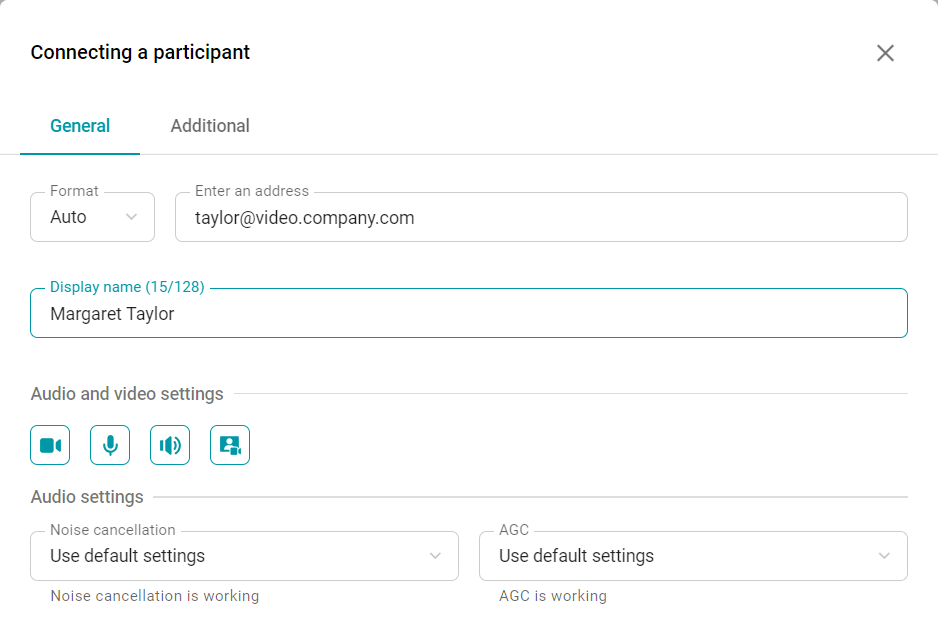
In the Additional tab, the settings described here are available.
Adding participants on the fly
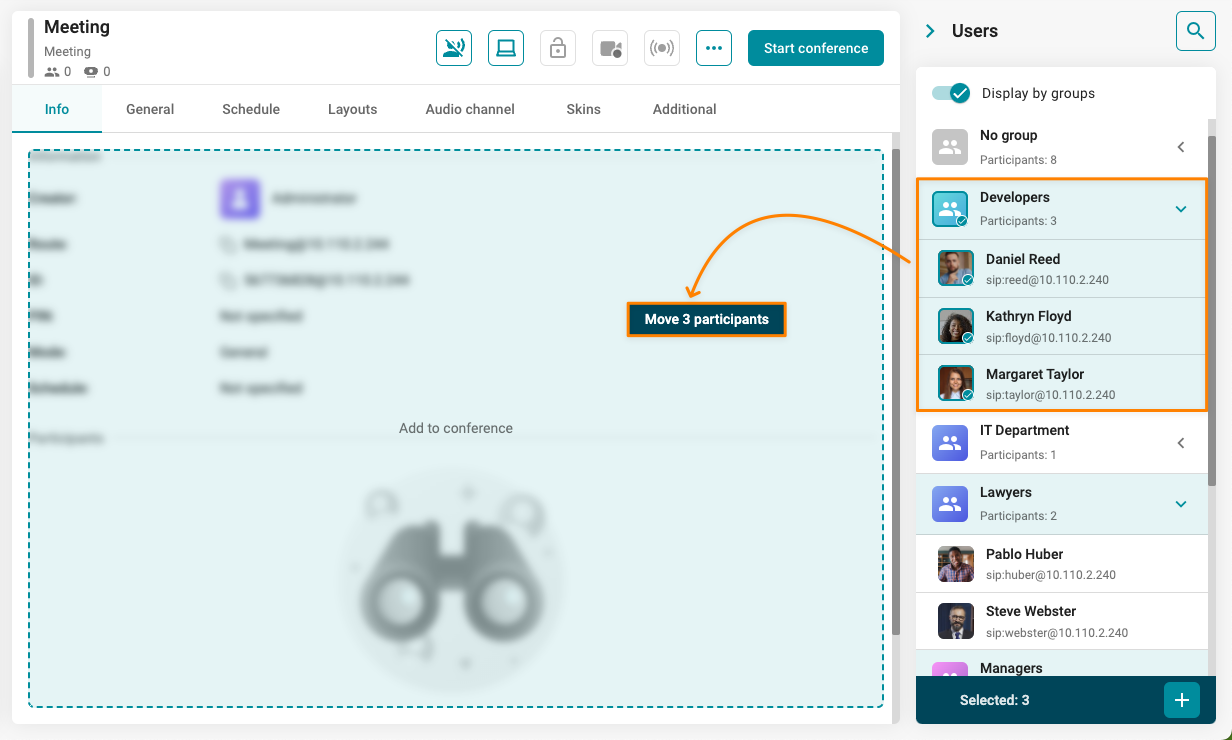
If the user list panel is displayed on the right, quickly add participants by selecting them in the right sidebar menu Users and dragging them with the mouse into the conference settings area:
Main
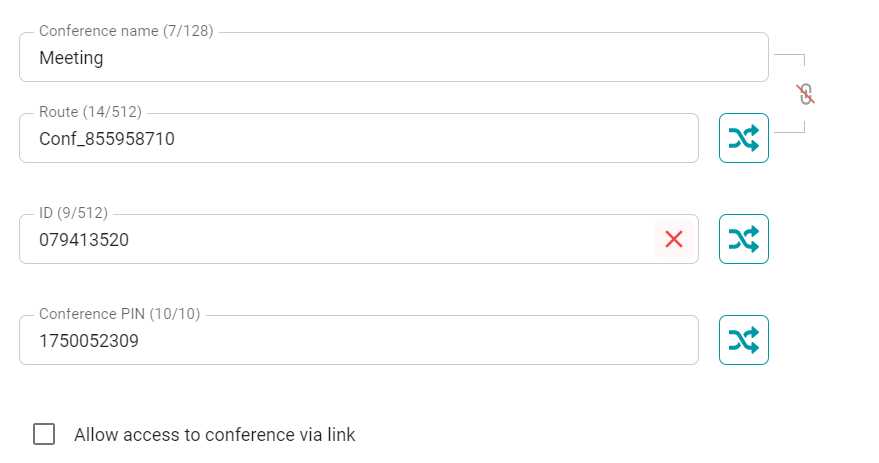
This section includes the settings for the conference name, route, ID, and PIN.
Conference name
The event name, which is also used on the conference connection page, can be changed on the fly during the conference, but will revert to its original value once the conference ends.
Route
Route is a required primary identifier used to access a conference. It can consist of numbers, Latin letters, a hyphen, and an underscore. By using button  , you can choose not to use the conference name as its route. For instance, in the image above, the route would look like this —
 Conf_855958710. To generate a new value, press button  , and to clear the field, use button
  .
.
ID
ID is an additional conference identifier consisting only of digits. It is used for alternative access to the conference and for connecting via DTMF. This identifier is generated automatically when the conference is created, but it is not mandatory. You can delete it as described above.
PIN
An additional way to protect a conference from unwanted entry is to use a PIN, which consists only of numbers. It can be changed on the fly during the conference, but the original value will be restored after it ends.
Conference connection page
To connect participants using the TrueConf client application, you can enable and share a link to the conference connection page. To do this, check the Allow access to conference via link box. For more details about the connection page, refer to the relevant section.
Conference modes
Select the conference mode:
General
Lecture
Speaker.
Descriptions of the listed modes are available in this section.
Settings for conference participants
In this section, you can specify the settings for the users added to the conference. By default, these settings are as follows:
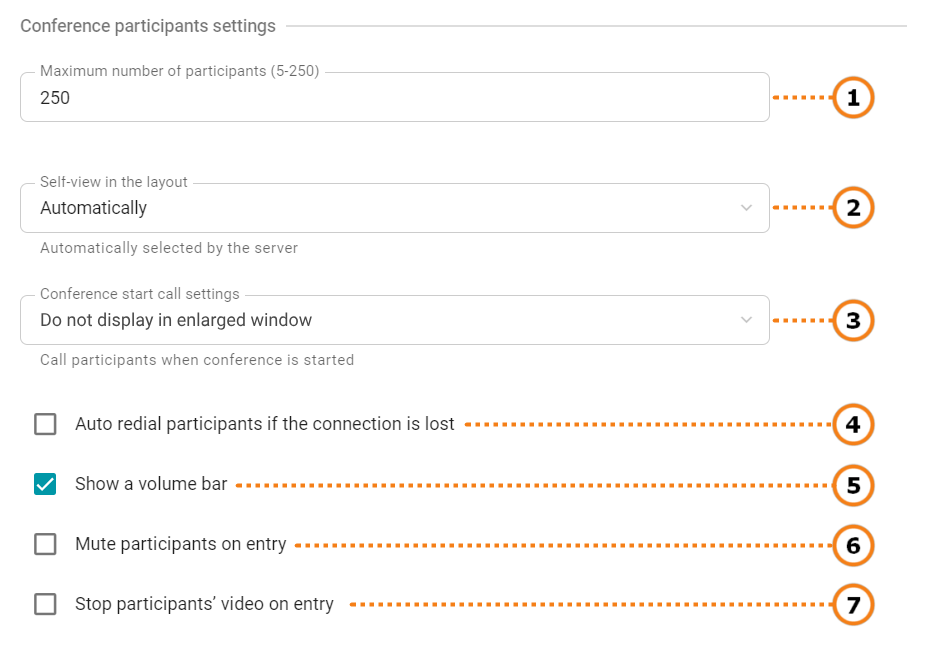
You can adjust each of these parameters:
Select the maximum number of participants.
Select the settings for displaying participants' self-views in the layout:
- Automatically;
- Display;
- Do not display in enlarged window (enabled by default). The speaker will not see themselves in the priority window;
- Don't display for all.
Configure participant call at the start of the conference:
- Call participants when conference is started;
- Don’t call participants when conference is started;
Check the box to allow the server to attempt to reconnect with any conference participant in case of an accidental disconnection. If the video conferencing server operator manually disconnects a participant from the conference via the web interface, auto-redial will be disabled until the next session.
Configure the display of the audio level indicator in the video windows (enabled by default).
Check the box to have conference participants join with their microphones muted.
Check the box to have participants join the conference with their cameras turned off.
Schedule
Conference duration
To set the duration of the conference, select the desired value from the dropdown list Duration.
If no schedule is set for the conference, it will be turned into a virtual room by default.
Automatic сonference ending
In this section, you can configure the rules for automatically ending the current conference. These settings are similar to those available in the Administration section.
Adding a schedule
Click the Add button to make the conference recurring.
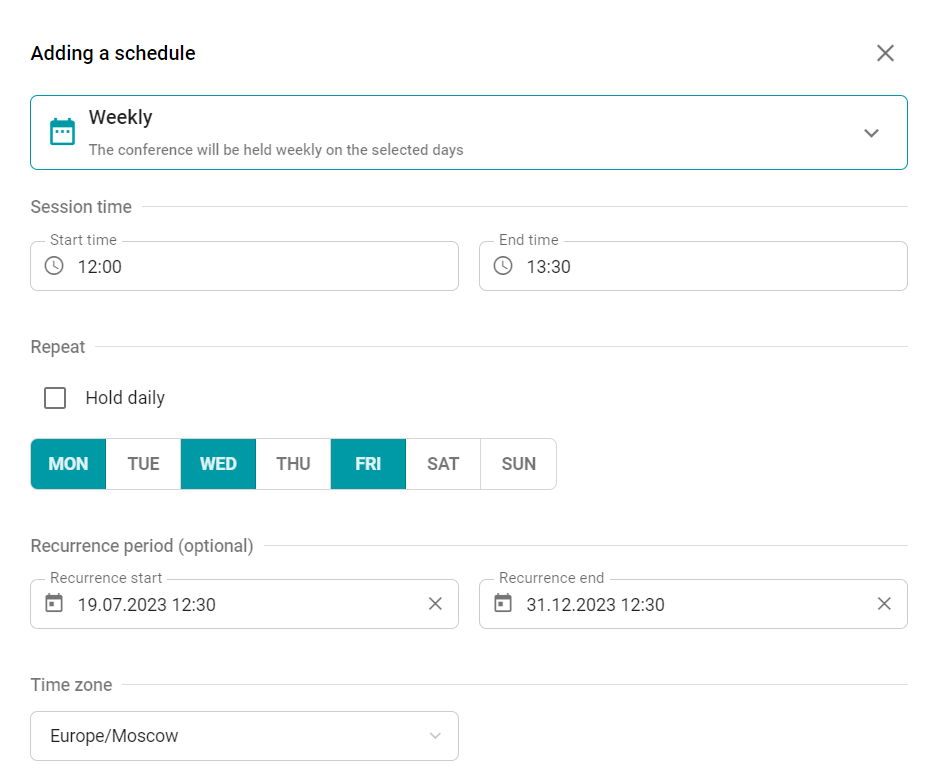
Select the repetition mode in the pop-up window. Depending on the selected mode, various settings will be available:
- Do not repeat - specifying the date and time of the event;
- Weekly - specifying the time and day(s) of the week for recurring conferences;
- Monthly - specifying repetitions on specific days of the month.
Below you can find the example of a weekly conference repeated on certain days (meeting duration and validity period of the schedule are also included).
[send conference invitations]{1};
To send an invitation to the event, you need to:
Configure the SMTP gateway.
Ensure that the invited participants have an email address added to their profile.
Add a schedule to the conference.
After that, the  button in the conference control panel will become active, allowing you to send an invitation.
Layouts
The video layouts in TrueConf MCU are divided into the following categories:
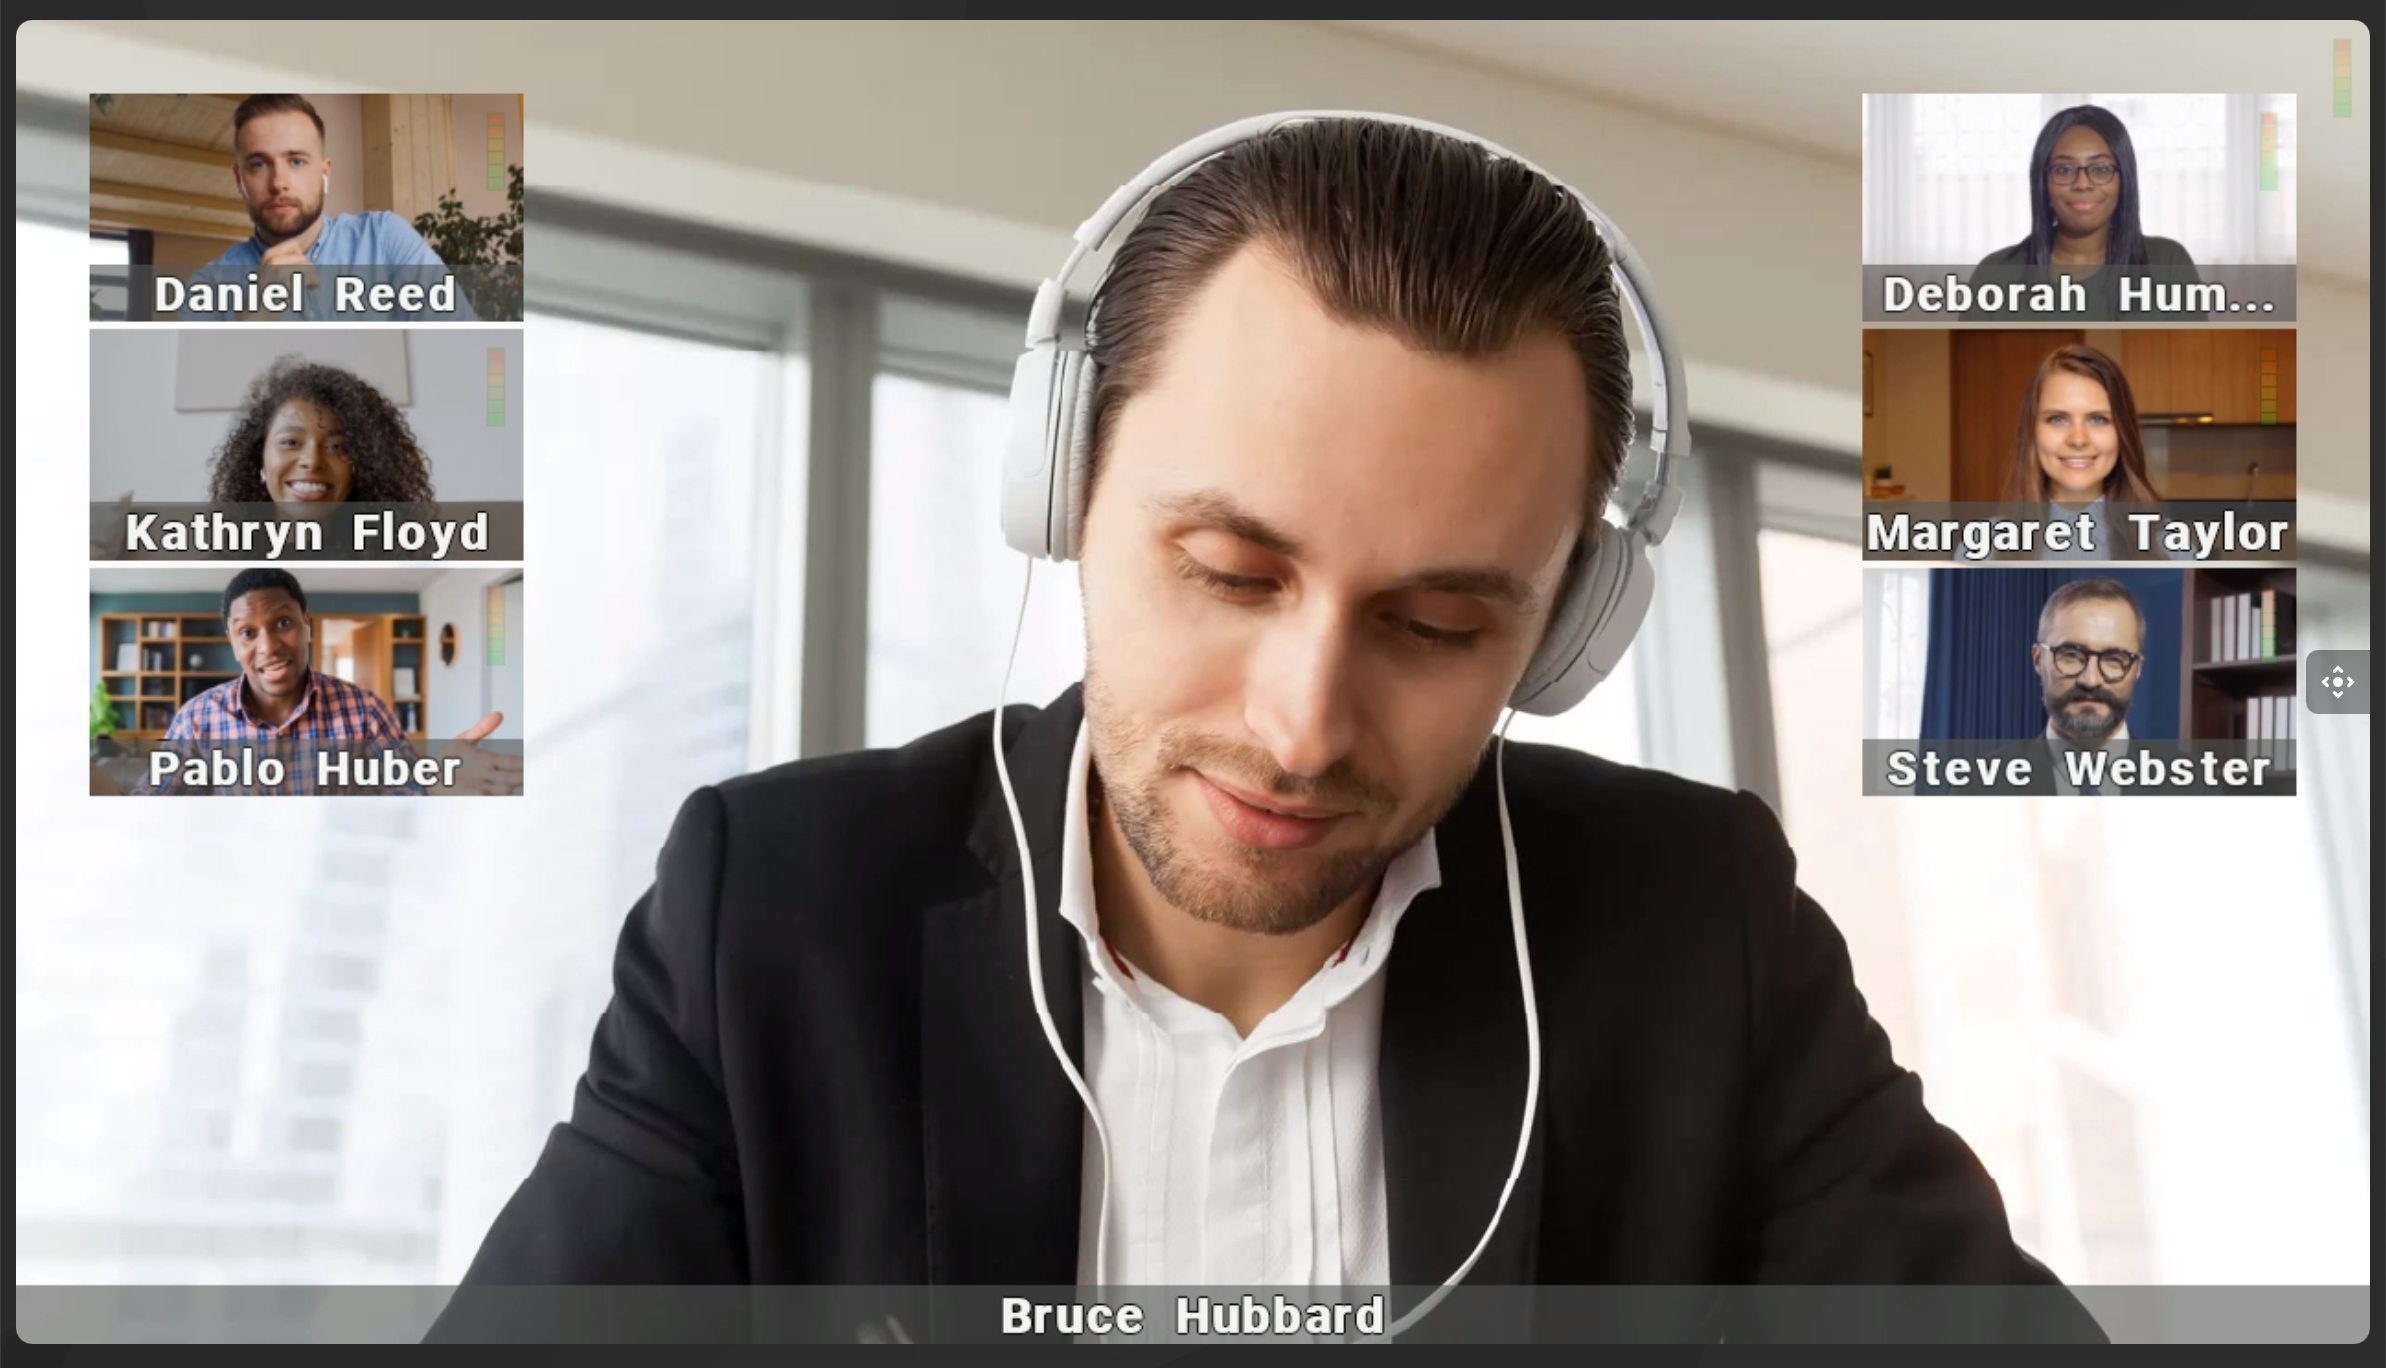
1. Automatic configuration. Selected by default. Provides the best display in the conference participant video layout. The arrangement of participants in the layout is determined by their voice activity. The number of slots in the layout ranges from 1 to 13; the remaining participants are off-screen:
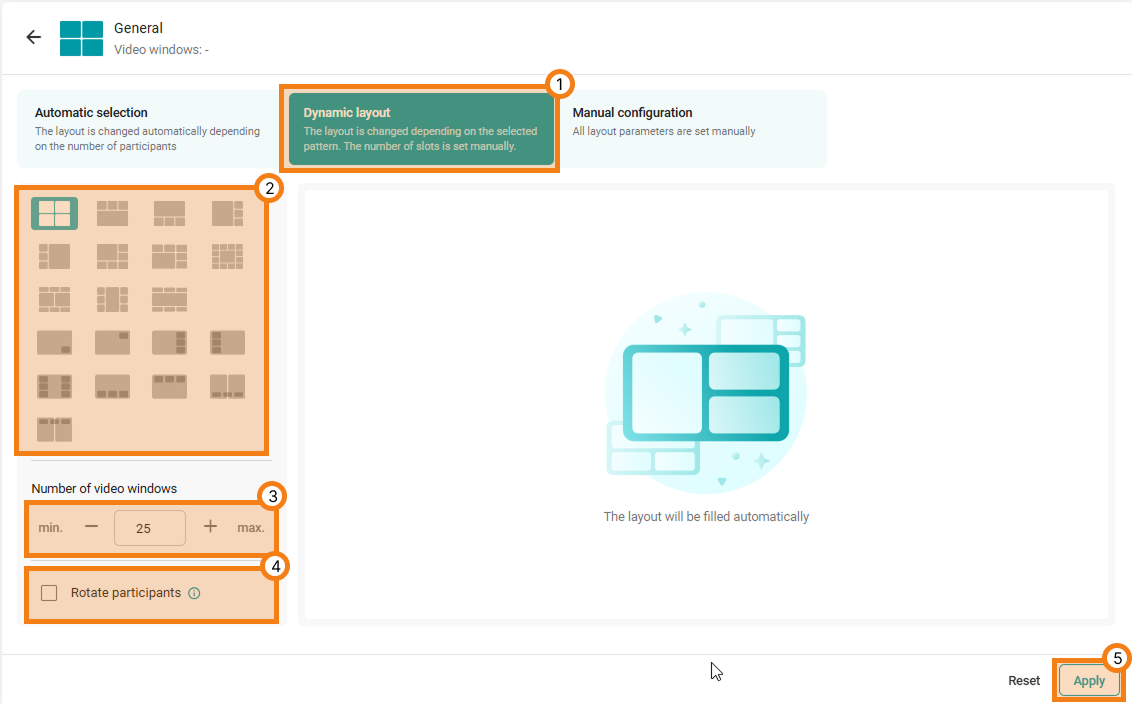
Dynamic video layout. It works with any number of video windows but displays no more than 250. This layout populates automatically. You can also set up automatic participant rotation if there are more participants than slots in the layout. In this layout, participant windows can be positioned over another video window.
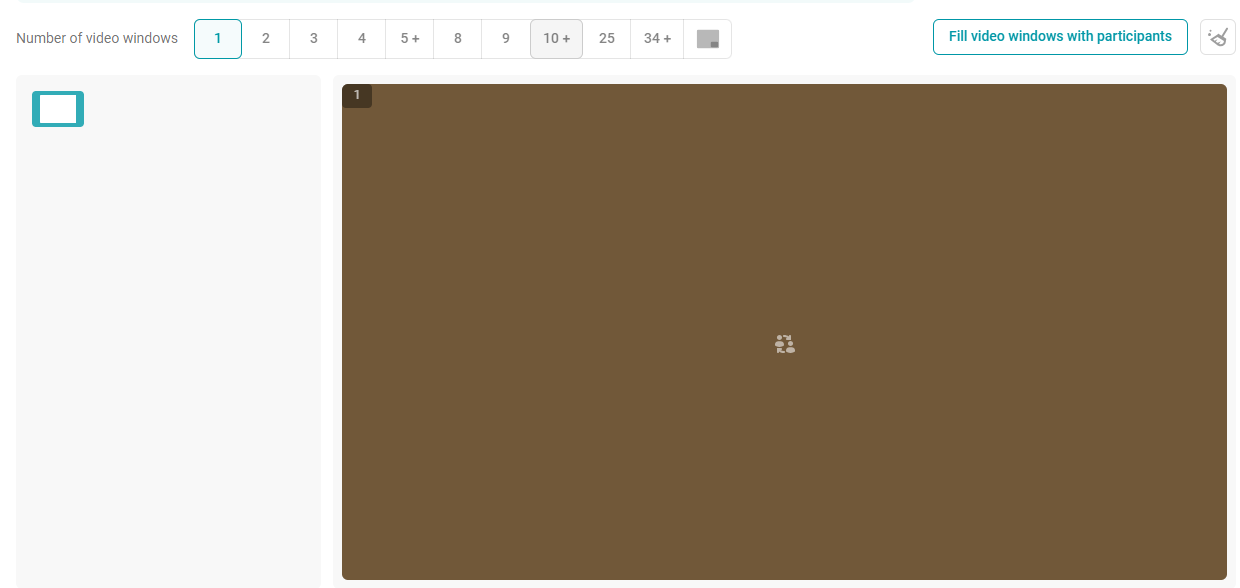
Manual setup. A flexible layout template builder where you can select the desired number of video windows, choose the slot arrangement, pin a specific person in a particular spot, pin a media file, or set up user rotation.
Layout settings
Video layout configuration is available only for SIP and H.323 connections.
You can set video layouts both when creating a conference and during the event. By default, a layout named General is created. This layout is assigned to all participants who do not have their individual layouts. For example, a subscriber who joins the conference using an ID will receive the global layout.
To edit the video layout, select it from the list:
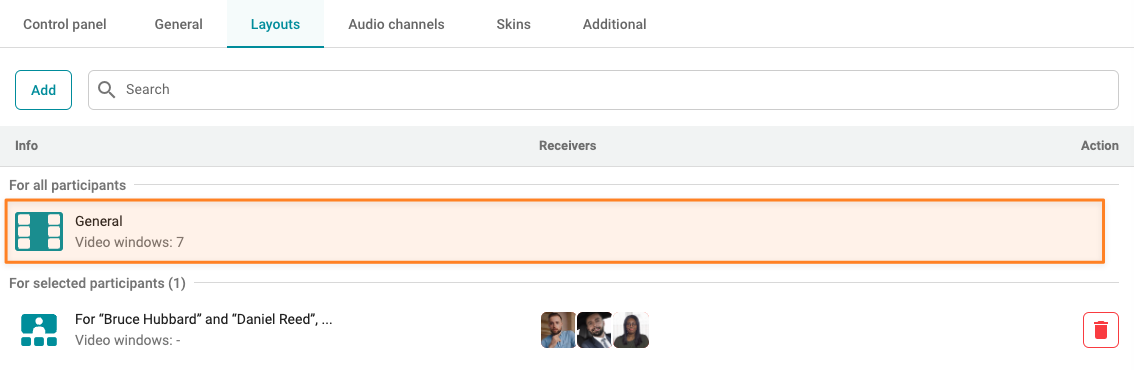
Click the Add button to create a custom video layout for one or more participants. A window with the list of conference participants will appear:
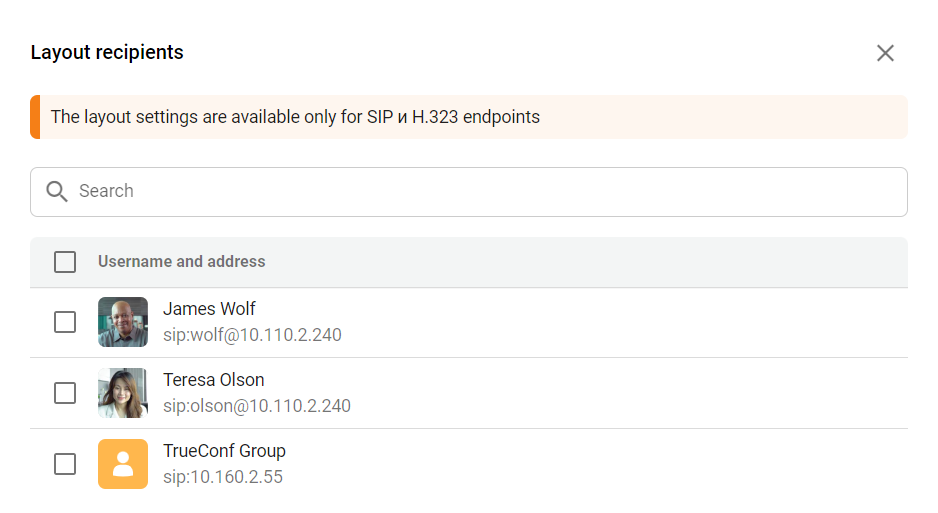
Select the users for whom you are setting up the video layout, and click the Next button to enter the layout editing mode.
Editing a video layout
In editing mode, the main video layout settings are available. By default, Automatic layout is selected with smart window distribution mode.
You can change the layout template name (1) and adjust the video layout by selecting a different mode (2).
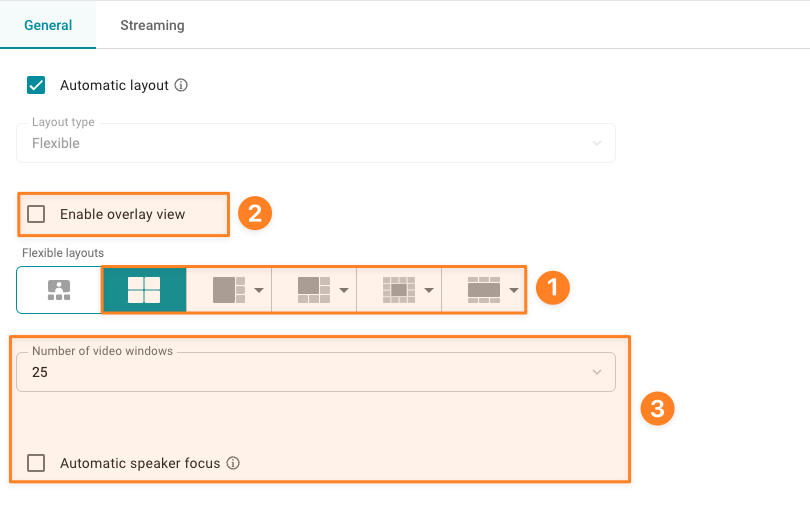
When you select any video layout other than the automatic one, the layout editor will be available to you.
Configuring dynamic video layout
When configuring dynamic video layout, you can select a layout design where layouts with a solid background and windows on top are overlay mode layouts.
Manual configuration
You can flexibly adjust the video layout according to the number of video windows using manual settings.
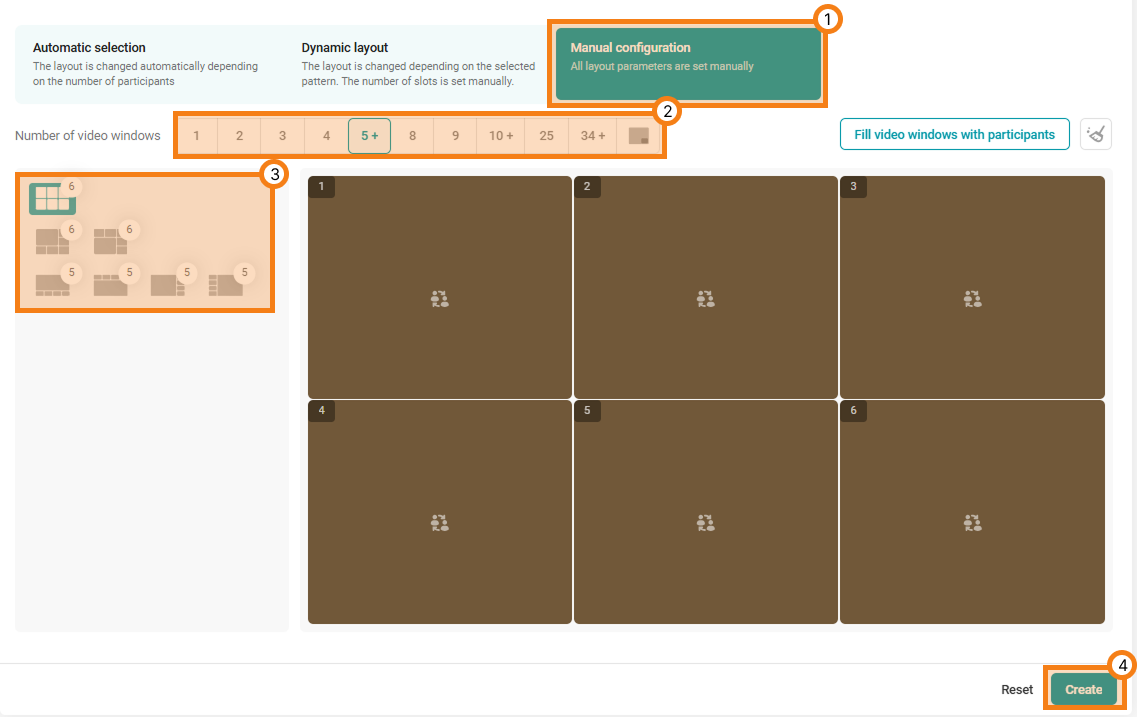
You can also save the layout template for future use by clicking Save. Layouts saved this way will be highlighted with color and a border in the  builder interface. The currently applied layout is highlighted in green
  .
.
In video layout templates
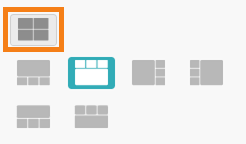
In selecting the number of video windows

Video Slot Settings Menu
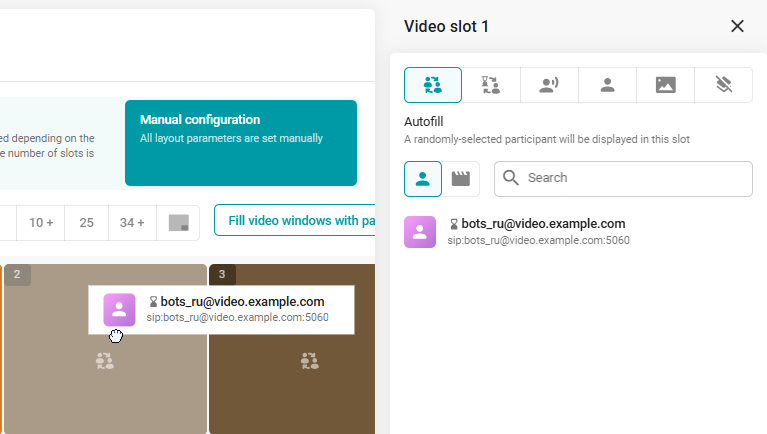
You can open the video slot settings menu by right-clicking on the video slot within the manual layout settings.

Additionally, by clicking on a video slot, the video slots settings menu will open, where you can:
 - enable automatic filling of the video slot with an active participant;
 - enable participant rotation within the video slot;
 - assign a slot for the active speaker;
 - pin a participant to a video slot;
 - Pin content to the video slot; if there is no content in this video slot, a placeholder will be displayed.
 - leave the slot empty.
You can also pin a participant or content using drag-and-drop. Simply hold the cursor on the desired participant or content window and drag it to the video slot.
Audio channels
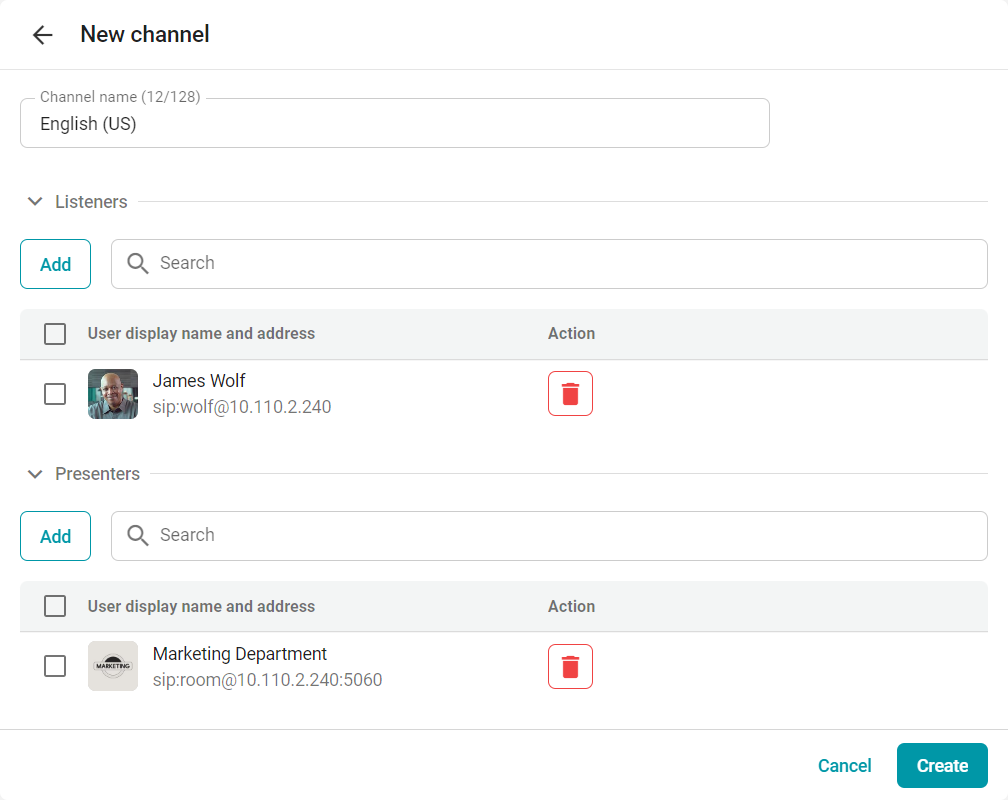
In TrueConf MCU, you can separate video conference participants into audio streams, assigning them roles as speakers or listeners within each stream. This option significantly simplifies organizing events that require simultaneous interpretation into multiple languages.
To create a new channel, click the Add button. In the window that opens:
Enter the channel name.
Add attendees and speakers.
Click the Create button.
Design
By default, all conferences use the theme set in Administration → Skin styles. To apply a different theme for all video layouts in this conference, check the box Enable custom settings and customize it to your liking. For more details on styling, refer to the Personalization section.
Additional
In the Additional section, you can configure recording and video/audio transmission settings for the current conference:
Enable/disable noise suppression and AGC
Select audio and video codecs to be used
Set the resolution, bitrate, and scaling mode
Specify settings for using participants' avatars in the video layout.
By default, values from the global calls and video settings are used.
Disabling certain codecs may resolve compatibility issues with some SIP devices. You can learn more about this from our technical support service.
Recording of the conference and presentation
To optimize conference recording, you can select the quality:
Highest
Optimal
Minimum size.
In this case, the maximum recording duration will be calculated based on the available free space in the video storage:

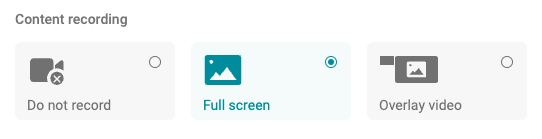
To configure presentation (secondary stream) recording or disable it, select the corresponding option in the settings (by default, the presentation will be recorded in full-screen mode):