Managing an Active Conference
Managing an Active Conference
In section Conferences, the left side of the window displays a list of active events. When you select one of the ongoing conferences, a management panel for it appears.
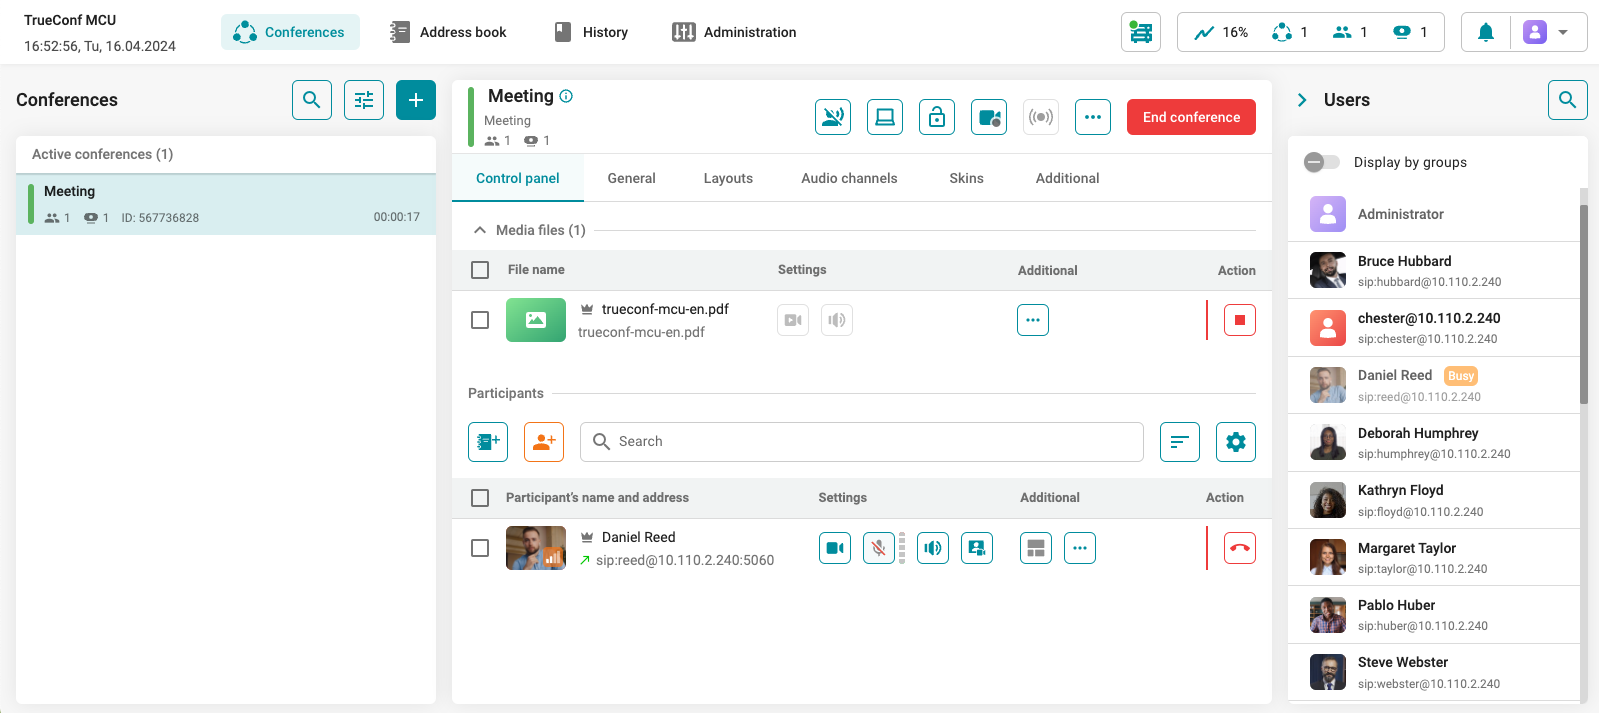
The UI and features on the page of an ongoing conference are almost identical to the settings available when a conference is created (except for the features listed below).
When an ongoing conference is selected, some options will become available above the tabs in the settings “header”:

 — disable/enable joining the conference. The administrator can manually add new participants.
 — start conference recording;
 — starting conference streaming.
Control Panel
Monitoring and management of an active conference are performed on the Control panel tab.
Participants
The functionality of this section is detailed in the Creating a Conference section. Here, we will focus on the features available only during an active conference.
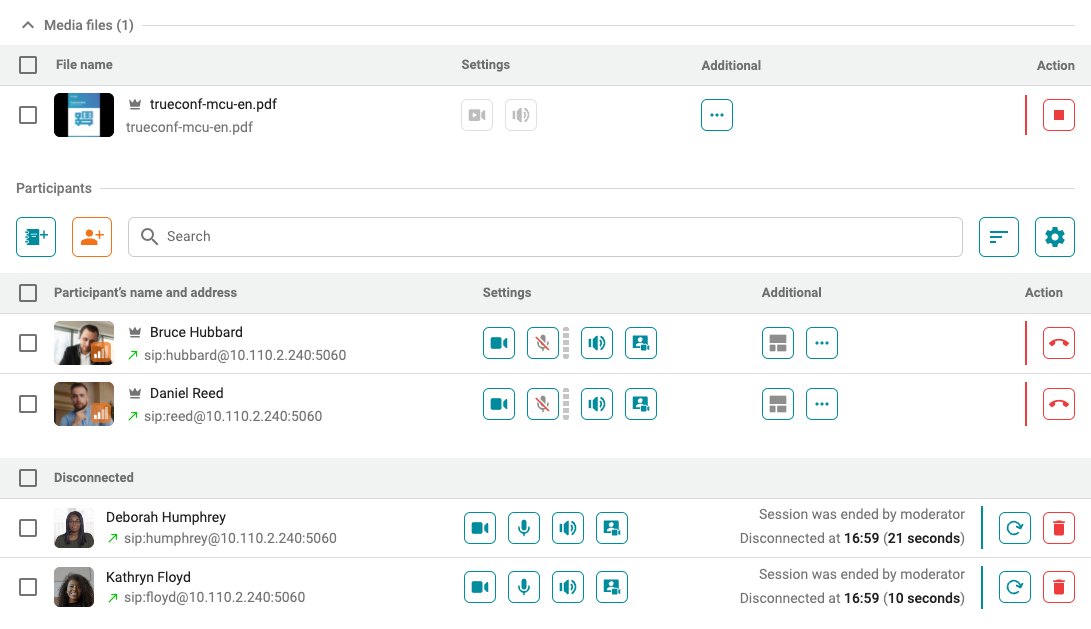
The participant list is divided into several sections: media files, active conference participants, and not connected. Depending on the selected mode, buttons for crown, speaker, or an icon for active speaker will appear next to the user's name.
By clicking on the name of an active participant, you will access information about their connection. Using the buttons from the list below, you can perform certain actions on conference participants:
 — configure a custom video layout for this participant;
 — re-invite the user to the conference;
 — configure the display of additional information on the active conference screen:
Audio and video codecs
Video stream bitrate
Users’ avatars and their video previews
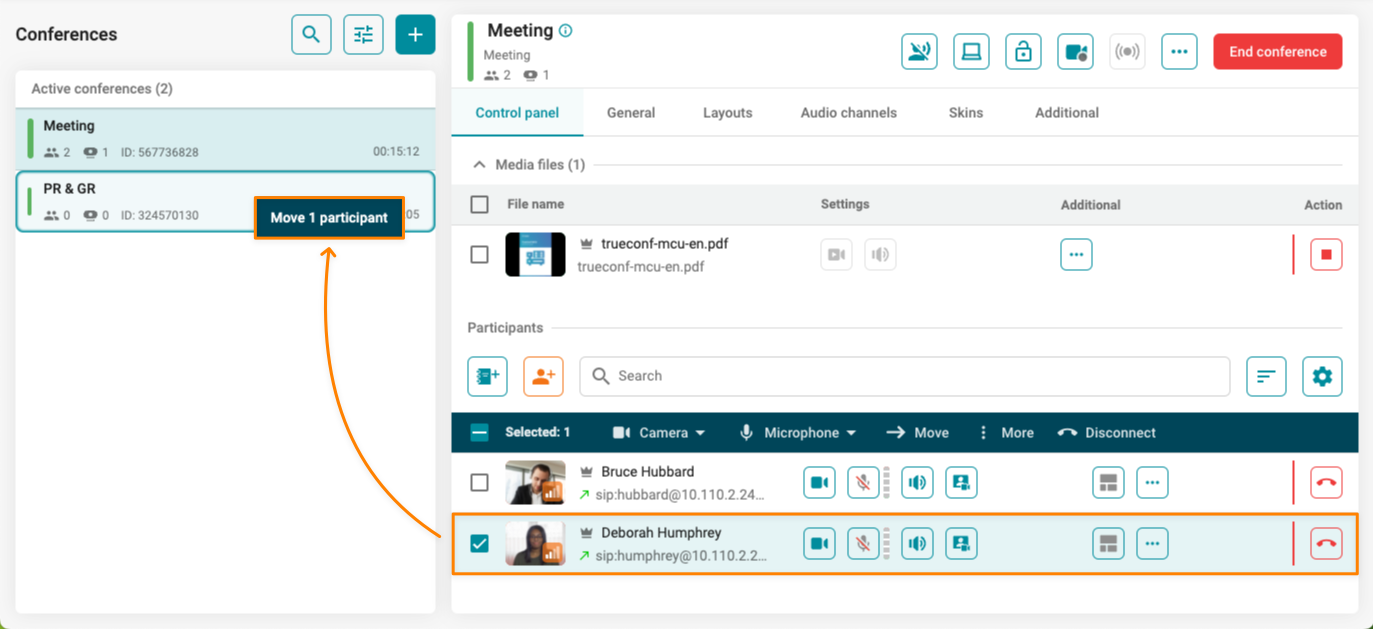
 — additional features:
- Move participant — moving a participant to another active conference. Additionally, transfers can be done manually by dragging and dropping the desired participants with the mouse.
- Volume control — adjusting the participant's sound volume and microphone sensitivity.
- Tone dialing (DTMF) - sending a tone signal (DTMF command) to the participant's device. Additionally, you can view the camera feed of the selected participant in this window.
- Call details — display of the window with connection information.
If a participant added to the conference is not listed in the address book, you can add them by clicking the  button next to their name.

When participants either leave the meeting or are removed by the administrator, a corresponding status will be displayed next to their name:

If a conference participant shares content, you will see the video stream info and the forced stop presentation icon under the participant’s name.

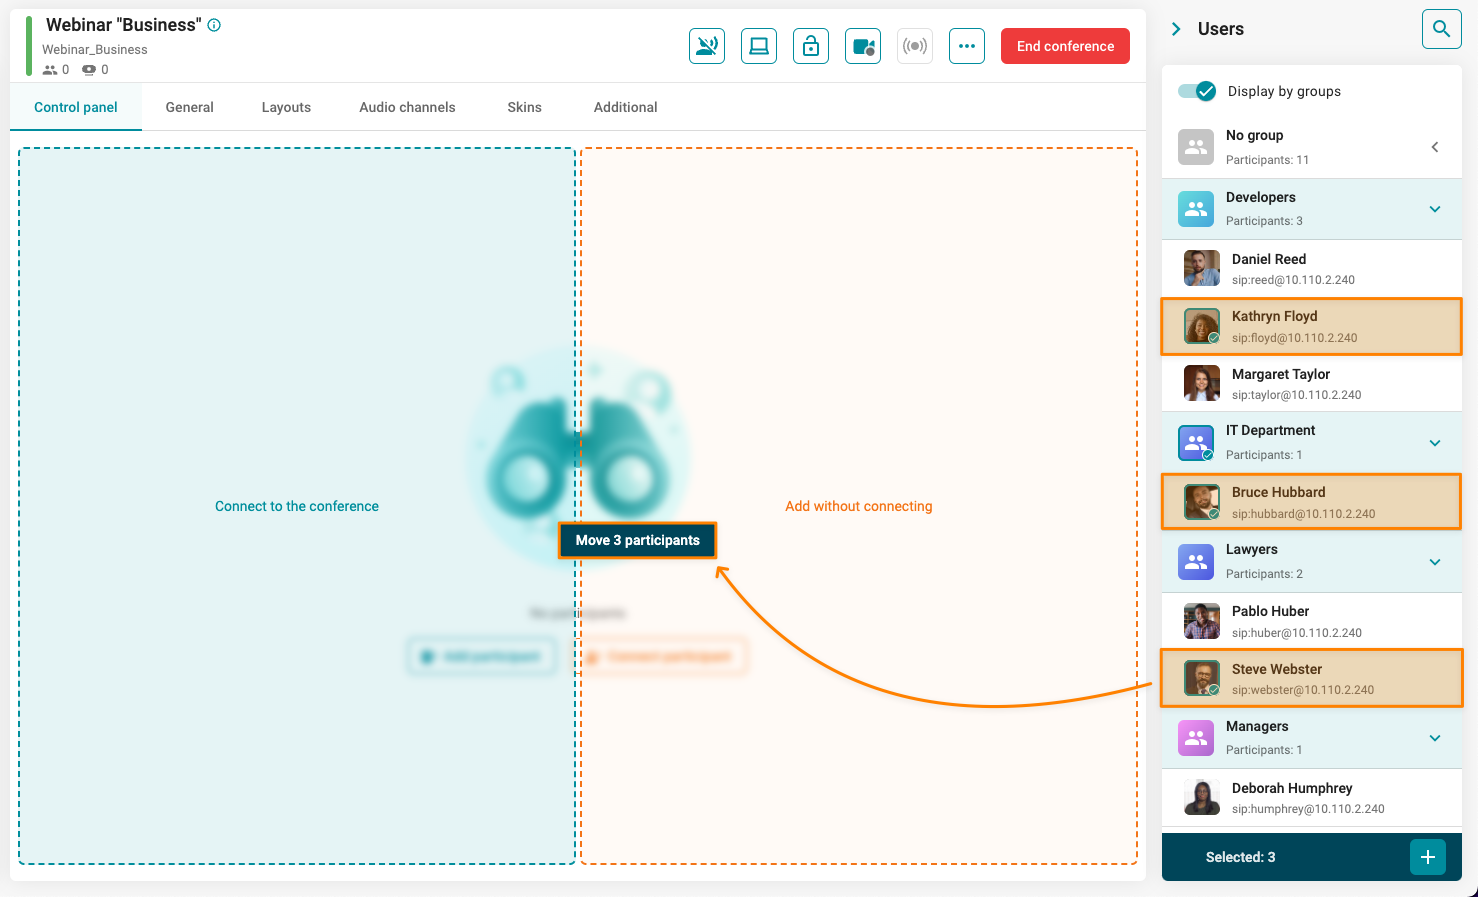
Adding participants via drag-and-drop
To add a participant to an ongoing conference, you can drag the selected user from the list. Two options are available:
- Connect to the conference.
- Add without connecting.
Reinvite participant with different parameters
You can redial a participant by selectively setting different parameters: protocol, address, audio/video settings, codec list, activation of cascading, etc.
To do this, simply click on the user's name in the list of participants who have not connected, adjust the necessary parameters in the window that appears, and click the Connect button.
Connection Information
When selecting any participant connected to an active conference, you will see the connection info.
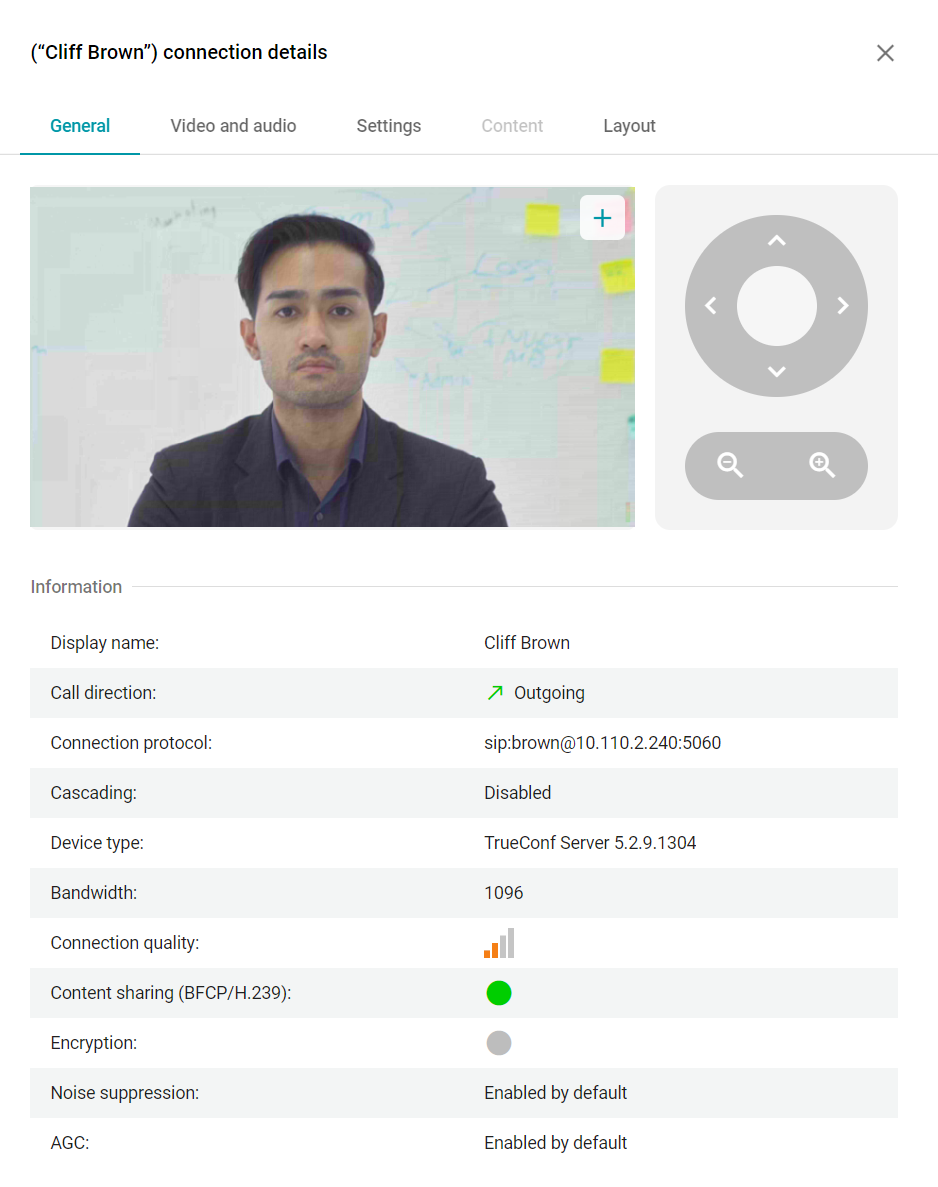
The General tab contains:
participant's video stream preview
remote camera control tools (available for compatible PTZ cameras)
device information
On the Video and audio tab, you can view information about the audio and video codecs in use.
The Settings tab allows the conference operator to:
Change participant's display name
Enable/disable the speakers and microphone and adjust their volume and sensitivity
Enable/disable automatic gain control (AGC).
The Content tab is used to preview the participant's broadcasted content.
The Layout tab contains a preview window of the video layout received by the conference participant.
Content Sharing
During a conference you can share media content:
images — .png, .jpg, .jpeg
documents — .pdf
video files — .mkv, .mp4.
To add media files in the conference control window, click the  button. In the window that appears, select the stream in which you want to broadcast the content:
primary — you can select multiple files which will be displayed in the common video layout
secondary — only one file is available for streaming and it will be displayed in a separate window.
By default, looping is enabled for video file playback. You can disable it using the  button next to the file name.
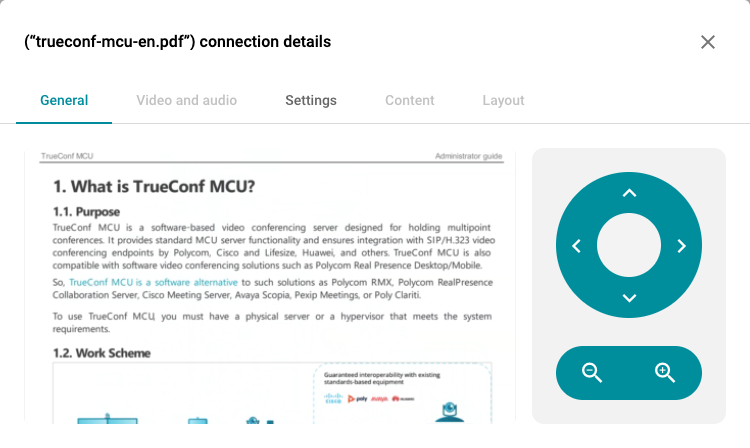
Capabilities during a broadcast
During the presentation of images and documents, you can switch to the connection information window to zoom in, select the broadcast area, and turn pages using the PTZ camera control buttons:
When playing a video file, you can disable its video and audio stream:

To adjust the video volume, go to the connection information window on the Settings tab.
When video file streaming is stopped, you can change some of the settings, for example, before the file is re-used:

If necessary, you can move the streaming file to another active conference. To do this, click on the desired file's line and select Move file.
Scheduled Broadcast
You can add the necessary files to the conference during the planning stage, before the event starts. This functionality allows you to play a file at the beginning of the conference, such as a placeholder video, while speakers prepare for their presentations.
You can configure playback at startup using the  and
and  buttons. This can be done either when adding a file or at any time during the conference setup in the control panel.

Sending a message
The administrator and operator can send a message during an active conference. To do this, click the button and select Send a message to conference chat. A window will open for you to enter the message:
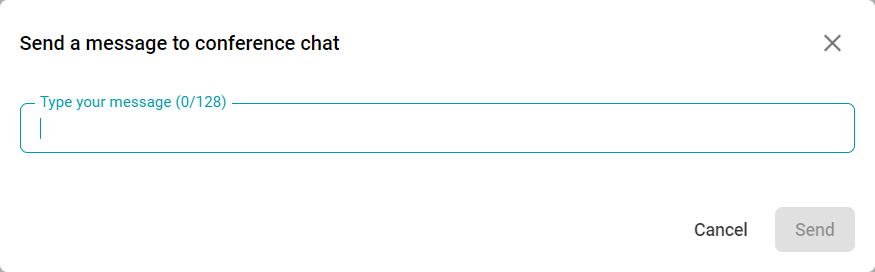
Enter your message and press the Send button.