
Address Book
Address Book
In section Address book, you can add new users, edit existing ones, and create user groups.
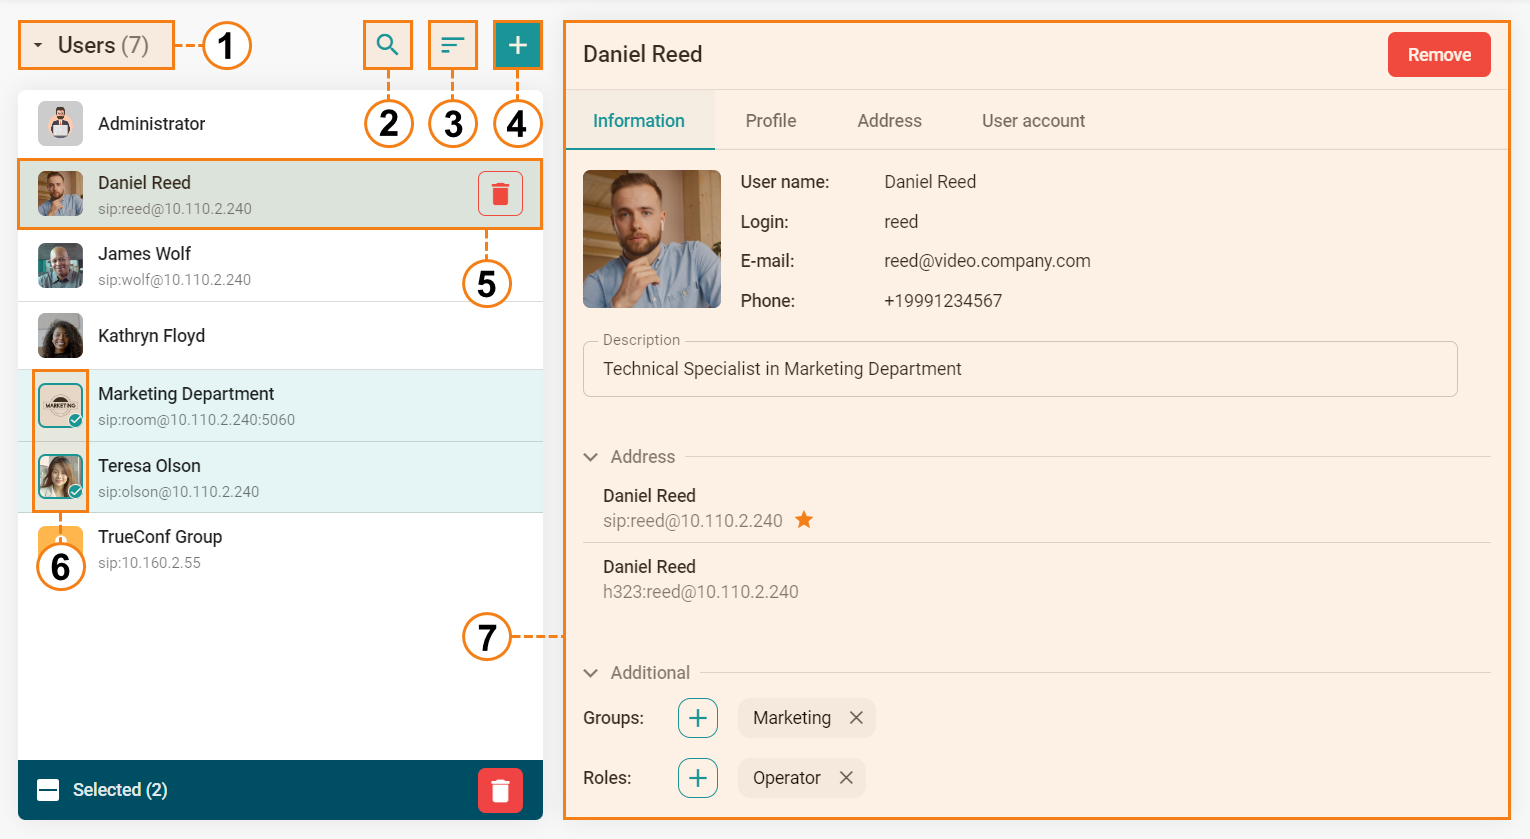
Select how the list should be displayed: by users or by groups.
Search for contacts in the address book.
Sort the list (from A to Z) or (from Z to A).
Create a new user or group (when the list is displayed by groups).
User contact that includes:
display name;
call string;
delete button.
Selection of multiple users for deletion.
The selected contact's card contains information divided into tabs: Information, Profile, Address, Account.
You can also select multiple users and delete them in bulk.
You cannot remove users who are currently participating in a conference from your address book.
Creating a contact and group
To add a new contact to the address book, click  , enter the display name, and click Save. The contact card will open on the Profile tab.
To create a group, you need to switch to the group display and repeat the steps described above. After that, an empty group card will open where you can add users, edit the group name, or delete the group (without deleting its participants).
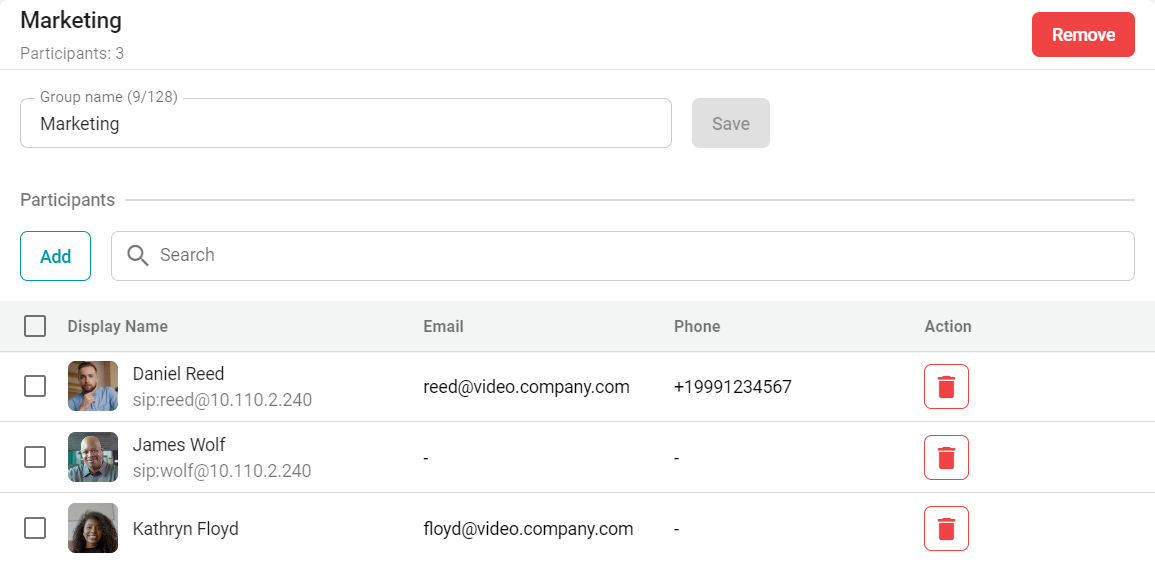
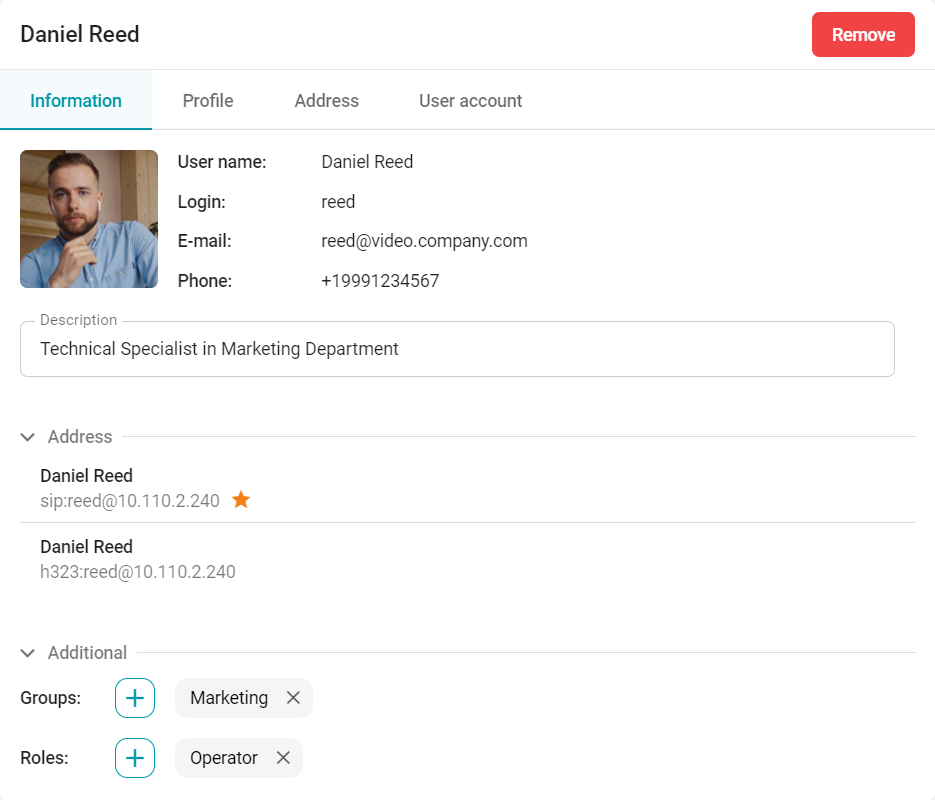
Contact card
Information
Here you can:
View information added in other tabs (display name, login, email, phone, addresses)
Upload a user avatar
Add a contact description
pin the user's address in the contact list using
 ;
;Add the contact to groups and assign the necessary roles.
Profile
In this tab, you can specify:
Display name
Email where invitations to a scheduled conference will be sent
Phone number
UI language of the control panel (this option is relevant if the user is assigned the role of operator or administrator who can access the control panel).
This data is displayed in the contact card on the Information tab.
Address
Here, you can assign multiple addresses with different protocols (SIP, H.323, RTSP, VNC) to a contact. To do it:
Click the Add button.
Select the type of protocol that will be used for connection.
Enter the route address.
Click the Save button.
If necessary, specify Display name, which is the name displayed during the conference. If not specified, the user's name will be shown in the conference.
Additional
On the Additional tab, you can select audio and video codecs, configure resolution and bitrate limits for the outbound video stream, and check the Cascading option.
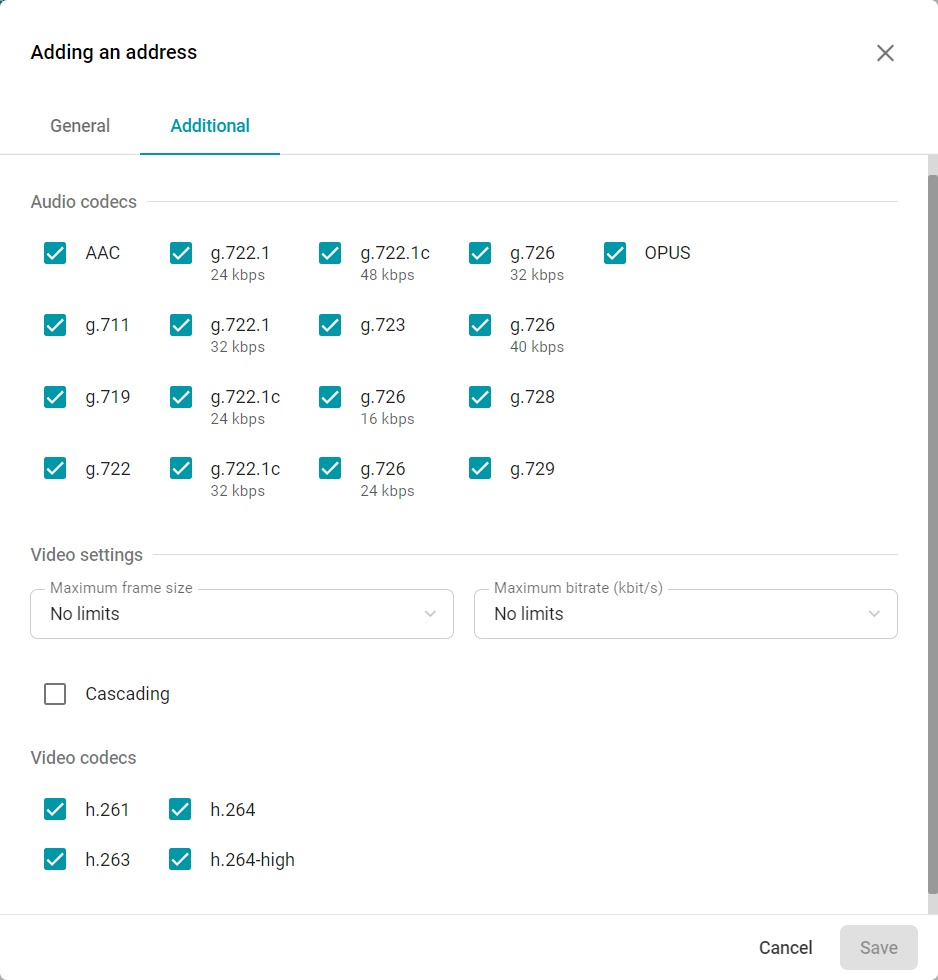
For participants with cascading enabled, their own video (self-view) will be automatically removed from the video layout. This feature is useful if the user is in a conference on another instance of TrueConf MCU or on TrueConf Server
You can specify multiple addresses for a single contact:
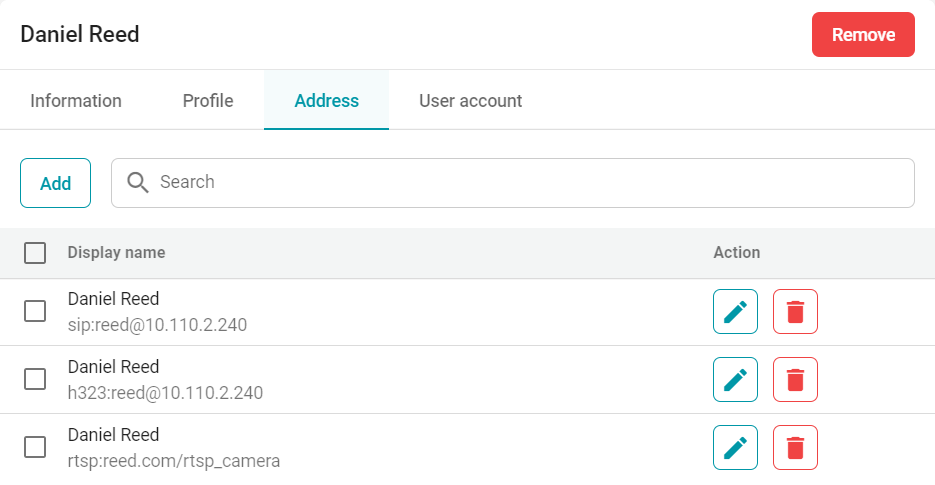
When multiple protocols are specified, TrueConf MCU will sequentially make calls according to the priority set in the server settings under Administration → Calls → Protocol priority.
To add the video conference TrueConf as a participant, use one of the SIP/H.323 protocols, but instead of a username, enter the string 00<Conference_ID>, where <Conference_ID> is the conference ID.
For example, 00639499375243@video.company.com
Account
You can assign a user a login and password to access the control panel for server administration or conducting conferences. Once the settings are saved, the contact will automatically be assigned the role of Operator.
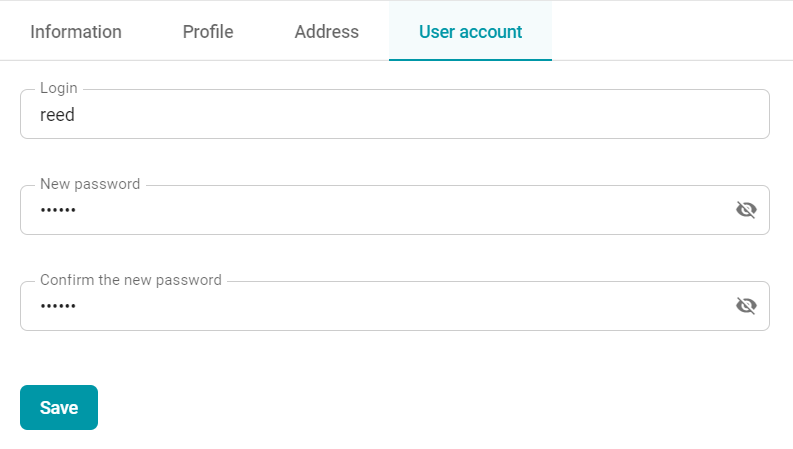
Here, you can also modify authorization data.