# Access to the control panel and setting preferences
Here are the minimum steps needed to set up a working corporate communication system:
Select a machine (PC, physical or virtual server) with suitable hardware.
Access the control panel. ◀️ You are here!
Configure HTTPS (it is used for many key features such as integration with the AI server, conference scheduling, etc.) and specify the external server address (the address of the guest page).
Configure access to the server for users within the corporate network and, if necessary, from an external network (outside the corporate network).
Create user accounts or integrate the server with a directory service via the LDAP/LDAPS protocol.
Install client applications for users and show them how to connect to your server (check the documentation for the desktop application).
# How to access the control panel (admin panel)
You won't be able to access the control panel if you install TrueConf Server on Windows Home (check system requirements)! You need versions of Windows that support user group management (Server / Pro / Enterprise). Additionally, regardless of the OS (Windows or Linux), the user account you are trying to authenticate with, must have a password.
If you have installed TrueConf Server on Windows:
Open your browser and go to the IP address of the machine where the server is installed.
If you are accessing the control panel for the first time from the same machine where TrueConf Server is installed, you should be automatically authenticated on the registration page:
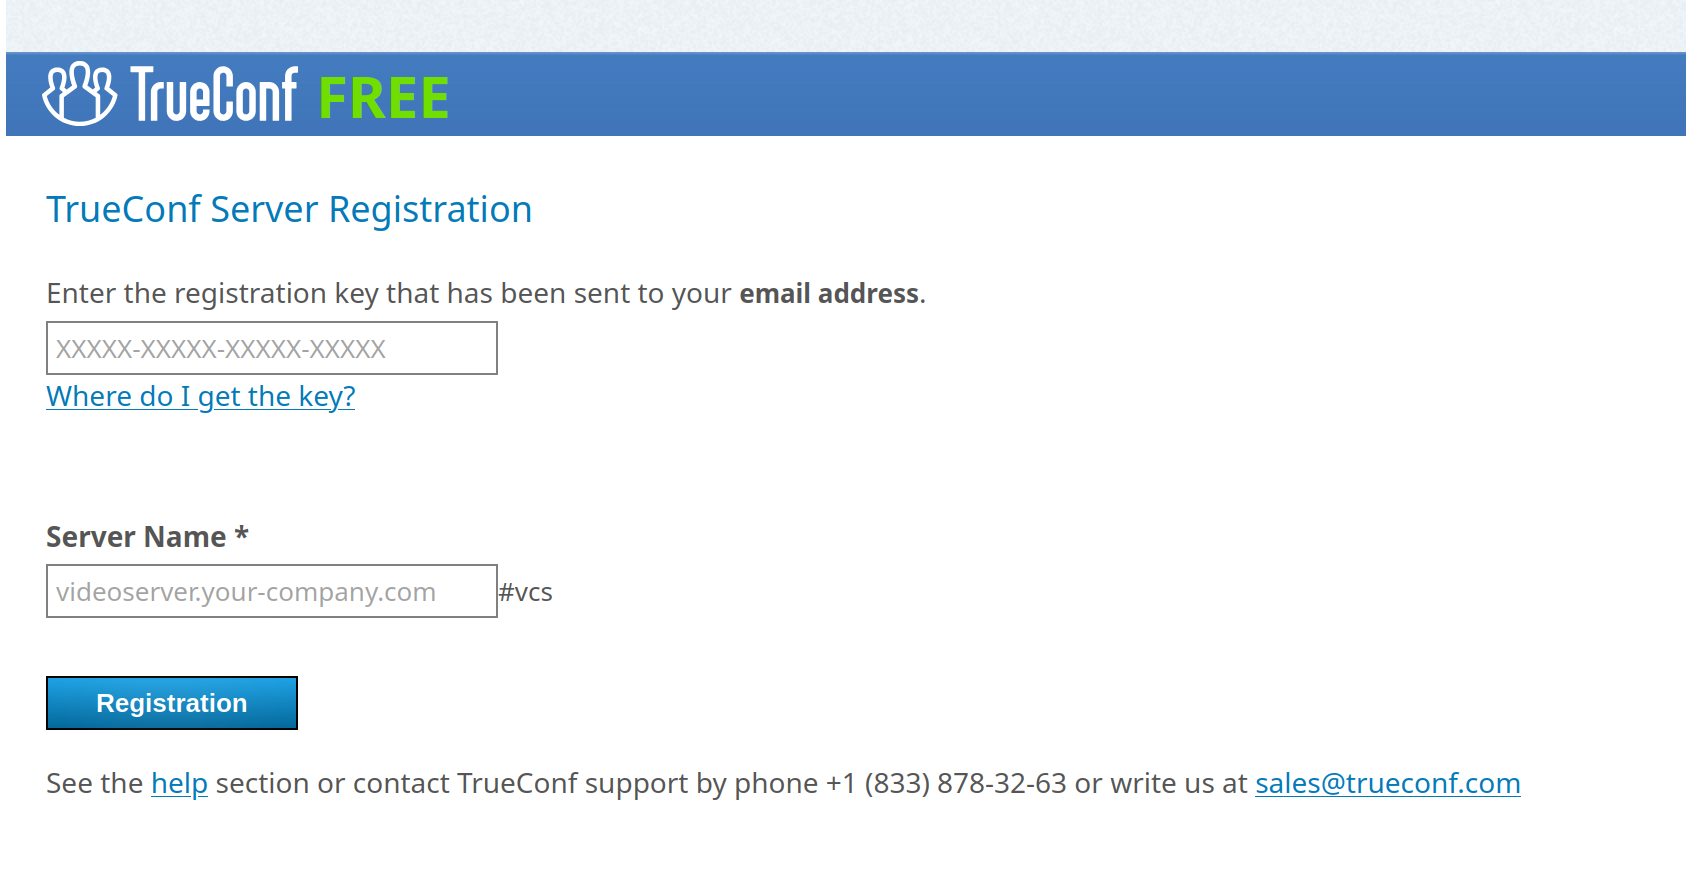
If the registration page opens, you may activate the server.
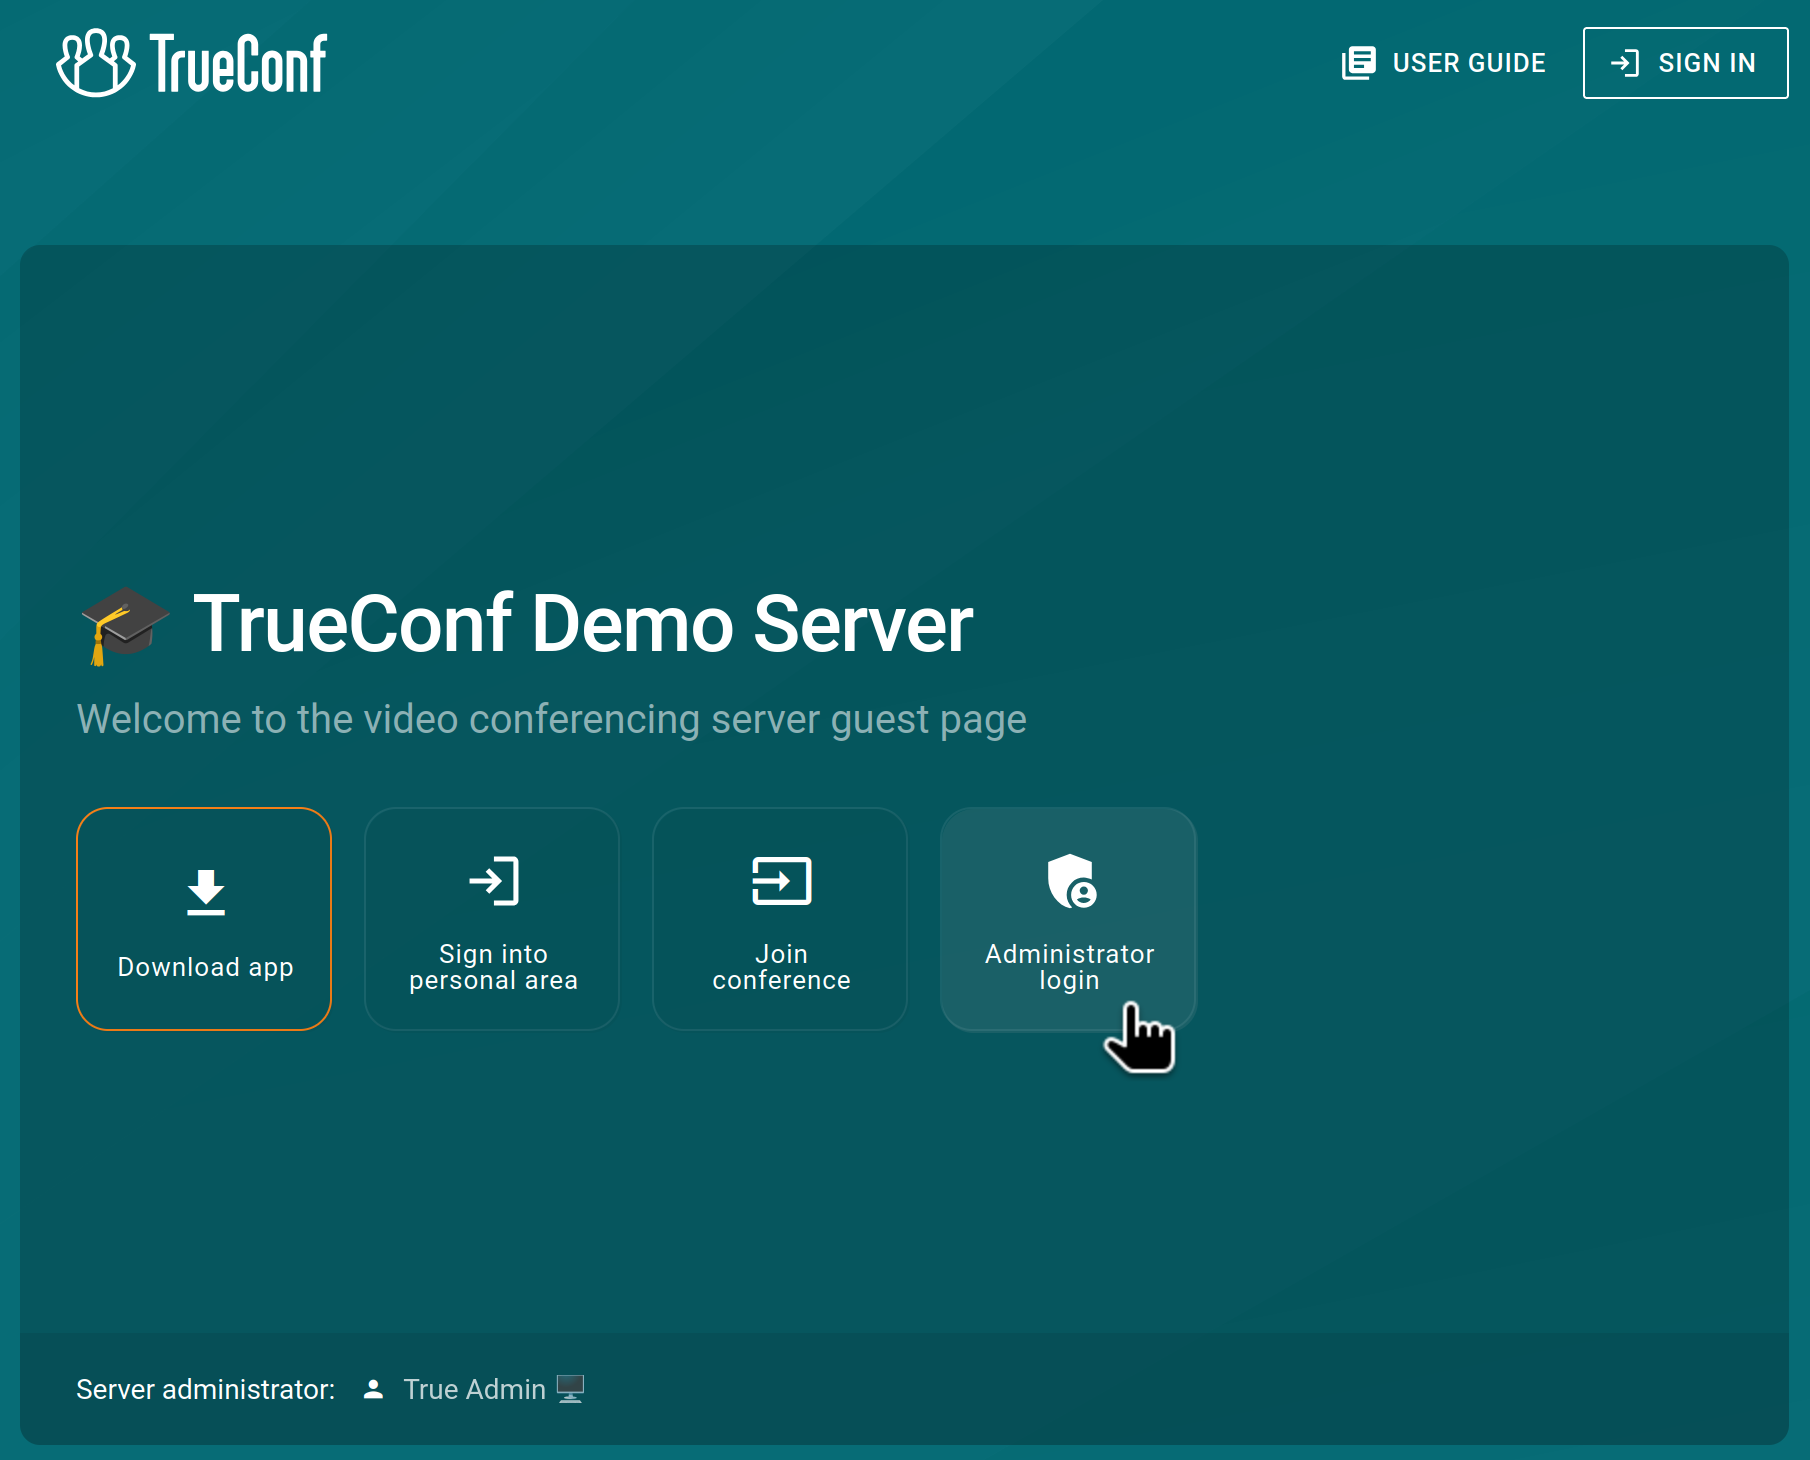
If you access the control panel from another PC and subsequently open the server address from the same machine, a guest page will be displayed:
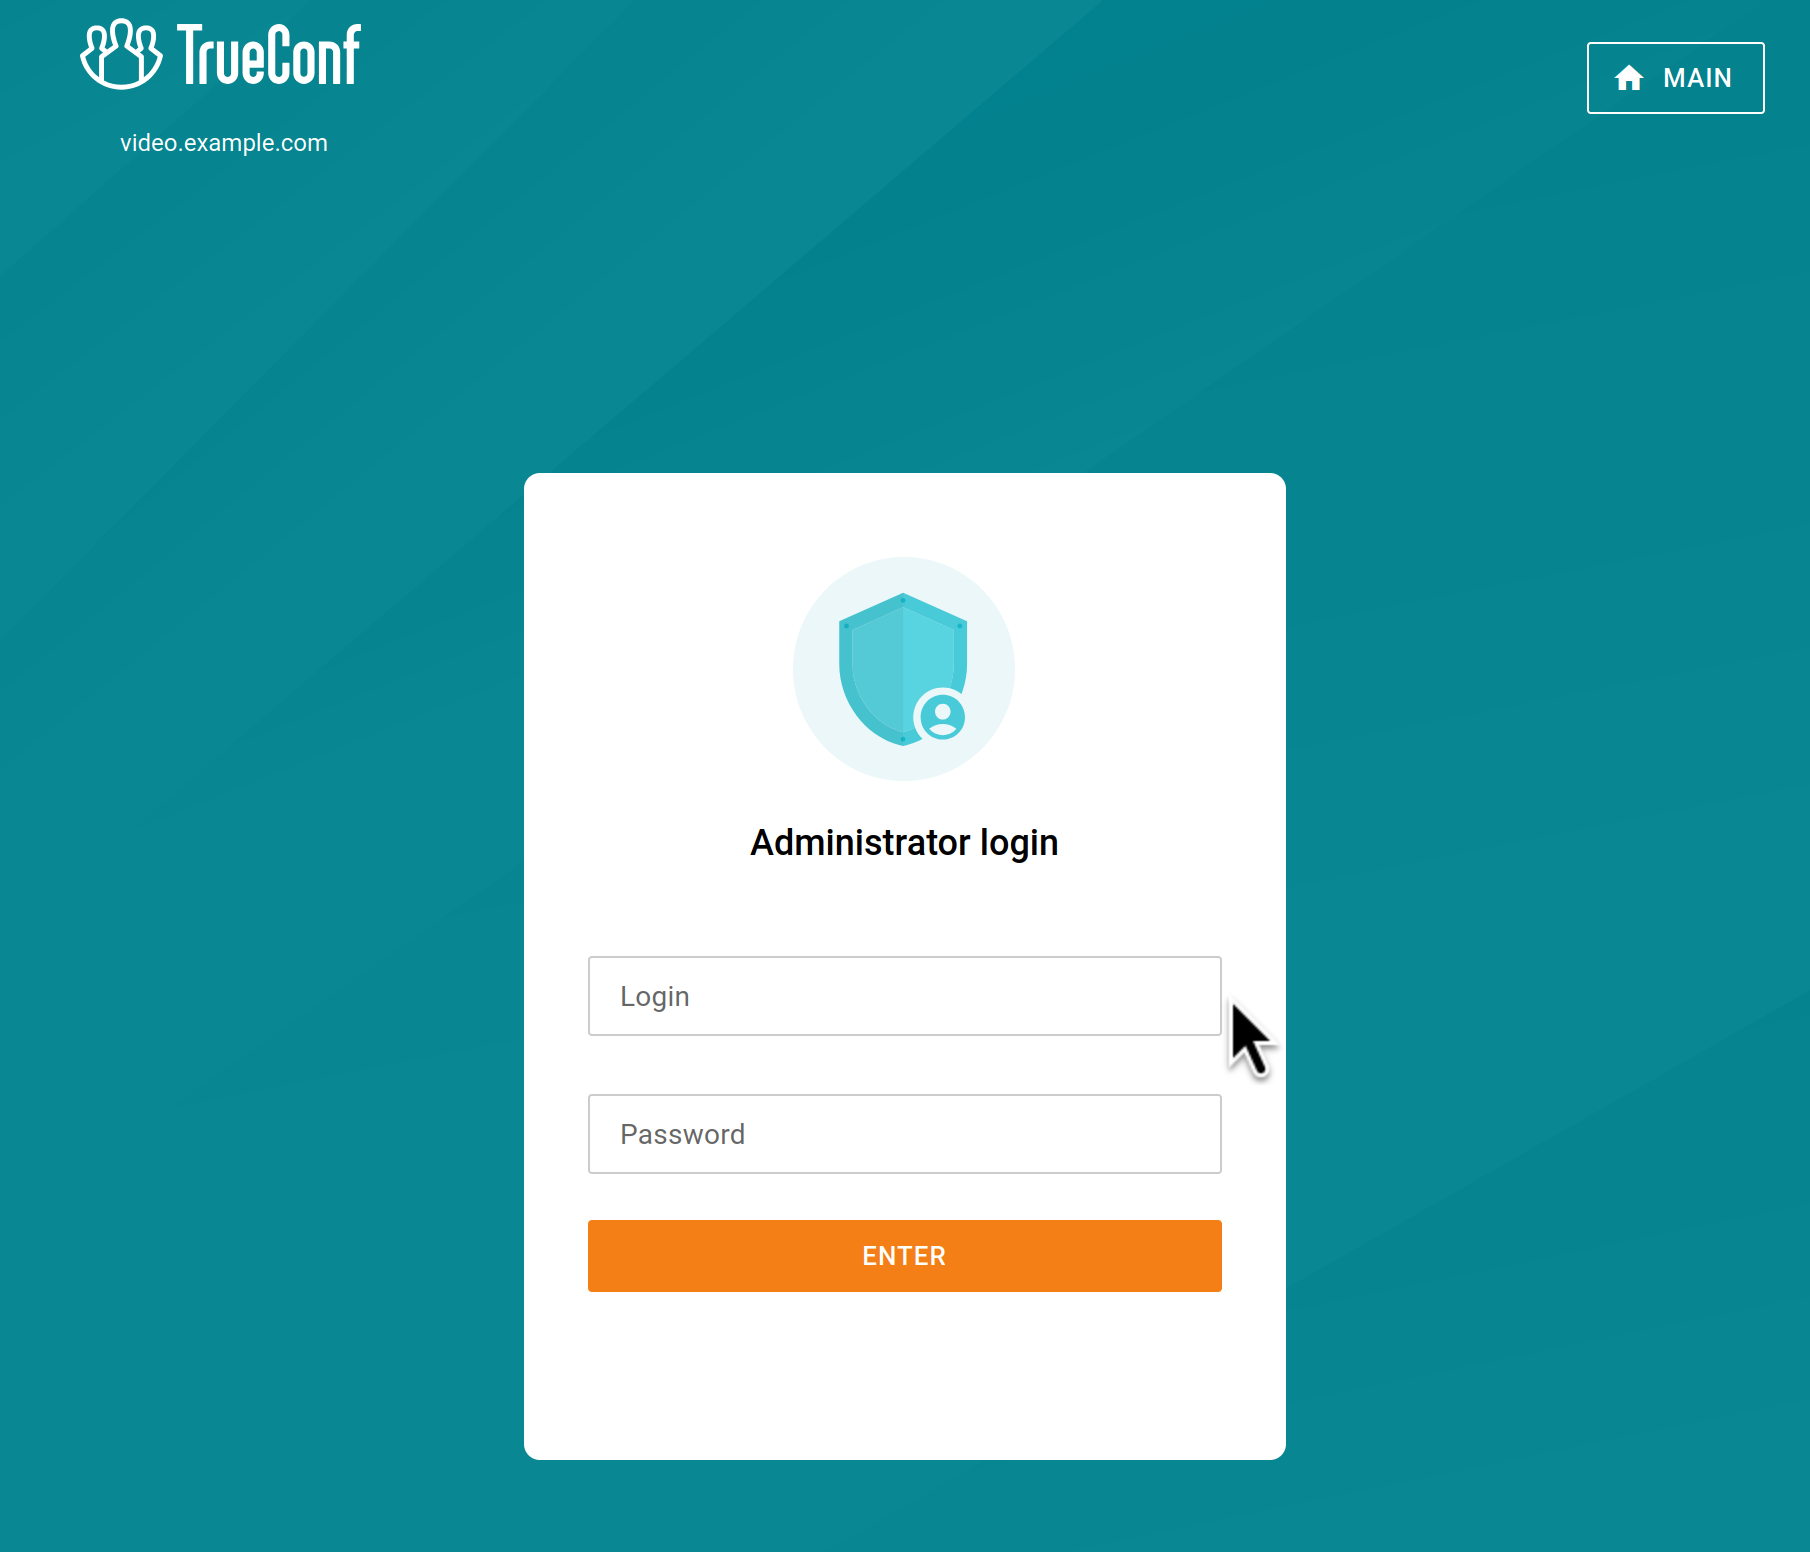
You need to click the Administrator login button and enter the OS username and password under which you installed the server:
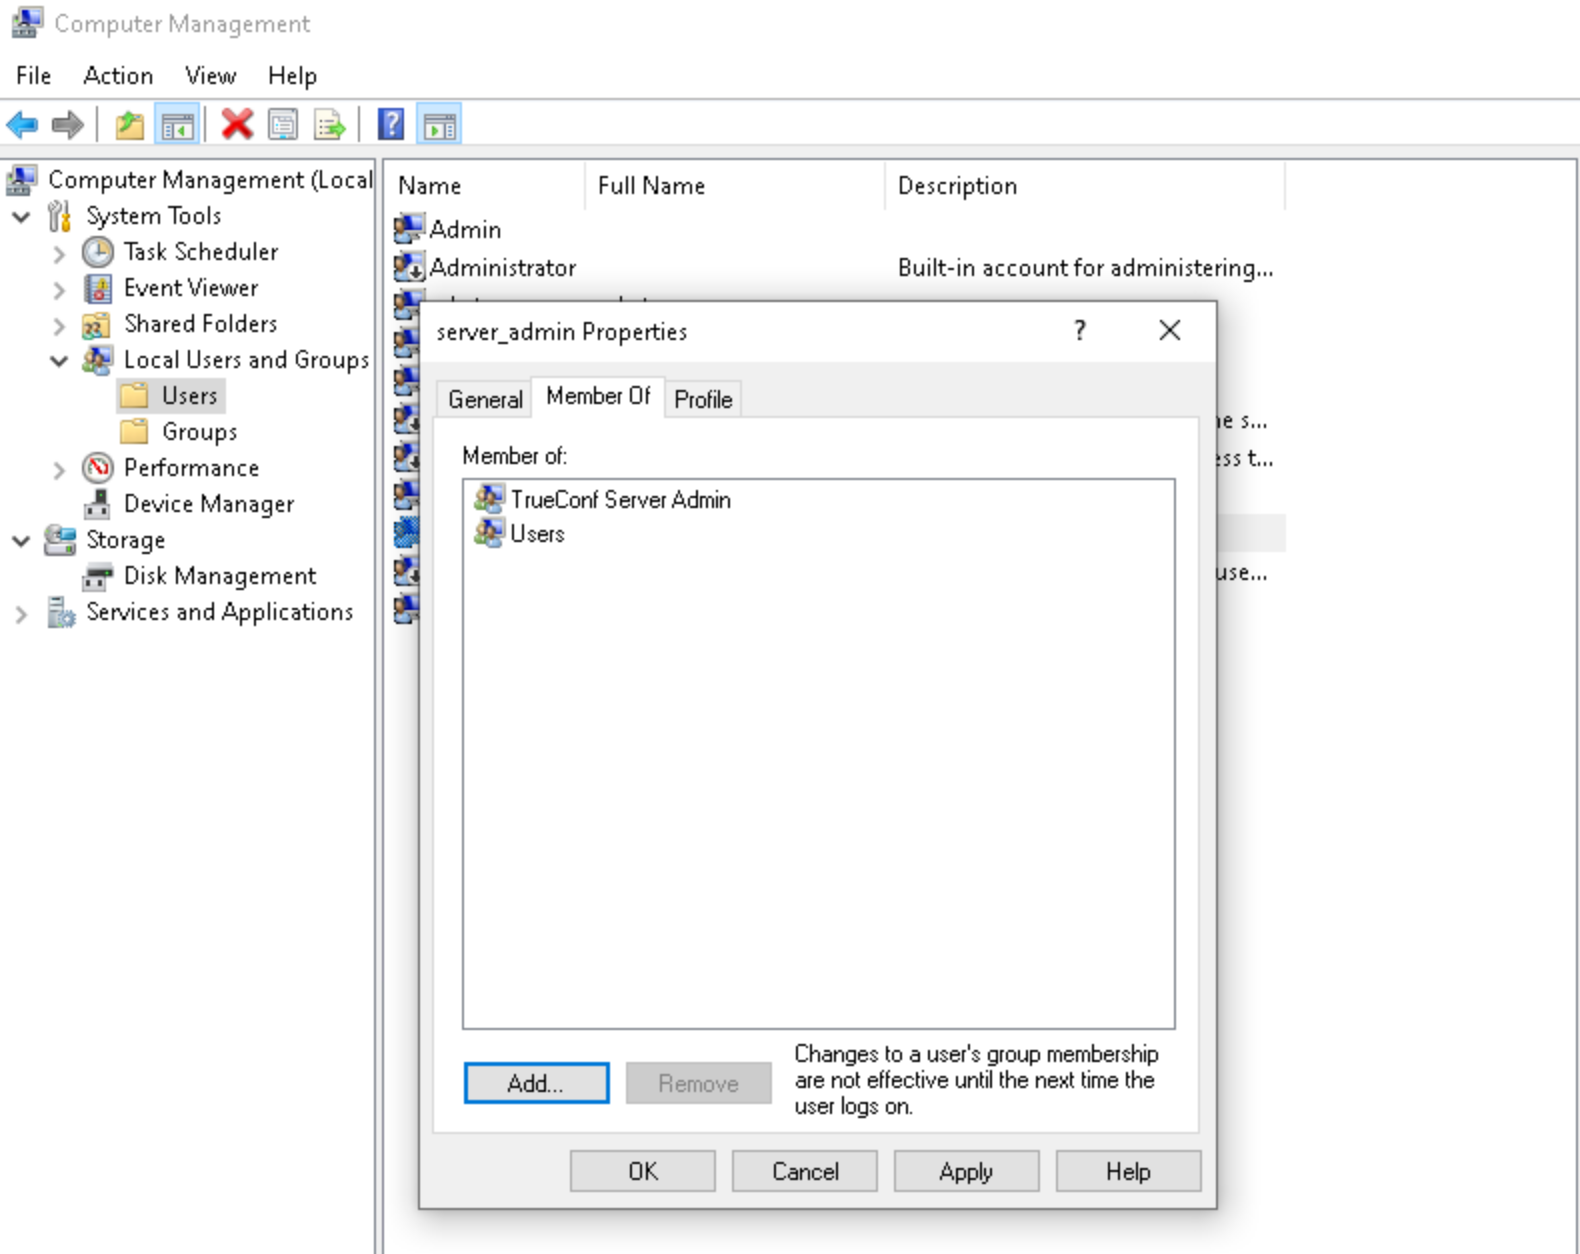
If you are unable to log in, make sure that the user on the Windows machine with the server is a member of the TrueConf Server Admin group:
On Linux, users are added to the tcadmins group manually during installation. These users will have access to the control (admin) panel.
There is no "universal" default login; you need to know the login and password linked to the account on the OS where the server was installed. Any type of access to the TrueConf Server control panel requires authentication with the login information of a user who is included in one of these groups:
TrueConf Server Admin group for Windows (tcadmins group for Linux) to manage TrueConf Server
TrueConf Server Security Admin group for Windows (tcsecadmins group for Linux) to view logs and conference recordings.
Important! There is no other way to add an account for administering TrueConf Server. Additionally, you cannot change another administrator's password or perform similar actions in the control panel; all access is managed through the OS user account.
By default TrueConf Server can be administered from any computer in the same local network where it was installed. In other words, by default access is limited to the following ranges of IP addresses: 10.*, 192.168.*, 172.16-172.31, 127.*.
Access settings are discussed more closely in the description of the Web → Security section.
You can learn how to create a new user account on different operating systems and add it to the desired group on the example of TrueConf Server Security Admin in our documentation.
TrueConf Server does not impose any restrictions on the number of administrators of each type.
If an administrator wants to manage TrueConf Server from a remote computer, they need to make sure that the firewall allows incoming connections over the control panel access port (80 by default) and that this option has been enabled in the Security section of the TrueConf Server control panel.
Learn how to administer TrueConf Server outside your local network in our article.
After access configuration, we recommend setting up HTTPS as soon as possible because it will be needed for frequently used features: application scheduler, real-time meeting management, and access to users' personal area. When HTTPS is configured, the port 80 (or any other port used to access the control panel) will no longer be needed for the work of TrueConf Server and can be disabled on the firewall for enhanced security.
# How to add administrators
You can configure access rights for existing accounts or create new ones. Below, we will show how to create a user and immediately add this account to the appropriate group on Windows and Linux.
# For Windows
To create a new local account on Windows and add it to the TrueConf Server Admin group:
Go to the Local Users and Groups section. To do this, press the Win+R key combination and execute the
lusrmgr.msccommand in the appeared window.Right-click on the Users list and select New User....
Fill in the required fields and configure the password change settings.
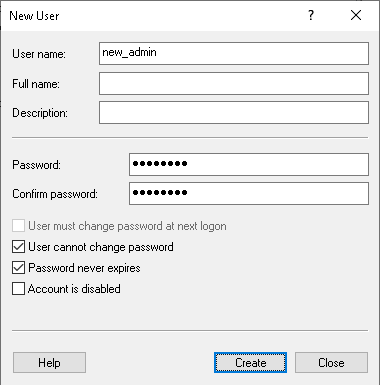
Go to the Users list.
To grant a user access to the server control panel, right-click the created account and go to Properties.
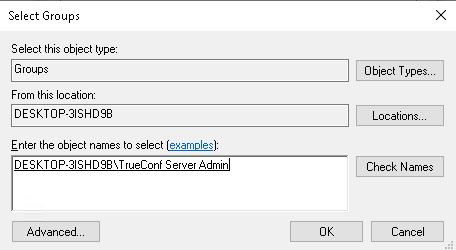
Click Add... on the Member Of tab.
Enter TrueConf Server Admin as the name of the selected object and click OK.
The user accounts imported from Active Directory/LDAP can also be added to the local <сonst name="security-server-group"/> group.
# For Linux
The commands listed below need to be executed with superuser privileges or using sudo (e.g., sudo command). Please note that sudo may be unavailable by default in your operating system. You can check its availability using the sudo -V command.
For Debian
- Run the following command:
sudo adduser --ingroup tcadmins [new_admin]
where [new_admin] is the username of the admin.
2. Enter your password in the corresponding field and confirm it.
3. Optionally, provide additional information for the admin (full name, phone number, etc.).
For CentOS
- Run the following command:
sudo adduser -G tcadmins [new_admin]
where [new_admin] is the username of the admin.
2. Set the password for the new user [new_admin] with the following command:
sudo passwd [new_admin]
# Server status
Server status is shown in the Server status field in green (if the server is working) or in red (if it has stopped) in top right corner of the control panel:

What to do if server is not running?
Stopped status is displayed in the Server status string.
There are three possible reasons for this:
Invalid license: contact your system supplier to get a license.
Some server files are missing or have been damaged: reinstall TrueConf Server (see Installation)
Server hardware key is broken: please refer to the instructions for resolving the problem with the key.
# Server log
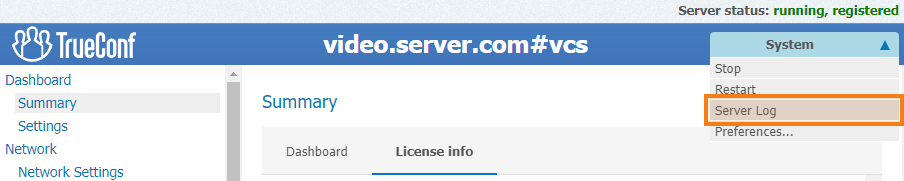
If you encounter any issues with TrueConf Server, TrueConf support team will be able to help you troubleshoot them more efficiently if you provide your server log files. To access the main log, go to System → Server log located in the top right corner of the control panel.
To make logs more informative, check the box Enable detailed logging in the Dashboard → Settings section. Technical support may ask you to do it so that it is easier to troubleshoot potential issues.
Do not enable detailed logging without a reason because it can unnecessarily occupy space with detailed log files.
A range of additional log files is saved in the TrueConf Server working directory. Learn more about additional log files in our article.
# Configuring preferences
Some settings can be set up personally for each TrueConf Server administrator. e.g., control panel interface language, time zone, and reports export parameters.
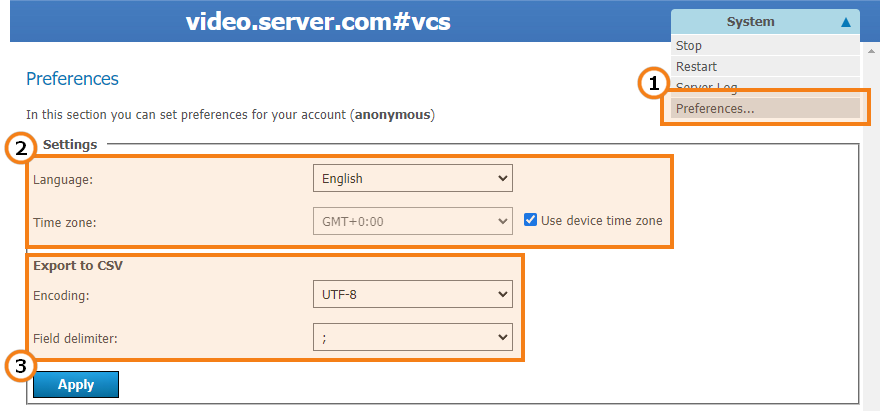
Proceed to System → Preferences... in the upper right corner of the control panel.
Select your language and time zone. Please note that the time zone will be applied to your meetings in all server logs and during the scheduling process. You can use the time zone of the computer where your TrueConf Server is installed by checking the corresponding box.
You can set report export parameters (encoding and field delimiter to convert the table string to text format) in the Export to CSV section.
After making any changes make sure to click Apply button.
If you are using TrueConf Server on Linux and change the time zone by checking the box Use device time zone, you will need to restart all server services.