# Surveys
If you want to examine your colleagues’ opinions on a specific topic, you can always hold a survey with the help of the corresponding feature.
To do it, select Surveys in the main menu:
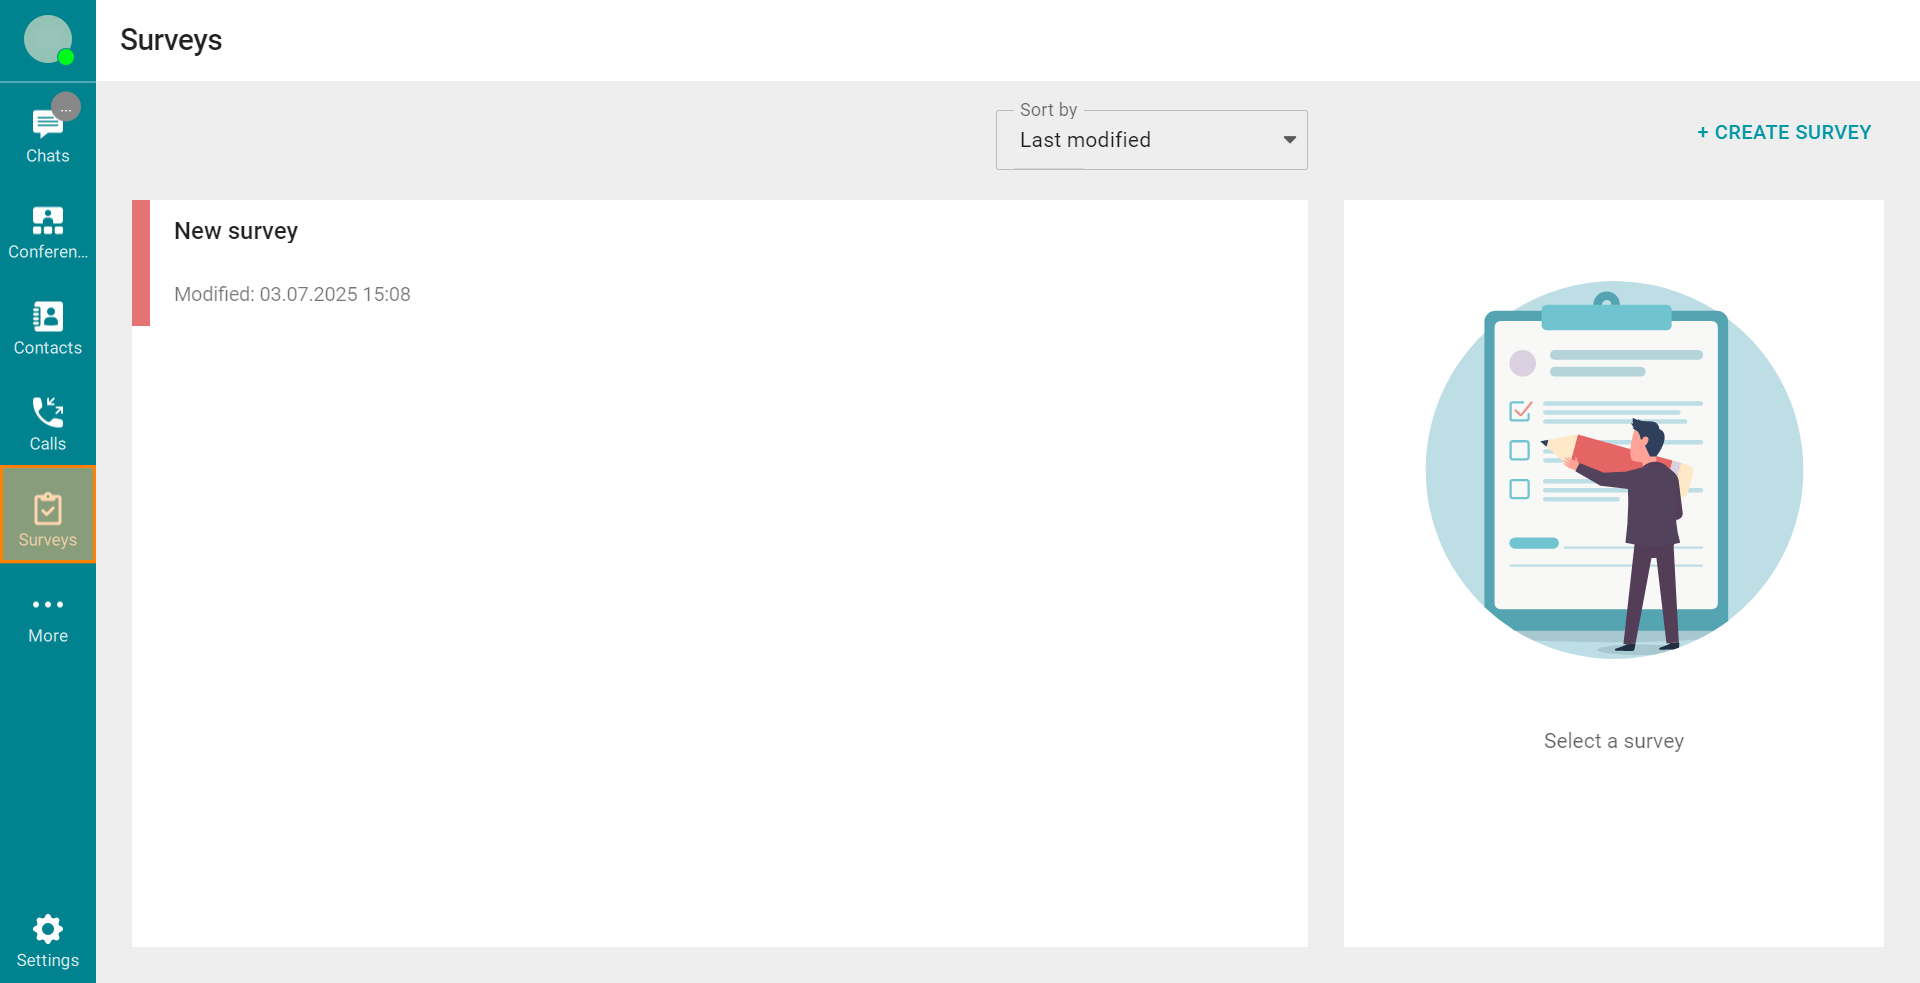
Here, you will see all the surveys created previously, they will be sorted by name or the last modification date. Here, you can also start your own survey.
# Creating surveys
To create your own survey, click the button in the upper right corner.
By clicking the button, you will open the window where a user can:
Enter the survey name
Add a description for the survey
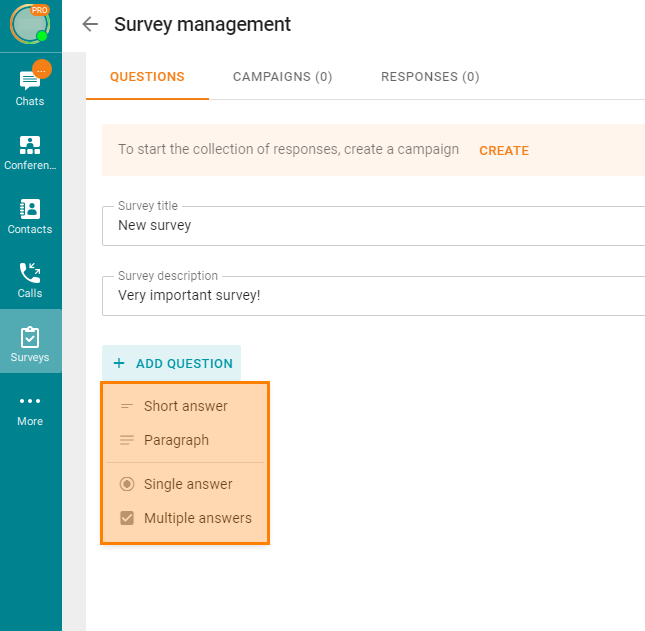
Create a question with the corresponding button.
When you click the Add question button, you will be asked to select the format of expected responses in the drop-down list:
- Short answer
- Paragraph
- Single answer
Multiple answers. When a user creates questions in this format or in the Single answer format, the additional Add the 'Other' option button is also available.
You can either add a text description of the question or attach additional materials (such as an image) by clicking the  button.
Images can also be attached as answer options for such formats as Single answer and Multiple answers. You can attach images in JPEG, PNG, and GIF formats.
If necessary, activate the Required switch.
All questions added to the survey will be saved automatically, even if you go to a different tab when creating it. When you return to the Surveys tab, you will see the survey created previously. You can select this survey and click the Edit survey button in the right-hand menu.
# Campaign launch
After creating the survey, you will need to start it in order to gather users’ responses. To do it, go to the Survey management menu, open the Campaigns tab, and click the Create campaign button. Set all required parameters In the pop-up window Creating a campaign:
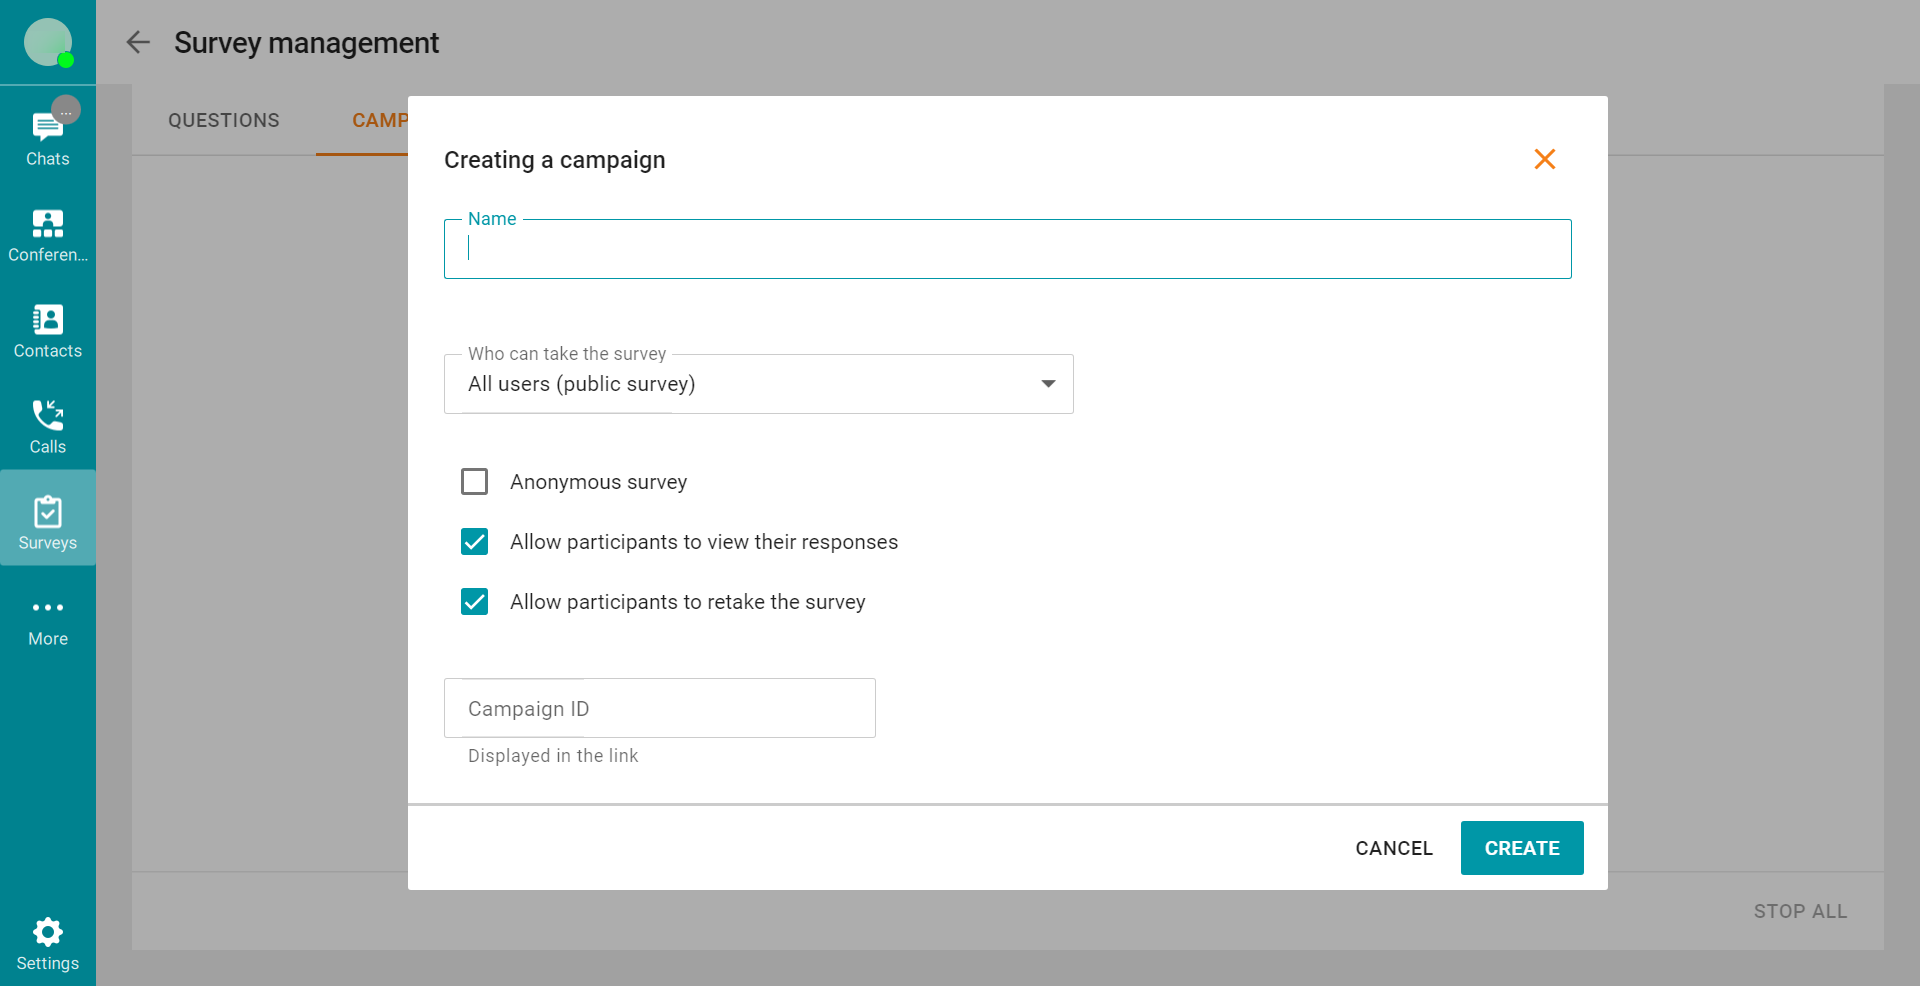
Campaign name
Who can participate in the survey (anyone with the survey link or only server users)
Additional options (whether the survey will be anonymous, whether users can see responses, whether they can retake the survey and change their answers)
The ID of the current campaign (it will be used for creating a hyperlink) which will help you to distinguish between different campaigns.
After setting all parameters, click Create. The campaign will be displayed in the list. In this list, you can view the number of responses received at any time, copy the link to the campaign, check its status, and quickly start or pause the campaign with corresponding buttons ( — start and
  — pause). You can launch several separate campaigns for one survey, for example, a survey for the general audience and the survey intended only for server users.
If you need to change the campaign settings or view the current responses, click the  button and select the required option in the drop-down menu.
# Responses
You can view current responses in the Survey management menu in the Responses tab.
To review overall results, refer to the Summary section.
You will also see:
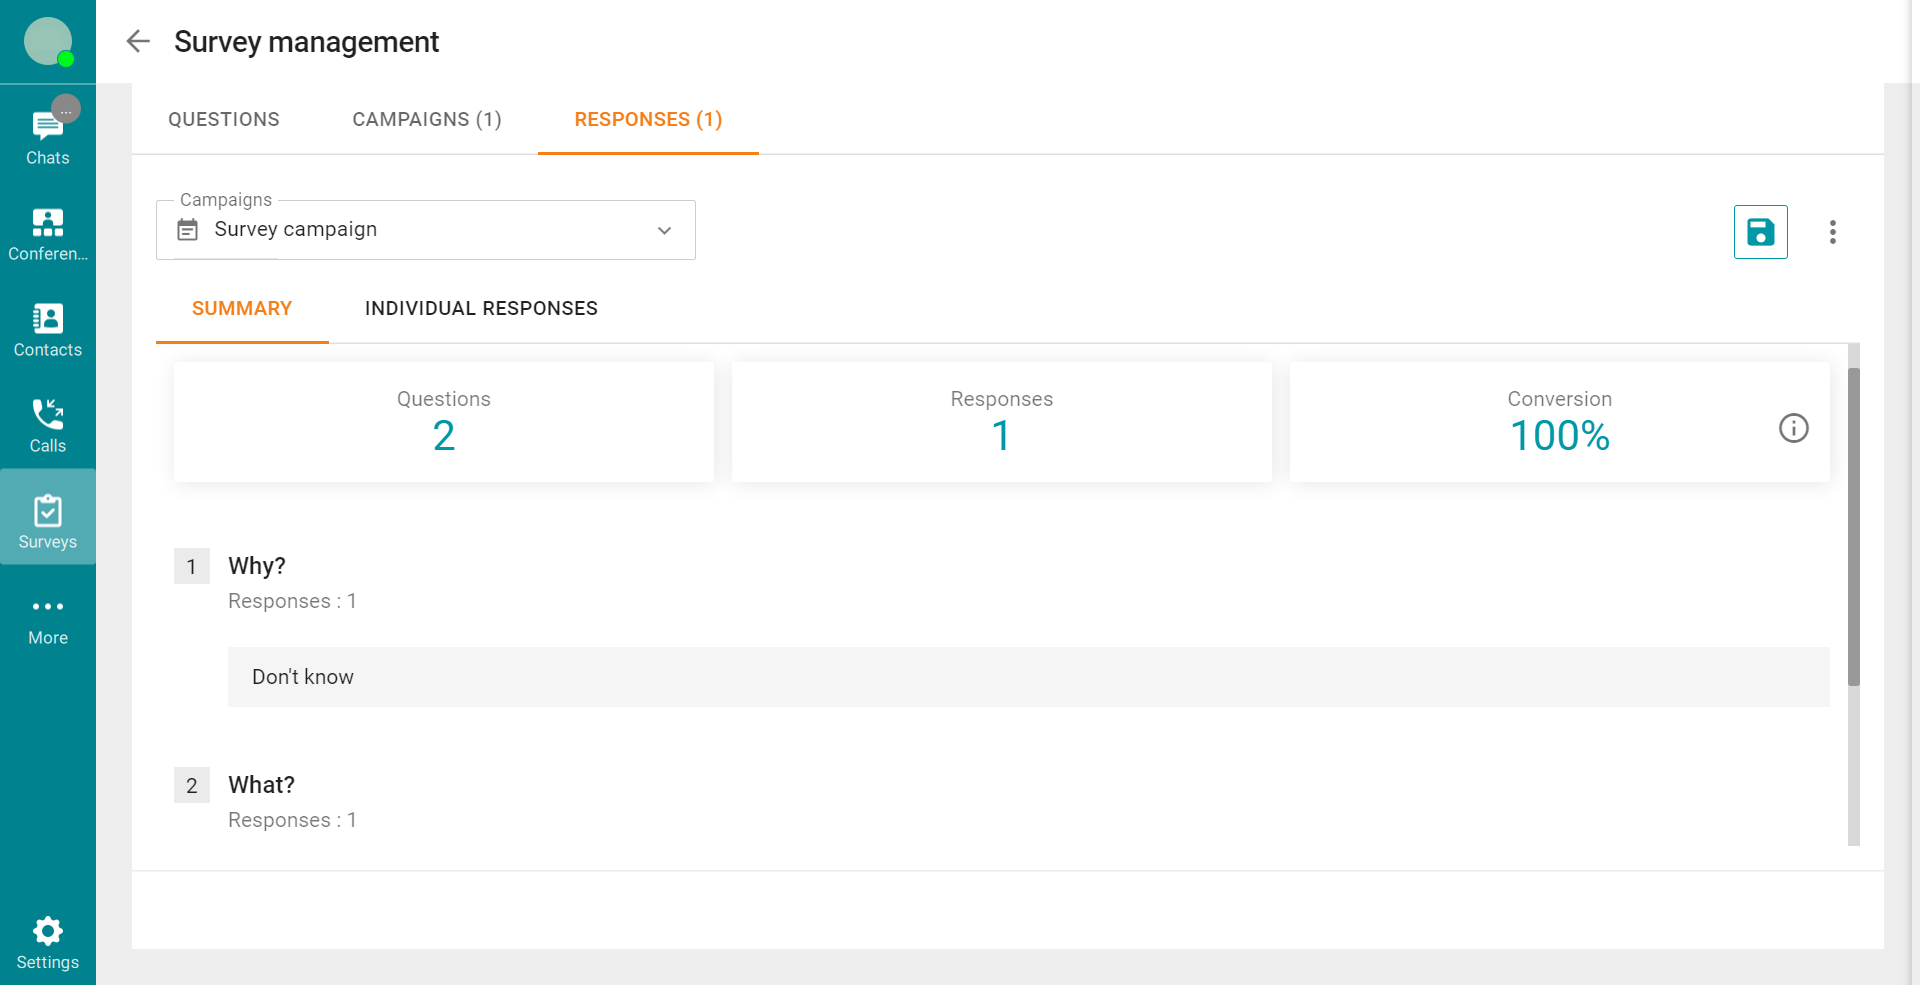
Total number of questions
The number of people who submitted responses
The percentage of respondents who completed the entire survey form.
For further analysis, refer to the rows below, where you will find how many times each individual response option was selected in your survey.
You can view the results for a single campaign or multiple campaigns at the same time. To do it, go to the Campaigns drop-down list and select the campaigns you want to include. Click Apply and the displayed results will change depending on the selected campaigns. Click Throw off to remove all the campaigns from the list.
In the Individual responses tab, you can review the results of each individual respondent along with the list of answers given by this person. Besides, it is possible to check how long it took the user to complete the survey.
You can delete the responses of any user by clicking the  button. If you want to delete the responses of all users, click
  and then click the Delete all responses button.
To export the entire survey results in the .csv format, for instance, if you need to share the results with a user who does not have access to the results, click the  button.