# Getting started
When you launch the application for the first time, allow it to send you notifications.
If you have a device with iOS/iPadOS 18.0 or above, you will need to grant permission to discover devices in the local network. This is necessary for connecting to local TrueConf servers.
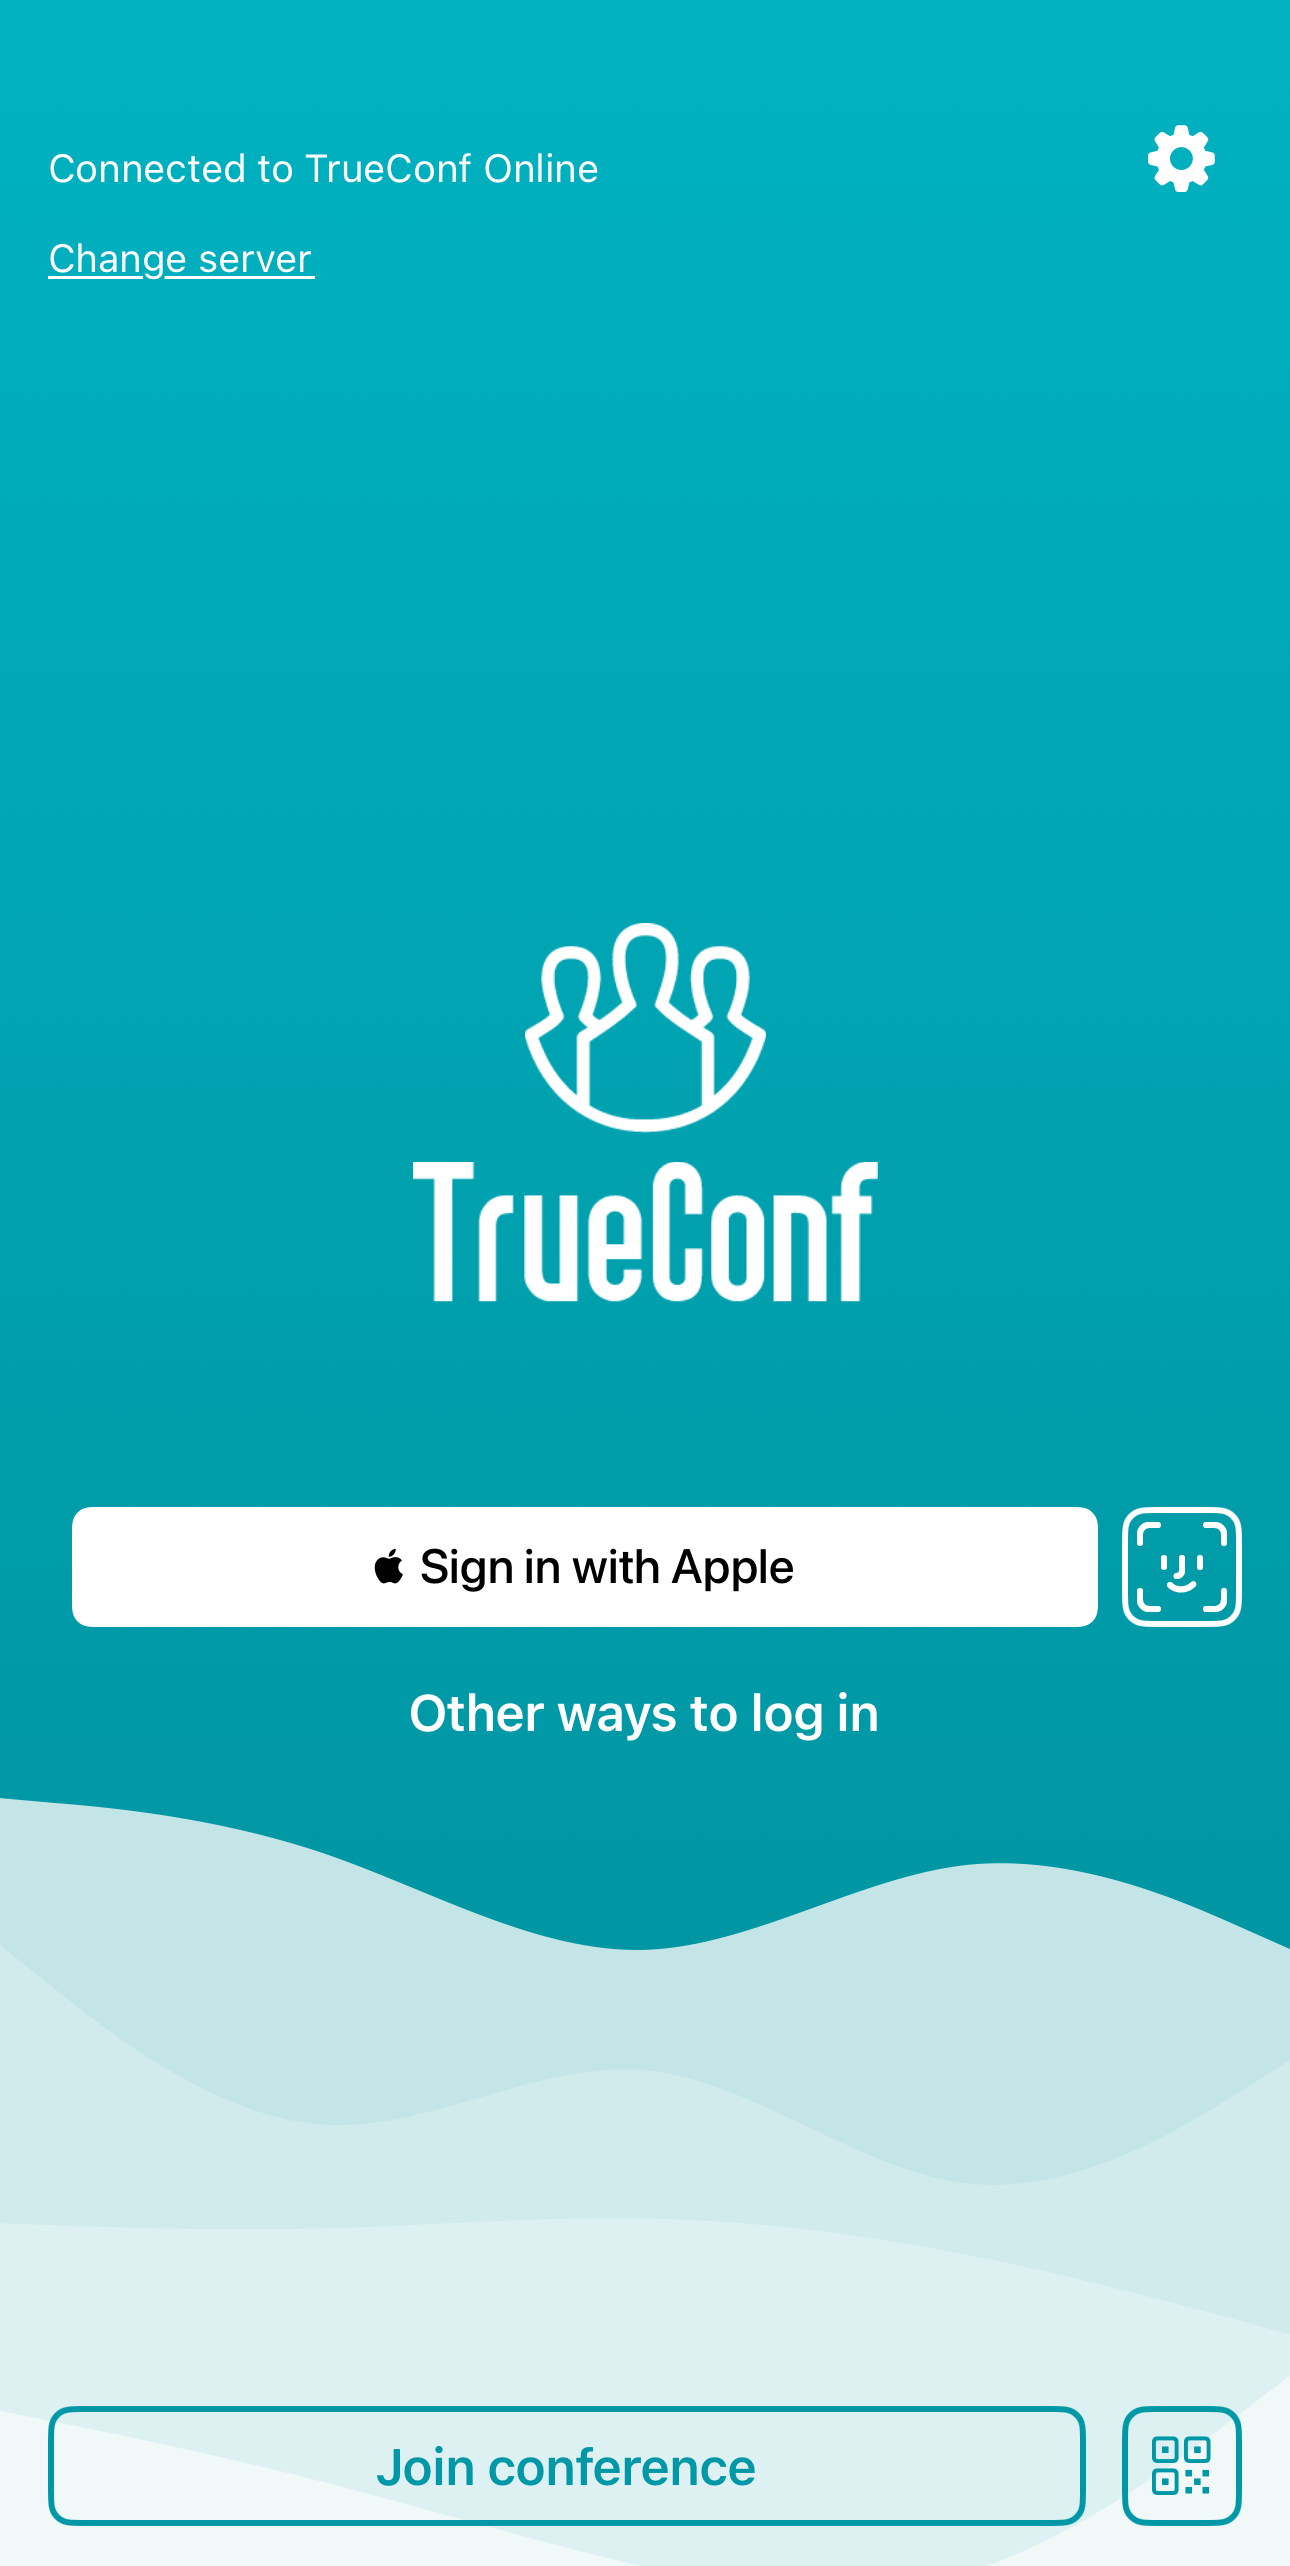
The authorization window will be available where you can:
Change server (by default, the application automatically connects to TrueConf Online cloud-based service.
Setting up the application
- Sign in to the cloud service with your Apple ID or other social network accounts (social network icons will be displayed if you tap on the button Other ways to login in button).
# Signing in
To connect to your corporate TrueConf Server instance:
Press the Change server.
Select the TrueConf Server option and specify its IP address or the domain name (e.g., server.company.com) and tap on the Connect button.


- If connection is successful, you will be able to see the server name in the top left corner.
Later, if you need to connect to a different server or to TrueConf Online, go to the Options → Profile → Sing out and follow the instructions described above.
Enter your login (TrueConf ID).
The password for your account. To sign in for the first time, you can obtain the login information from your system administrator.

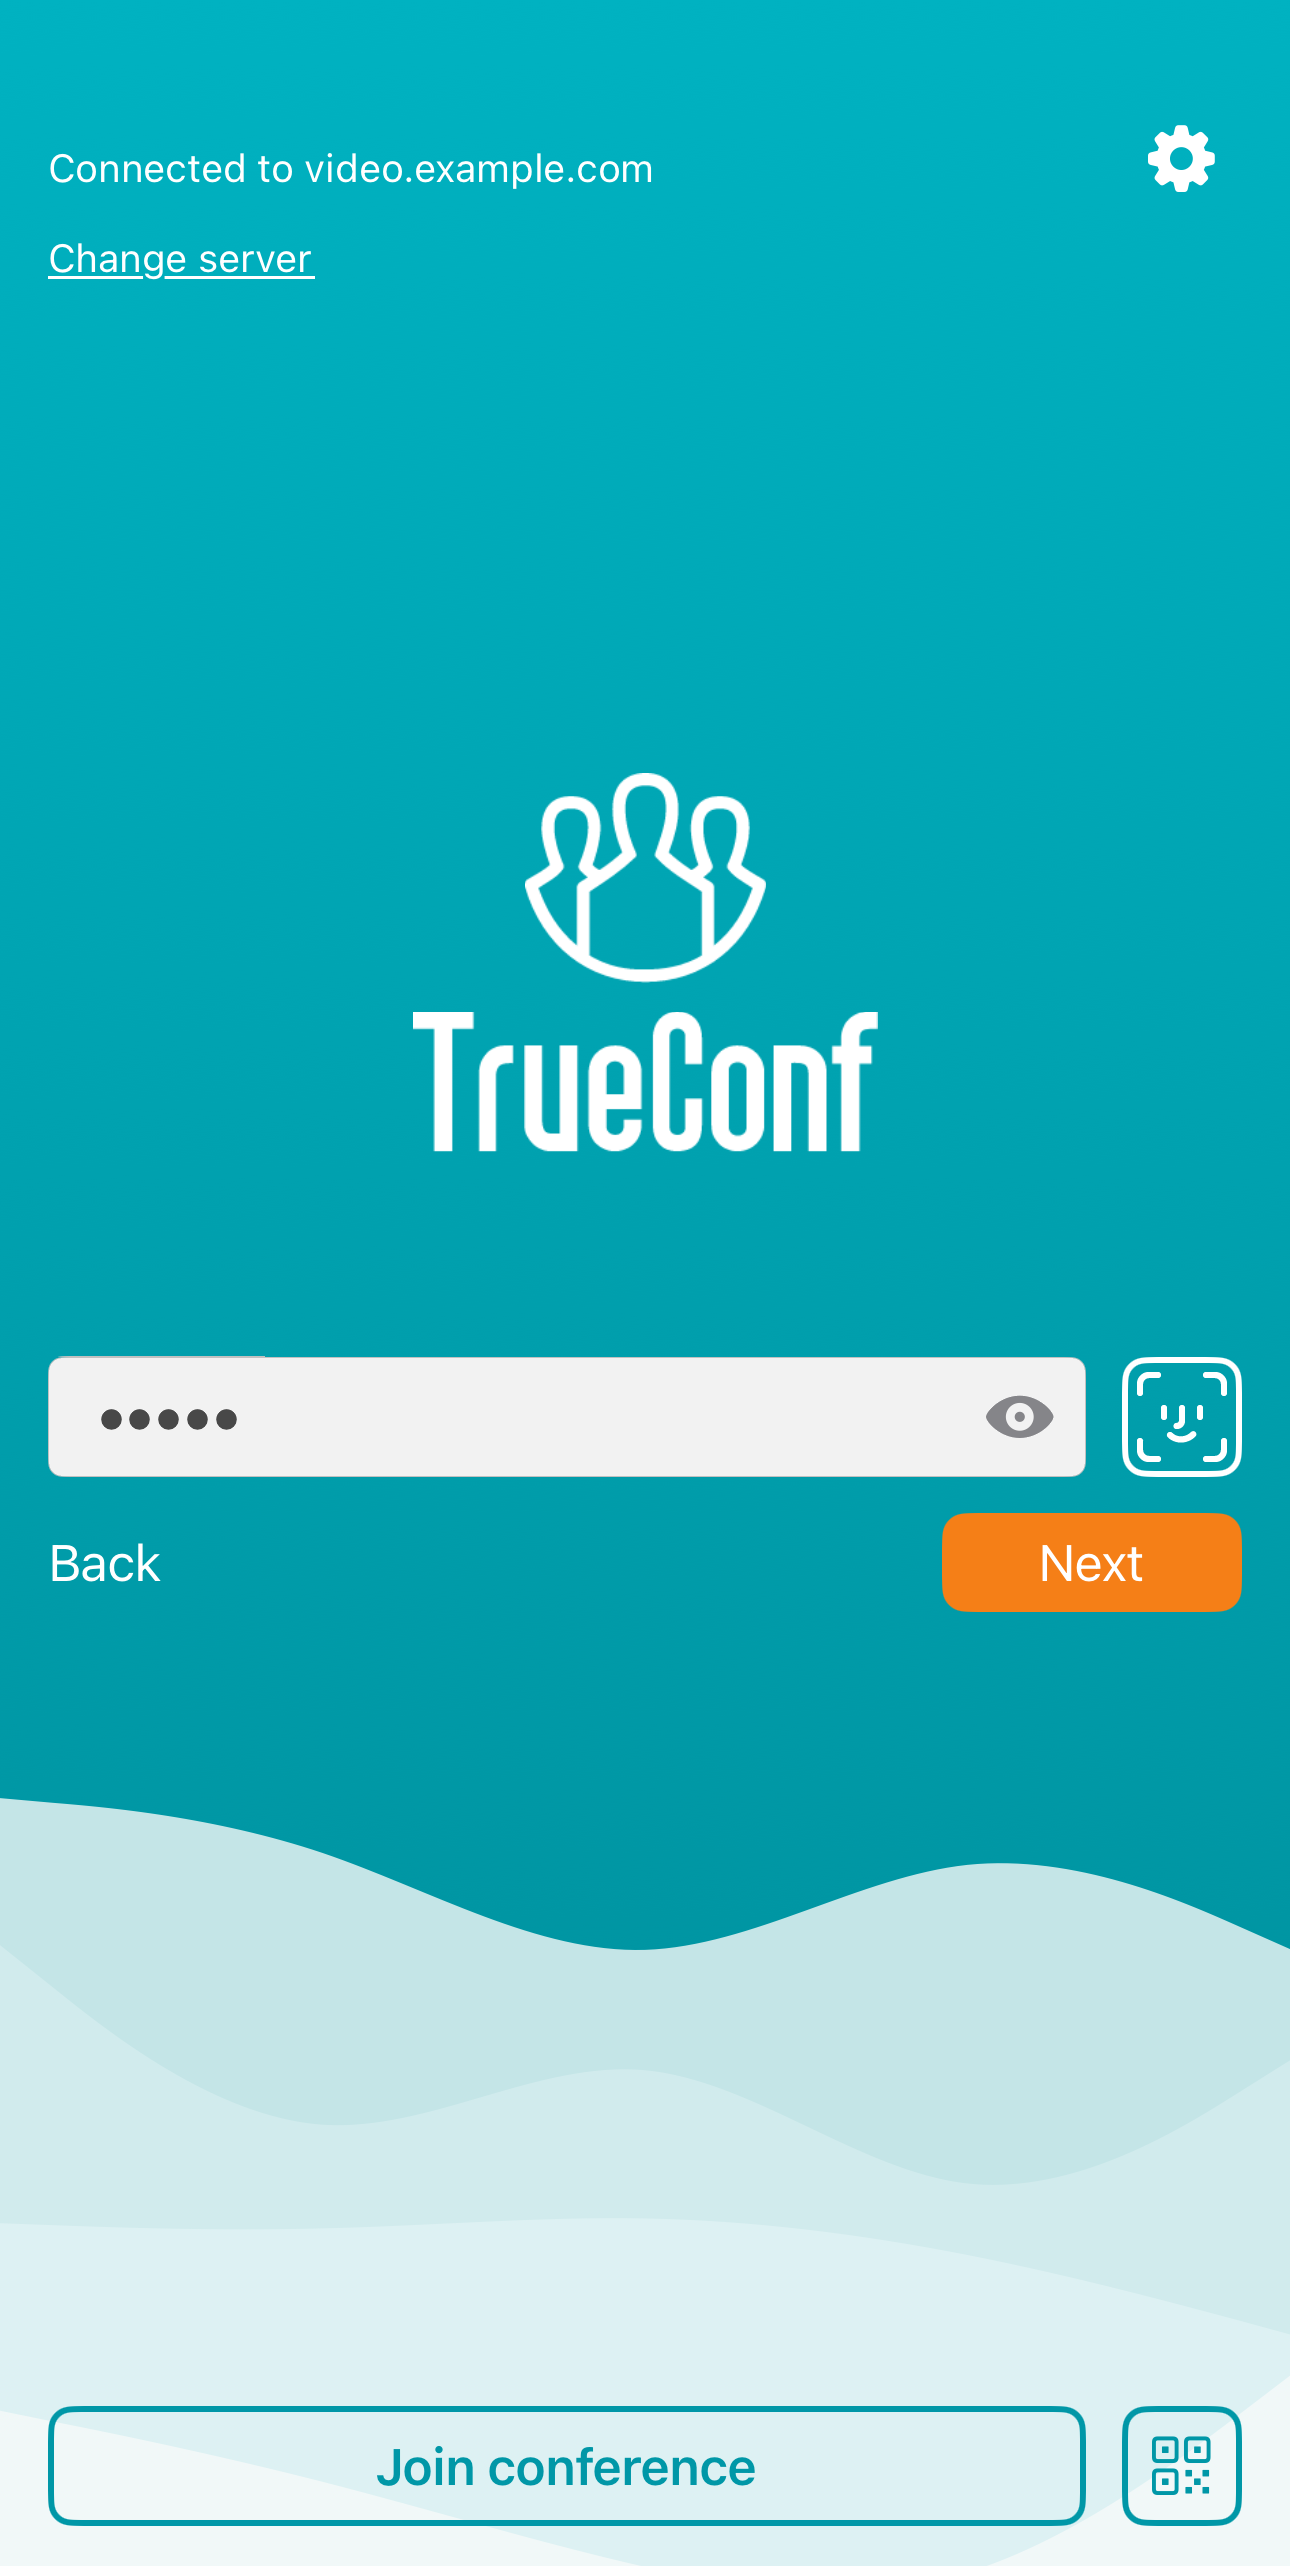
With the help of Face ID/Touch ID, you can enable secure login after the first sign in and avoid manual entering of your personal credentials each time you enter the application. To do it, tap the  or
or  button and confirm the use of biometric authentication.
Please note that if you decline secure authorization with Face ID/Touch ID, your phone password will be used for authorization. To enable secure authorization, go to iOS settings, select TrueConf in the list of applications and activate the switcher Face ID/Touch ID.
After signing in, you will have access to the 5 main sections of the application. Read the corresponding sections of the user guide to learn more about the features available in these sections.
# Sign in as a guest
You can join only a public conference (webinar) as a guest. There are multiple ways of doing it: with a QR code, with conference ID or directly from the conference page in the browser.
# With a QR code
Tap on the  button on the authorization page and scan the QR code displayed on the conference page.
You can also upload the QR code image saved on your iPhone. To do it, tap Gallery and select the photo.
In this way, you can join any public conference without having to connect to a different video conferencing server.
If you want to join a private conference with a QR code, you have to be signed in to your personal area on the conference page.
# With conference ID
Tap on the button Join conference on the authorization page. Enter the conference ID without the \c\ prefix. For example, if you have the following ID \c\2050356374@video.company.com#vcs, you will need to type only the digits 2050356374. Enter the correct data and tap on the Next button. Then, enter your name (alias) that will help other conference participants identify you and tap on the Log in button.
# Profile
The profile can be found in the Options section of the application. The following features will be available:
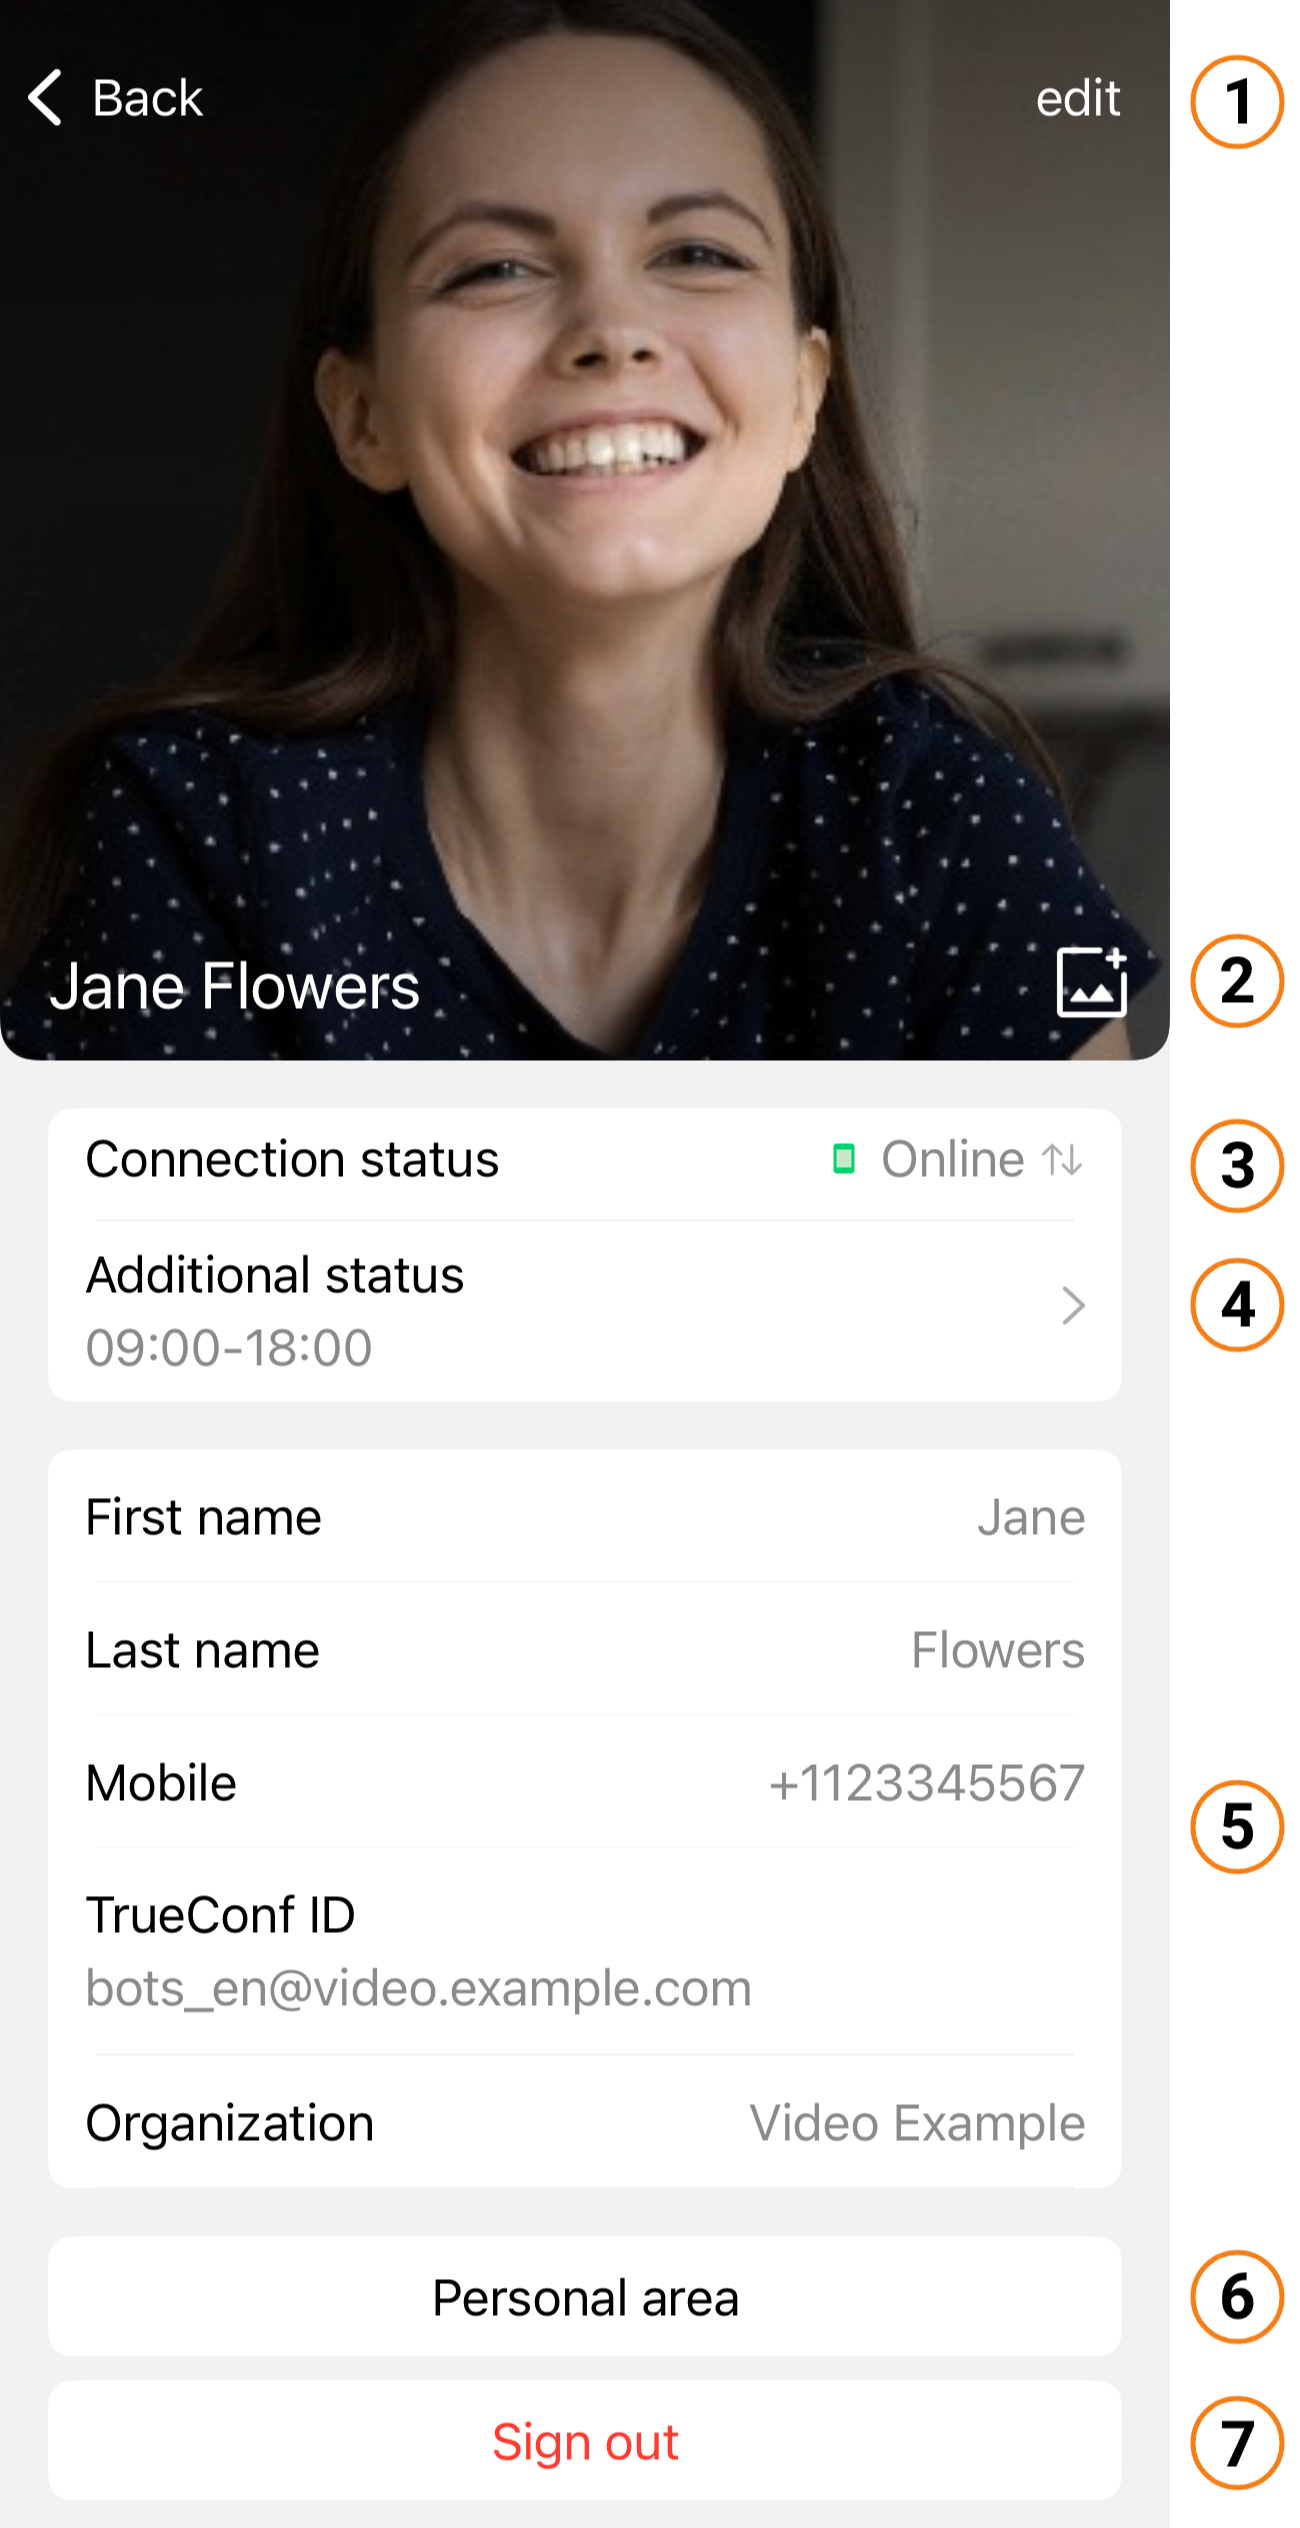
Edit personal information: display name, full name, and organization.
Set up an avatar.
Change the network status:
online
Do not disturb.
4. Set an additional status, such as information about vacation or changes in the work schedule.
5. Your information. Mobile and work phone numbers are set by the server administrator.
6. Go to the personal area.
7. Sign out.
# Personal area
Personal area is a separate web page on the server intended for scheduling video conferences and editing personal information or the address book.
Every user added by the server administrator has access to this page.
On the main page, you will see:
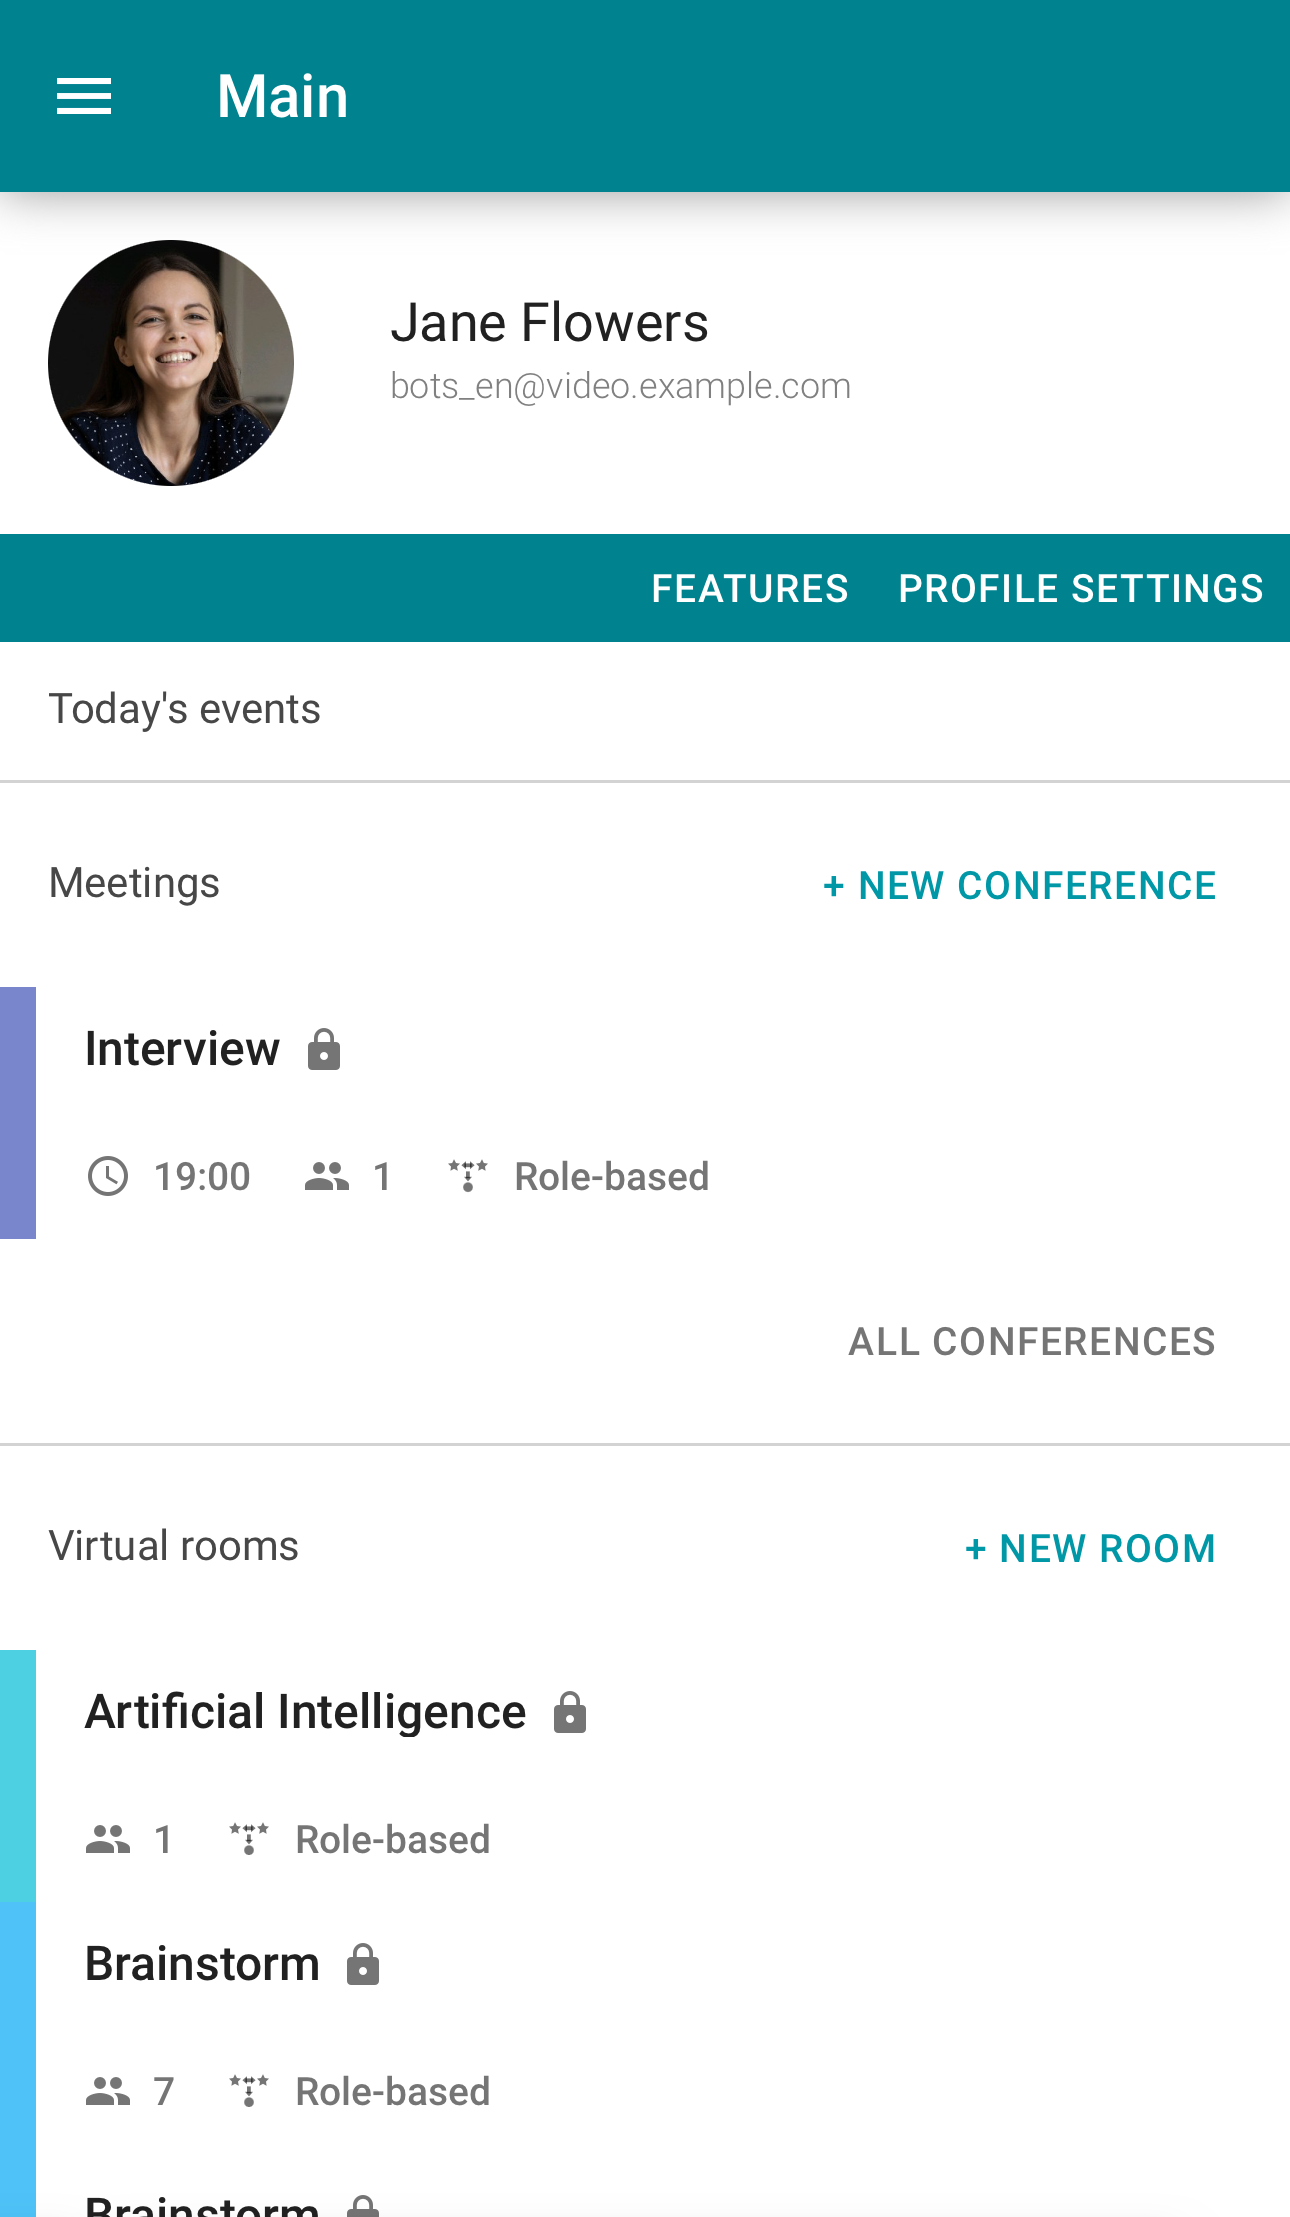
Conferences scheduled for today
Virtual rooms.
Only the events where you are the owner or participant are displayed.
By tapping on the conference name, you will open the conference card where you can:
Go to conference analytics.
Start the event.
Change its settings.
Export the event to the corporate calendar.
Delete the event.
# User statuses
TrueConf for iOS/iPadOS includes statuses that allow you to determine users' current activity:
 — online
 — online from a smartphone or tablet
 — online from a hardware or software SIP/H.323 endpoint
 — recently active: a status for the users who were previously logged in using their mobile app but are currently offline
 — the owner of an ongoing conference
 — busy (currently participates in a video call or conference)
 — away (away from keyboard for a certain time period, 15 minutes by default)
When the device screen is locked, the status of a user who is currently signed in to the TrueConf application is automatically set to . In this case, timeout settings for this status are ignored.
 — do not disturb (can be set manually by a user)
 — offline.
# Offline mode
If there are some problems with connection to the video conferencing server, you will see the No connection status; however, you will still be able to use the application. In particular, you can: