Transcriptions
Transcripts
If your company has implemented the use of TrueConf AI Server, you will see the Transcripts menu item in your personal area. This section displays a list of recognized and ready-to-be-recognized conferences:
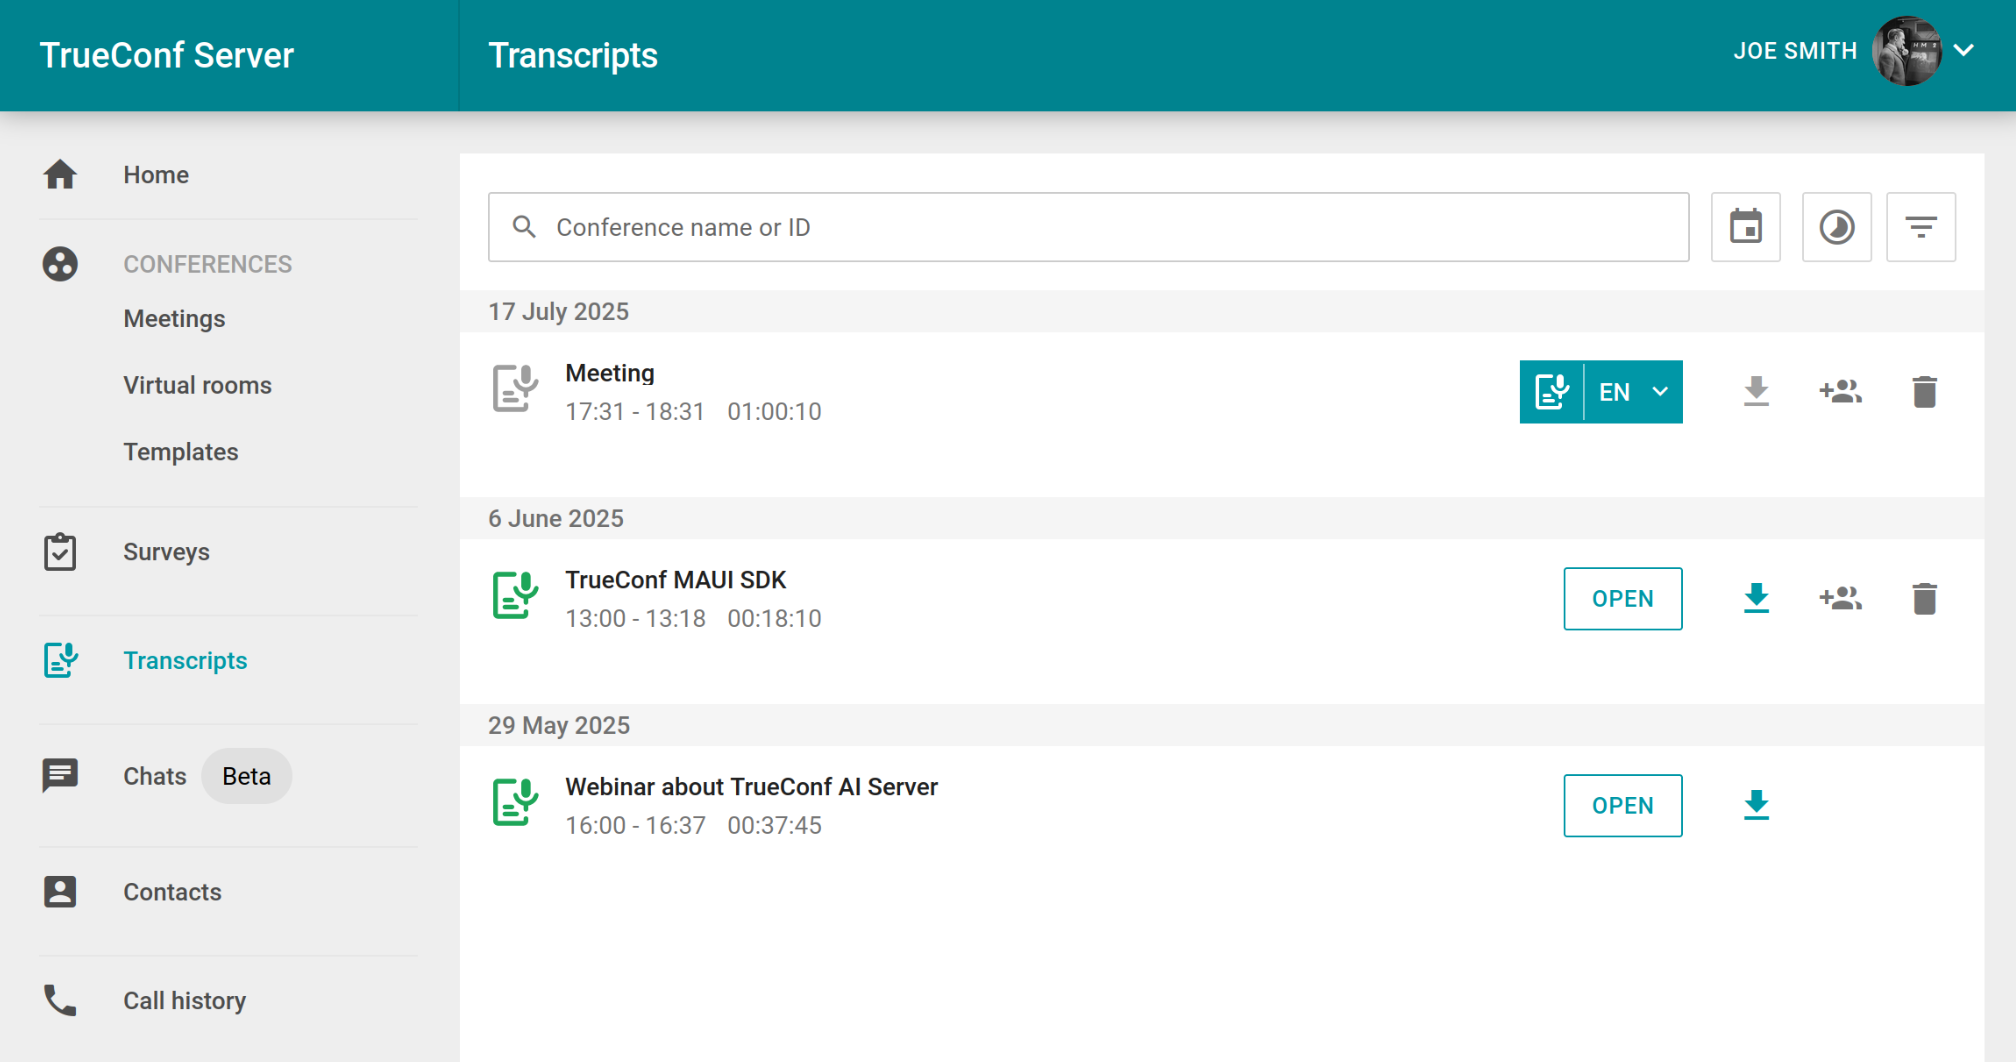
For quick transcript searches, you can use the Name, ID or transcript content input field to find a transcript by its title, ID, or spoken words. Filters are also available by clicking on:
 - by the time period of record creation, you can select the desired date and time range;
 - by recording duration;
 - by status (Transcribed, Not transcribed, All) and access (Full access, All).
Recognized conferences are distinguished by the presence of an icon  and a button Open for accessing the transcript text and downloading the audio of the corresponding conference. While the transcription is in progress, an icon
  and a label Added to queue are displayed. If the event has not yet been transcribed, you will instead see a button to start recognition with a language selection option
  (available if it has not been initiated yet).
To download the transcript text, click the  button. You can select the export format for the transcript: as a csv table, a txt text file, or a pdf document. Additionally, you can download the transcript as an archive with the original conference audio recording included.
You can delete the transcript by clicking  . This will remove both the transcription and the original corresponding conference audio track.
When the ![]() button is clicked, the conference owner will see the access management window, where they can add new users and assign read or full access rights to the recording for individual users.
button is clicked, the conference owner will see the access management window, where they can add new users and assign read or full access rights to the recording for individual users.
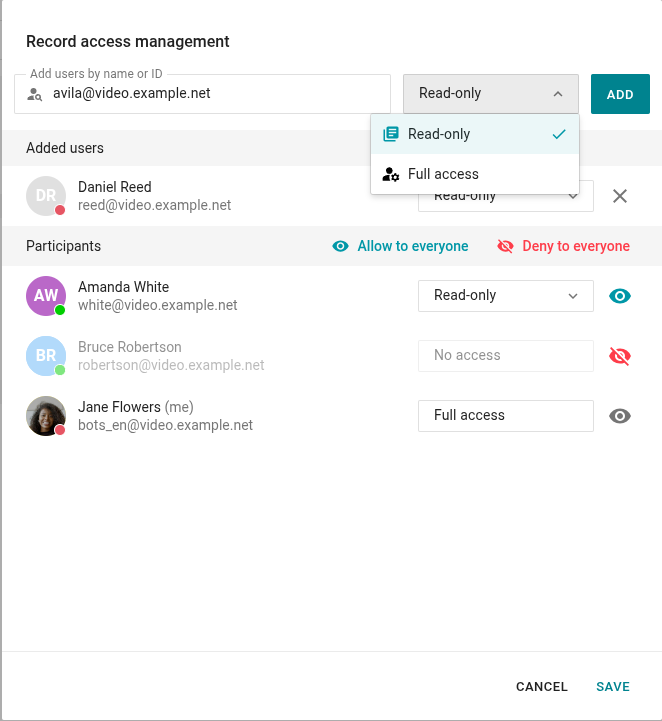
To add a user, enter their name or ID in the Add users by name or ID field, then select the access type (Read-only or Full access) from the dropdown list and click the Add button. The user will appear in the Added users list. If you need to remove the added user, click on  .
.
Access management to the recording among event participants is handled in the Participants list. For quick management, use the Allow to everyone button to grant access to all participants and the Deny to everyone button to restrict access to all participants except for the event owner (yourself).
For more flexible management, use the dropdown list to grant either full access or read-only access. Clicking the  button will completely revoke the participant's access, while clicking
  will reopen access with read-only permissions. You can then grant full access to the participant using the dropdown list.