Personal area
Personal Area
Personal area is a server-hosted web page designed for scheduling conferences or editing personal data or the address book.
Unlike the control panel which is accessible only to the administrator, this web page is available to every user.
The complete list of features available to the user in the personal area depends on the permissions configured by the administrator and the integration with external solutions (such as an AI server). This guide displays all features, and if you notice any missing, please contact your administrator for clarification.
The personal area supports a dark theme which will be used if the corresponding option is activated in your browser.
How to Log In
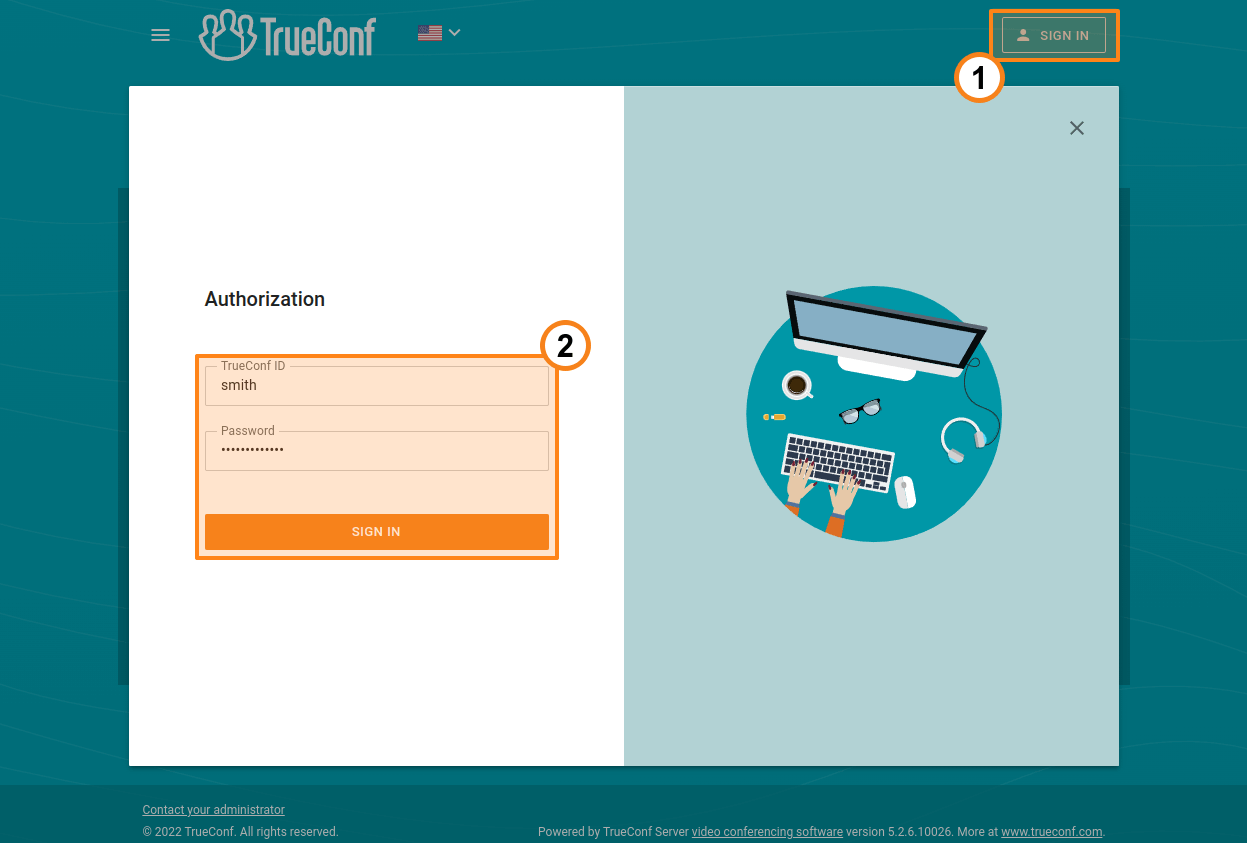
On the server's guest page, click the Sign in button in the upper right corner. Use your username and password to log in.
You can request the administrator to provide access credentials for the guest page.
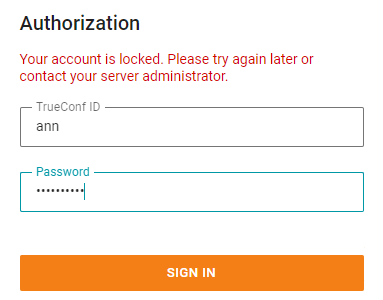
On the TrueConf Server side, a lockout can be configured for incorrect login attempts.
Authentication in the client application and in the personal area can be blocked after multiple failed attempts to enter the password. The maximum number of failed attempts and the lockout period will be determined by the administrator. If you want your user account to be unlocked manually before the lockout period expires, please contact the server administrator.
Main Page
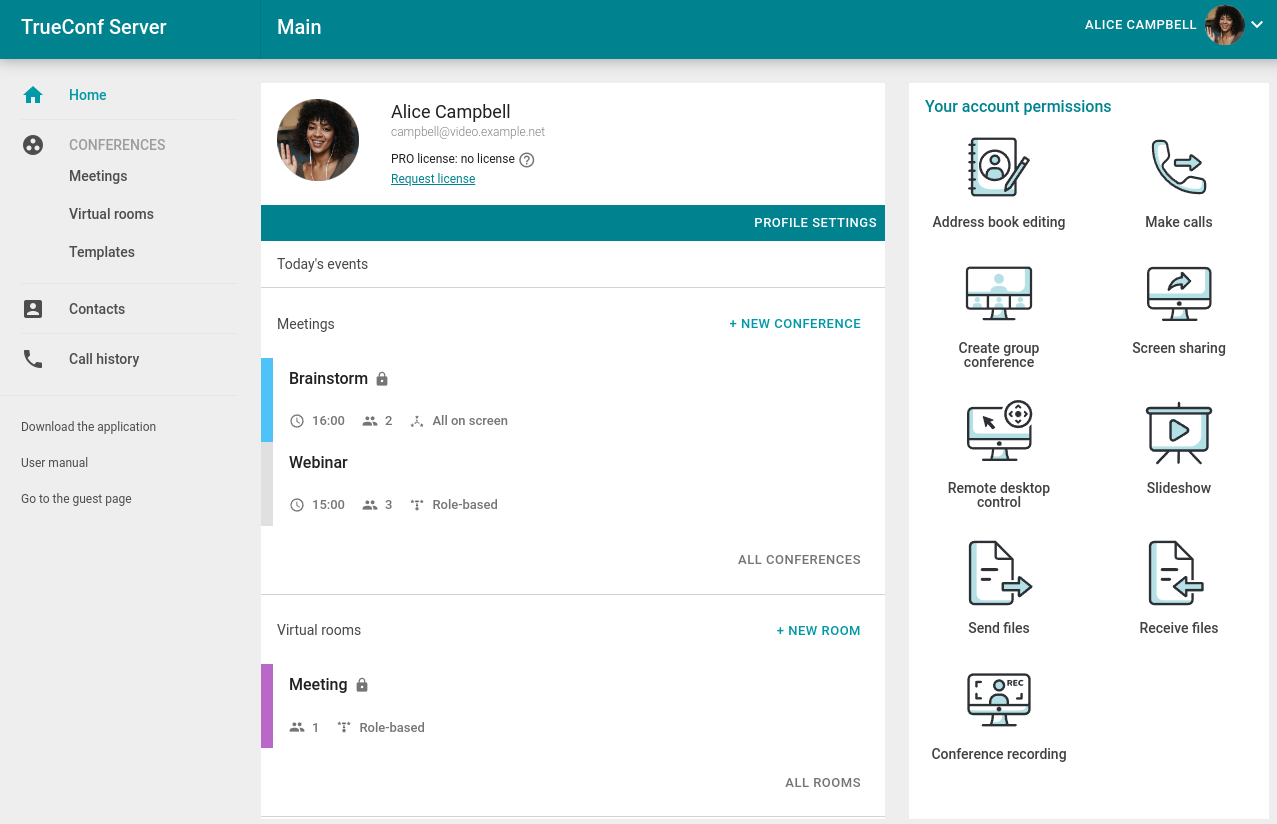
Once you have signed in, you will see a list of conferences scheduled for today and virtual rooms (up to 5) below on the main page.
In the personal area, you can see only the conferences in which you are involved as a participant/owner.
Events created "on-the-fly" in the TrueConf client application, such as in the Conferences → Meet now menu for TrueConf for Windows, do not appear in these lists.
By integrating with TrueConf Calendar Connector, users can create standalone events that are not tied to conferences. To create an event, click the Create button. On the event creation page, select the calendar to synchronize this event with from the dropdown list (if only one calendar is available, the dropdown list will be inactive).
Delete the conference (created by default) and configure the event settings in the General tab, and select participants in the Participants tab. Then click the Create button in the bottom right corner. The event you created will appear in the calendar.
License Information
Participation in conferences hosted on your server is determined by separate PRO licenses. If you do not have such a license, you will not be able to join an event as a participant, owner or moderator.
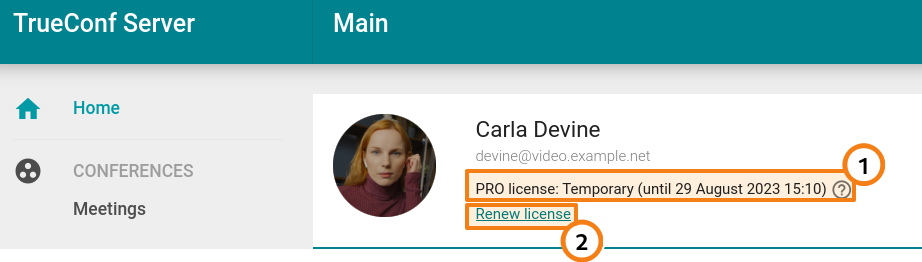
Information about your PRO license will be displayed on the main page of the personal area right below your name (and in the notification at the bottom of the page):
License information:
If you have a permanent PRO license, in addition to the title, you will also see the help button with additional information.
If you have a temporary PRO license, you will see its expiry period and the help button with additional information.
2. Renew a temporary license manually for 24 hours.
If the license is not given, the corresponding text hint will be displayed below your name:
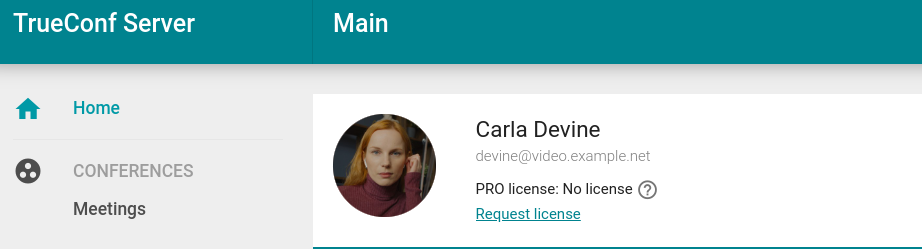
The display of PRO license information and the ability to renew it may be disabled by the administrator of your TrueConf Server. This means that your administrator fully manages license distribution, and if you are unable to participate in a conference, you should contact them directly.
Events List
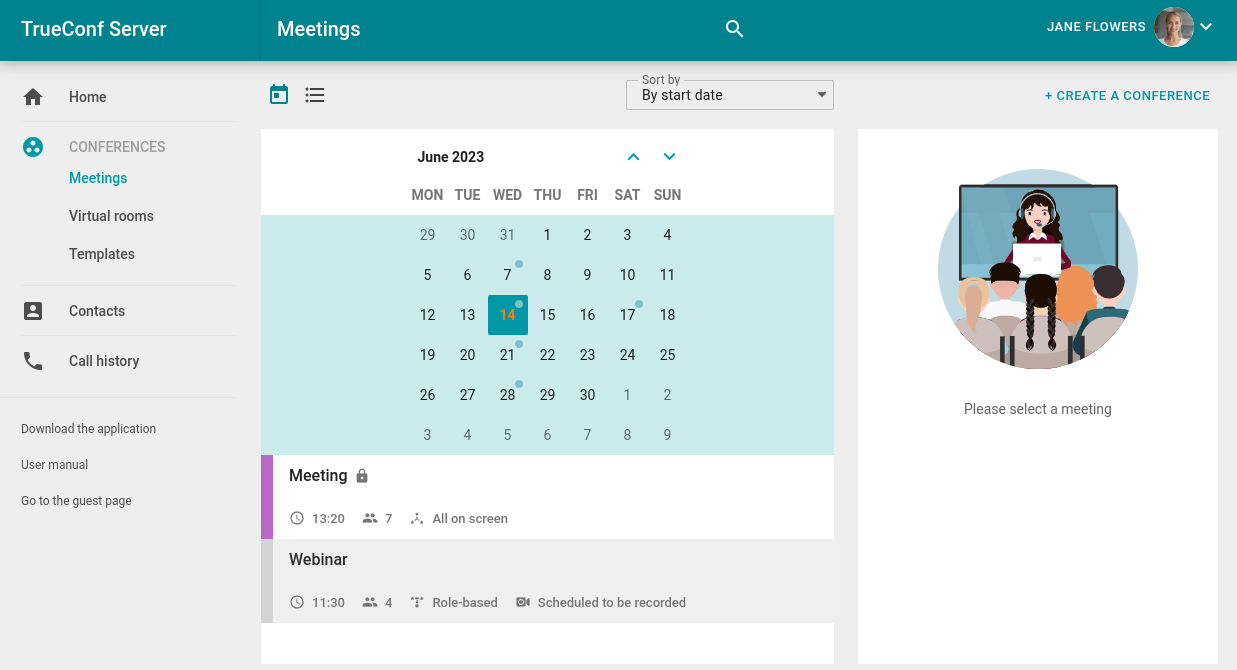
Full lists of conferences are displayed in sections Meetings and Virtual rooms.
Click on a conference to check its details. The sidebar on the right will include general information about the meeting and control buttons. You can export a scheduled conference to your Google Calendar, Outlook, etc.
In the card of the selected conference, you can find:
Number of invited participants
- Conference ID ;
PIN code (if it was set)
Owner
Access type (private or public)
mode;
Location (if specified)
Information about the current access status (displayed if the meeting is now locked)
Conference URL
A text hint indicating that the video recording of this conference will be saved on the server (displayed only if recording was enabled when the conference was scheduled).
In section Meetings, a calendar is displayed above the list of conferences. Select a date to view the list of conferences scheduled for that day.
Conferences scheduled for today are displayed on the main page.
Use the  and
and  buttons at the top to switch between the calendar and the list of all scheduled conferences.
Profile Settings
To change your account information and the language of your personal area interface, click on your avatar in the top right corner and select Profile settings.
On the Personal data tab, you can upload an avatar or take a photo using the webcam. You can also edit your personal information if it is permitted in the server settings.
You may need to give the browser access to your webcam to take a photo.
In the Email and password tab, you can change your email and password (if permitted by the server settings). When changing this information, you will need to provide your old password.
Language settings can be changed in the Other settings tab.
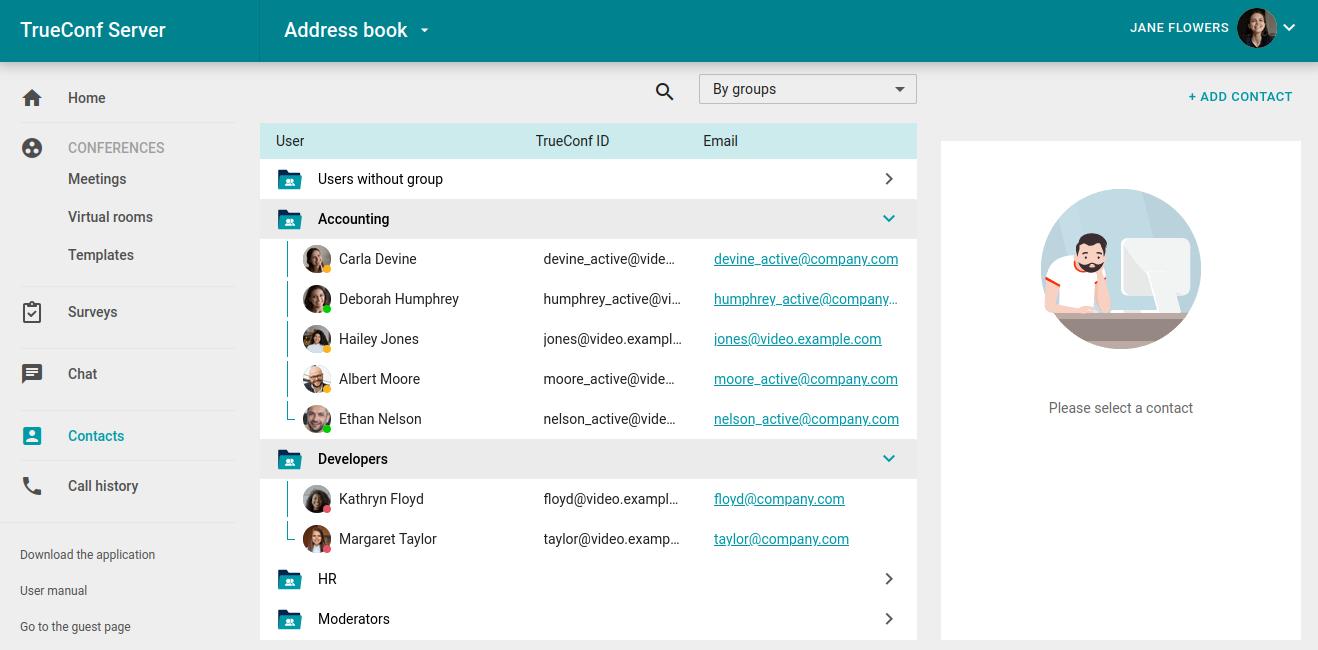
Address Book
To view and edit the address book, go to section Contacts. You can choose between a group view or a continuous list.
You can select any contact and either call them or send a chat message. To connect with a subscriber, you will need the client application, which can be downloaded via the link Download the application in the personal area menu.
You will be able to edit the address book only if this right is given to you by the administrator.
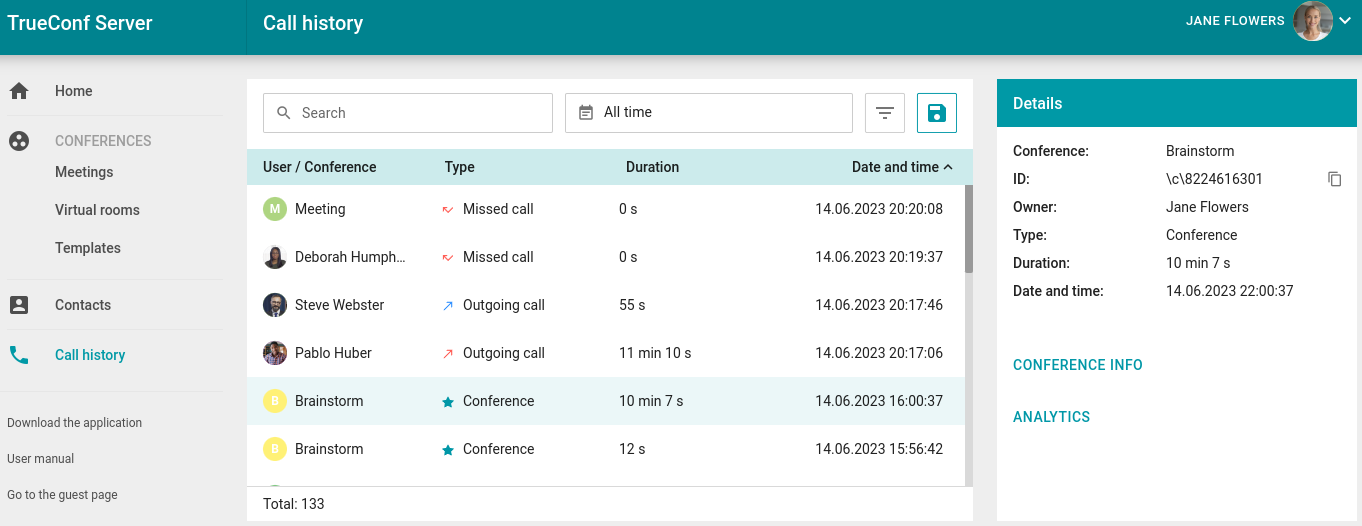
Call History
You can view the history of incoming or outgoing calls, including conference invitations. Go to the Call history section of the personal area. If you select a meeting from the list, the main information about this event will be displayed. In case you are the owner of the selected conference, you will be able to access the card providing more detailed information about it:
Chats (Beta Version)
The personal area also offers basic chat features:
View the list of all available chats
Create private and group chats
Open any existing chat
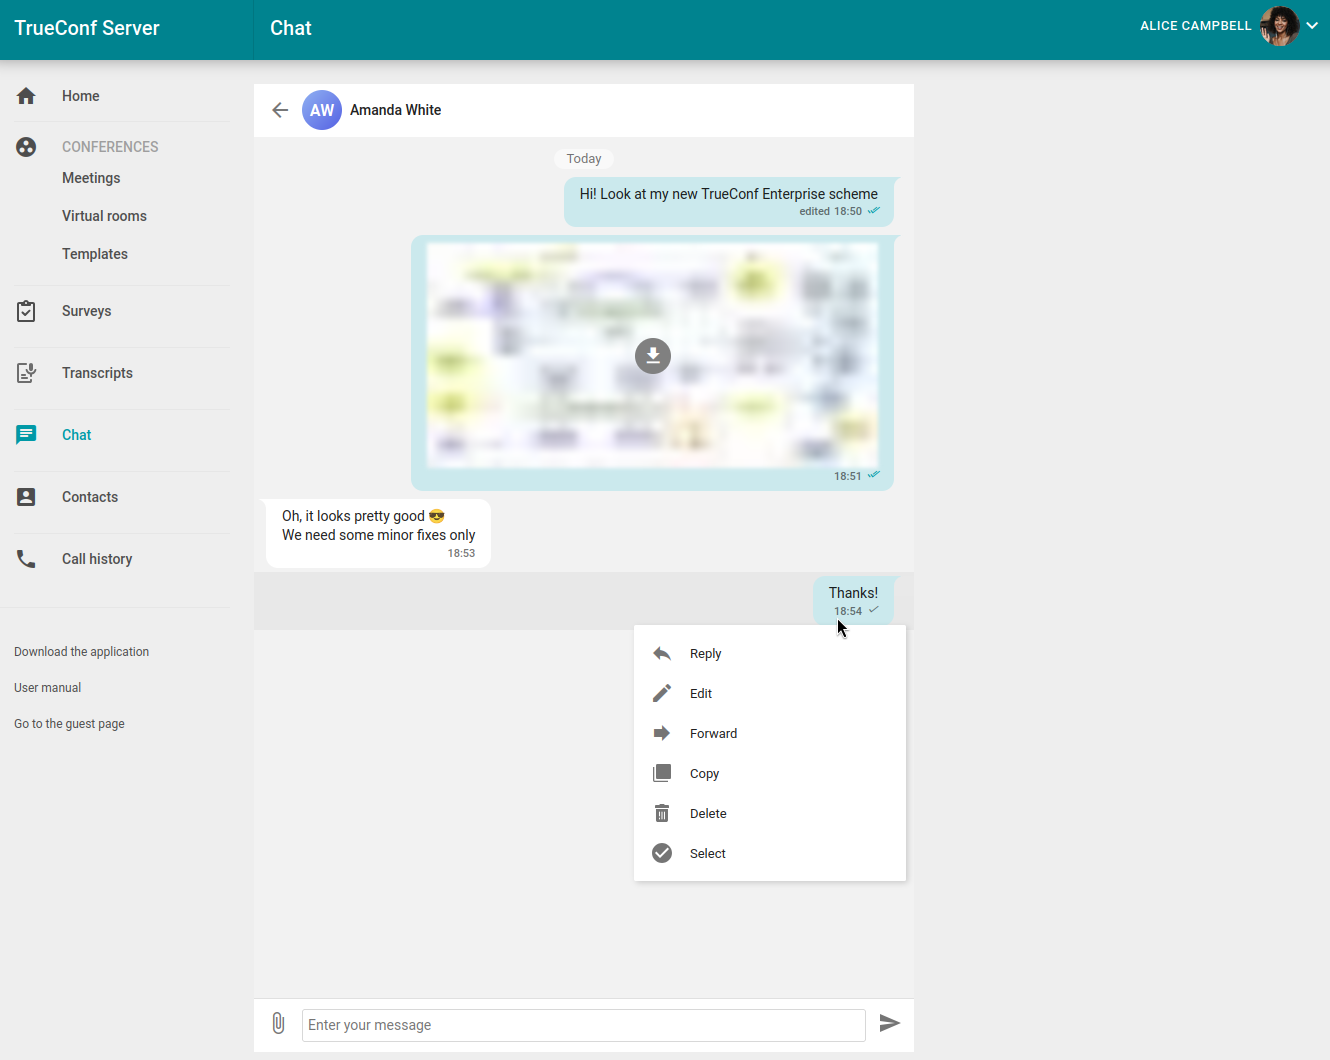
Send text messages and files
Basic actions with messages: forwarding, editing, replying, deleting
Download files and view images with the built-in viewer.
To use all chat features, you need to have TrueConf client application, but the chat in the personal area allows you to quickly view and reply to messages in the browser if you don't have the application at hand due to some reason.
When you go to the Chats section, you will have an online status for other users, even if you are not logged into client applications.
Important note for the administrator: A user who is authenticated in the personal area takes one online license even if he/she is not authenticated in client applications.
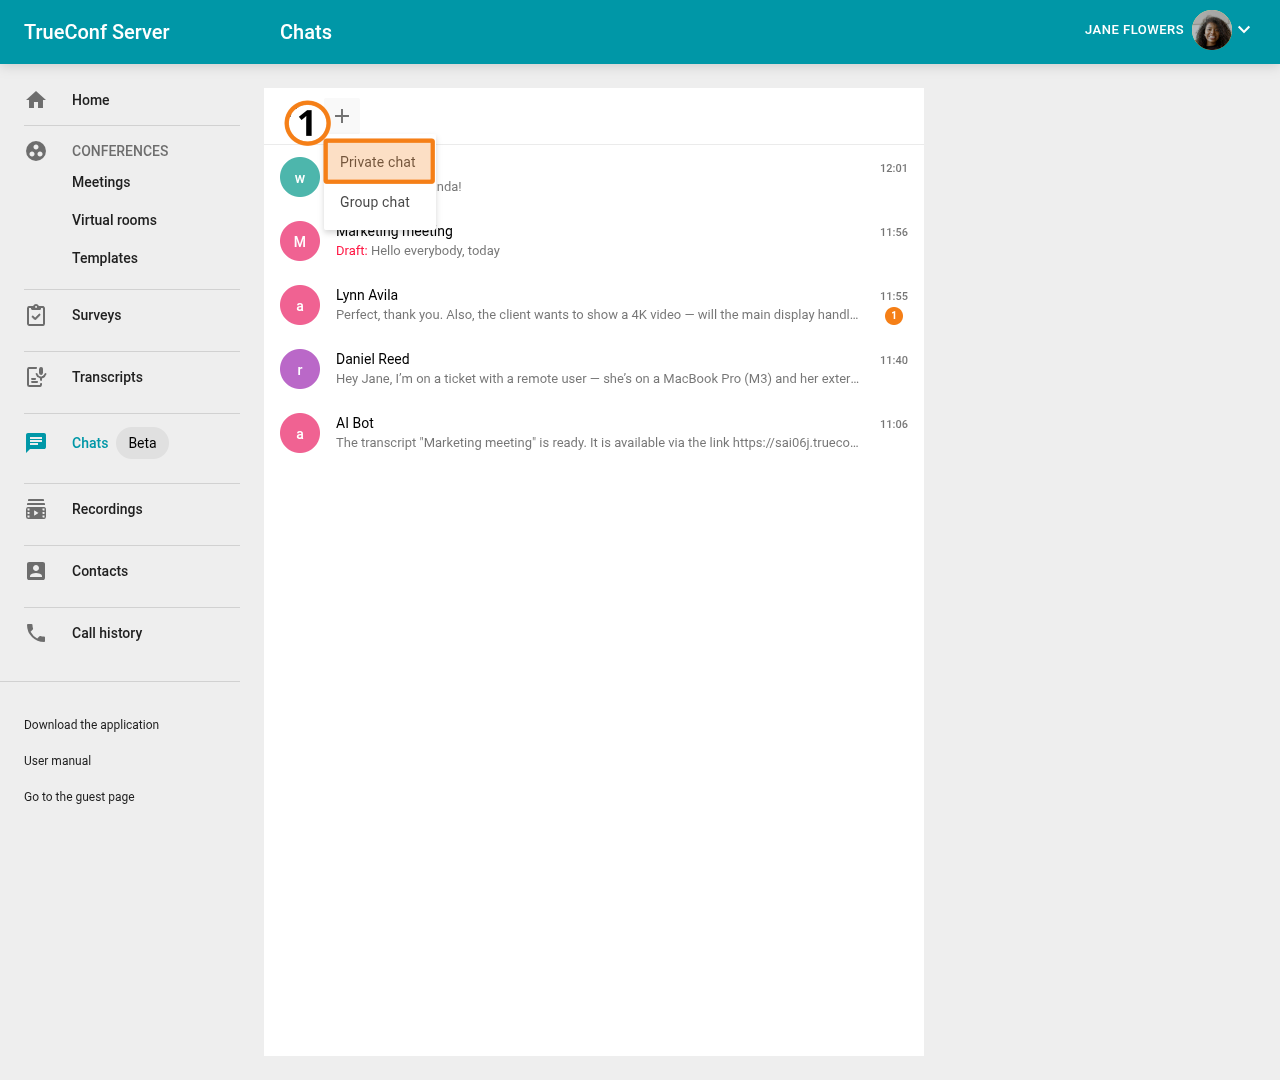
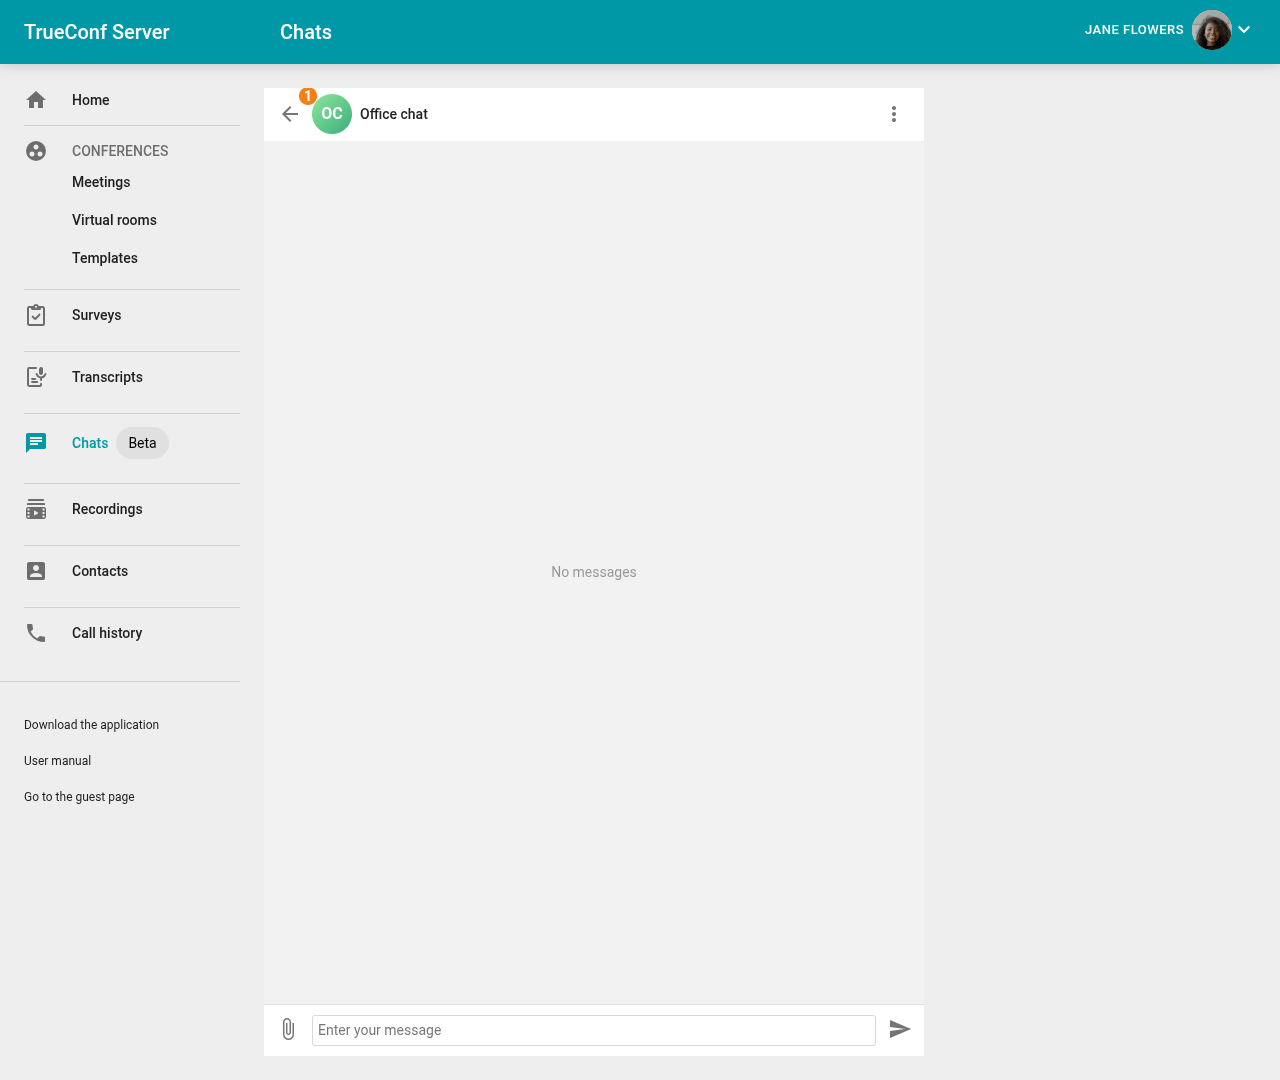
Go to the Chats tab to see a list of all your chats:

To open any of the chats, click on it in the general list:
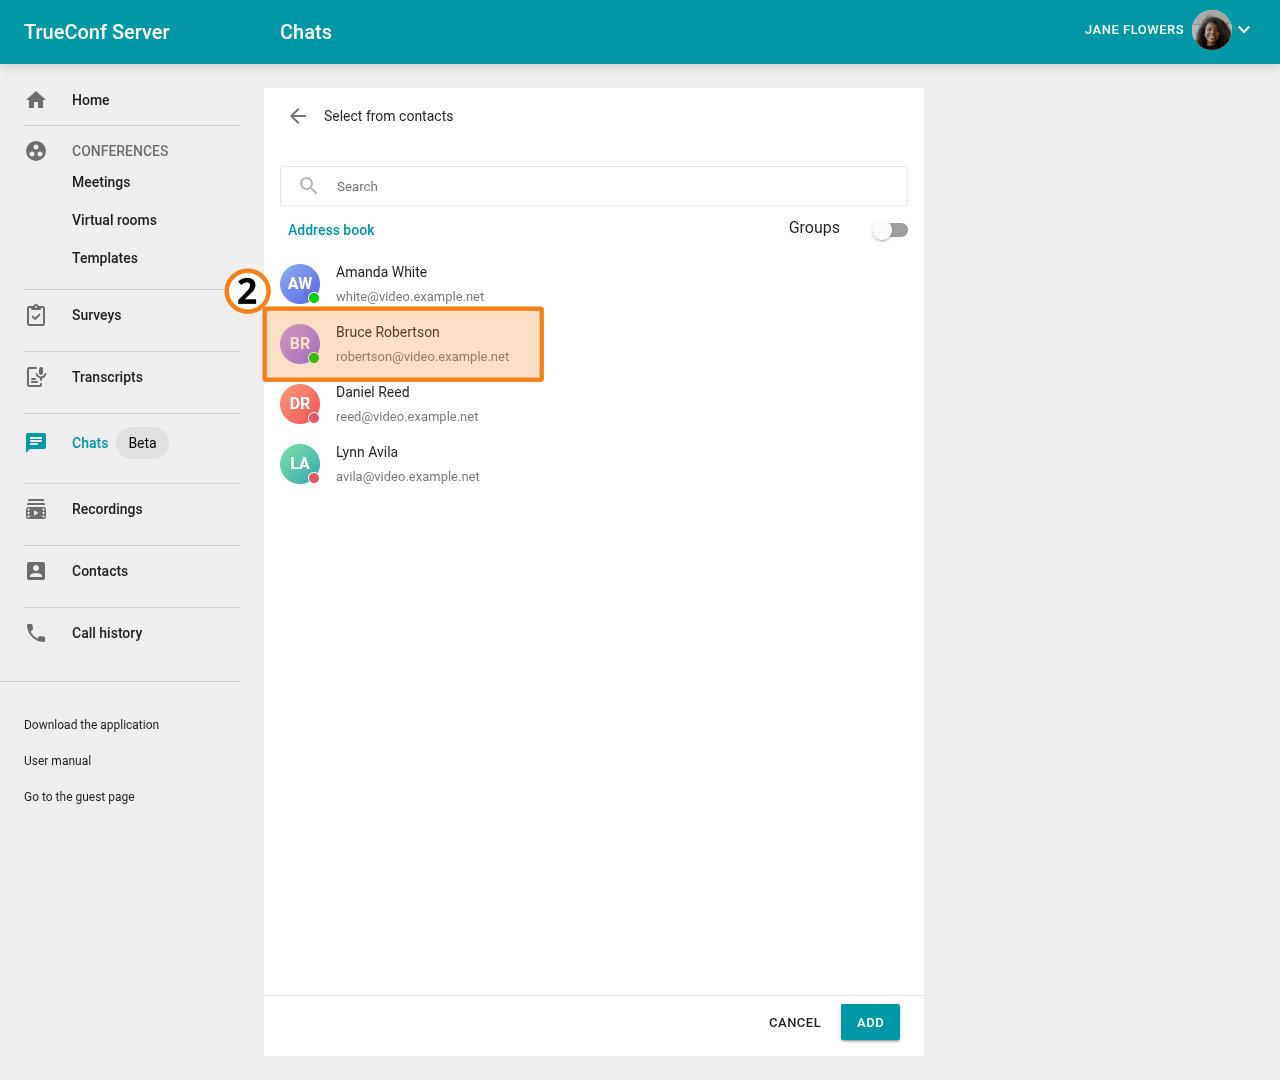
To create a personal chat, click the ![]() button at the top of the chat list and select Private chat. Then choose a contact from the list with whom you want to start a conversation and click Add.
button at the top of the chat list and select Private chat. Then choose a contact from the list with whom you want to start a conversation and click Add.
In the chat that opens, you can send messages and files to your contact. To create a group chat, click the same button ![]() and select Group chat.
and select Group chat.
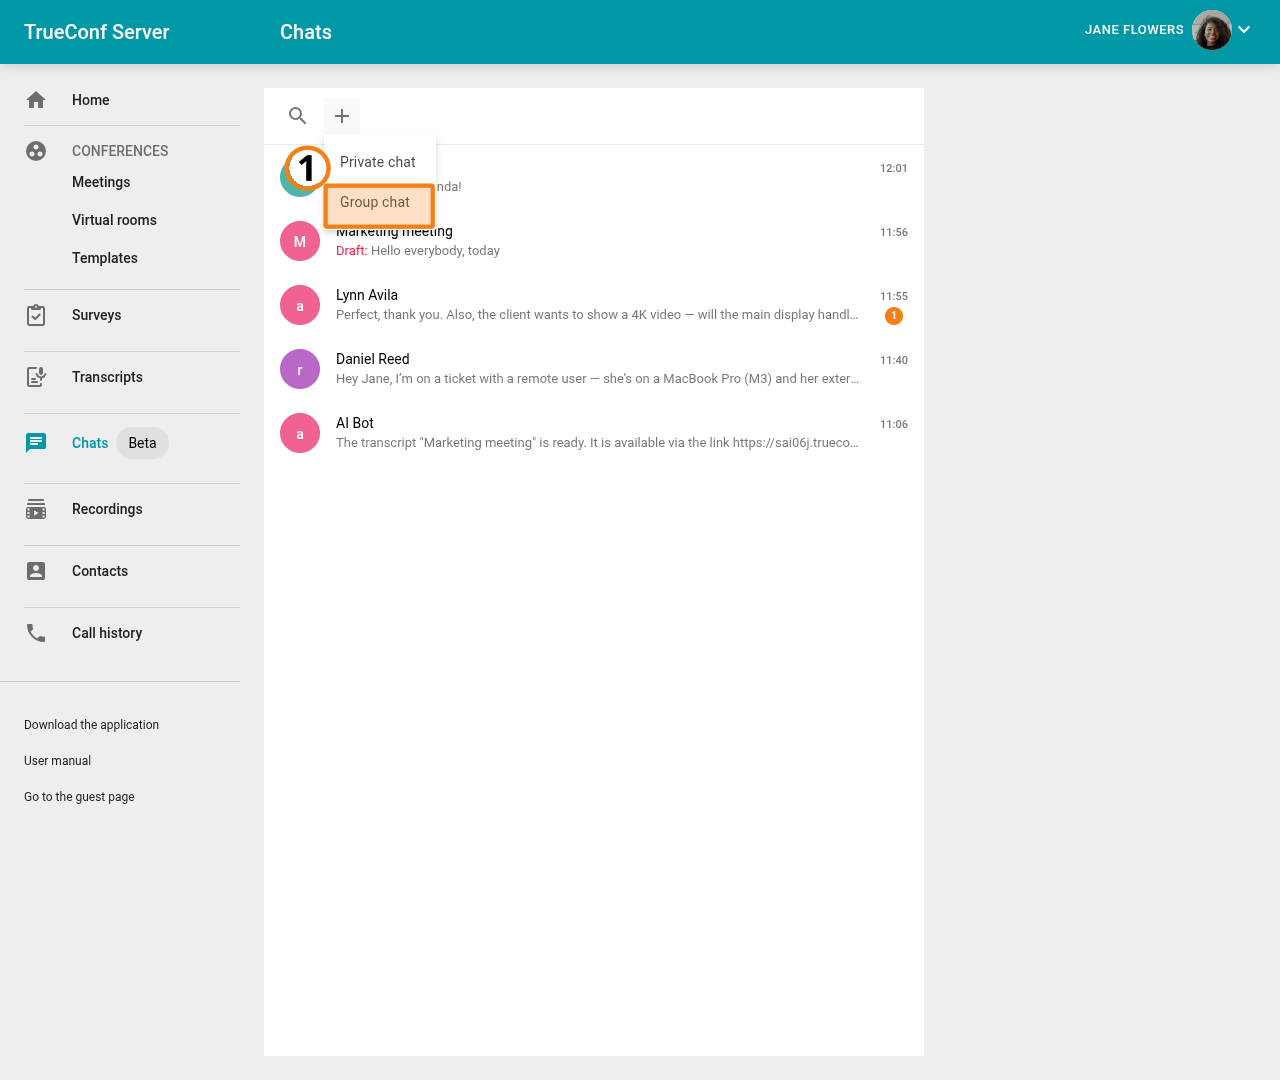
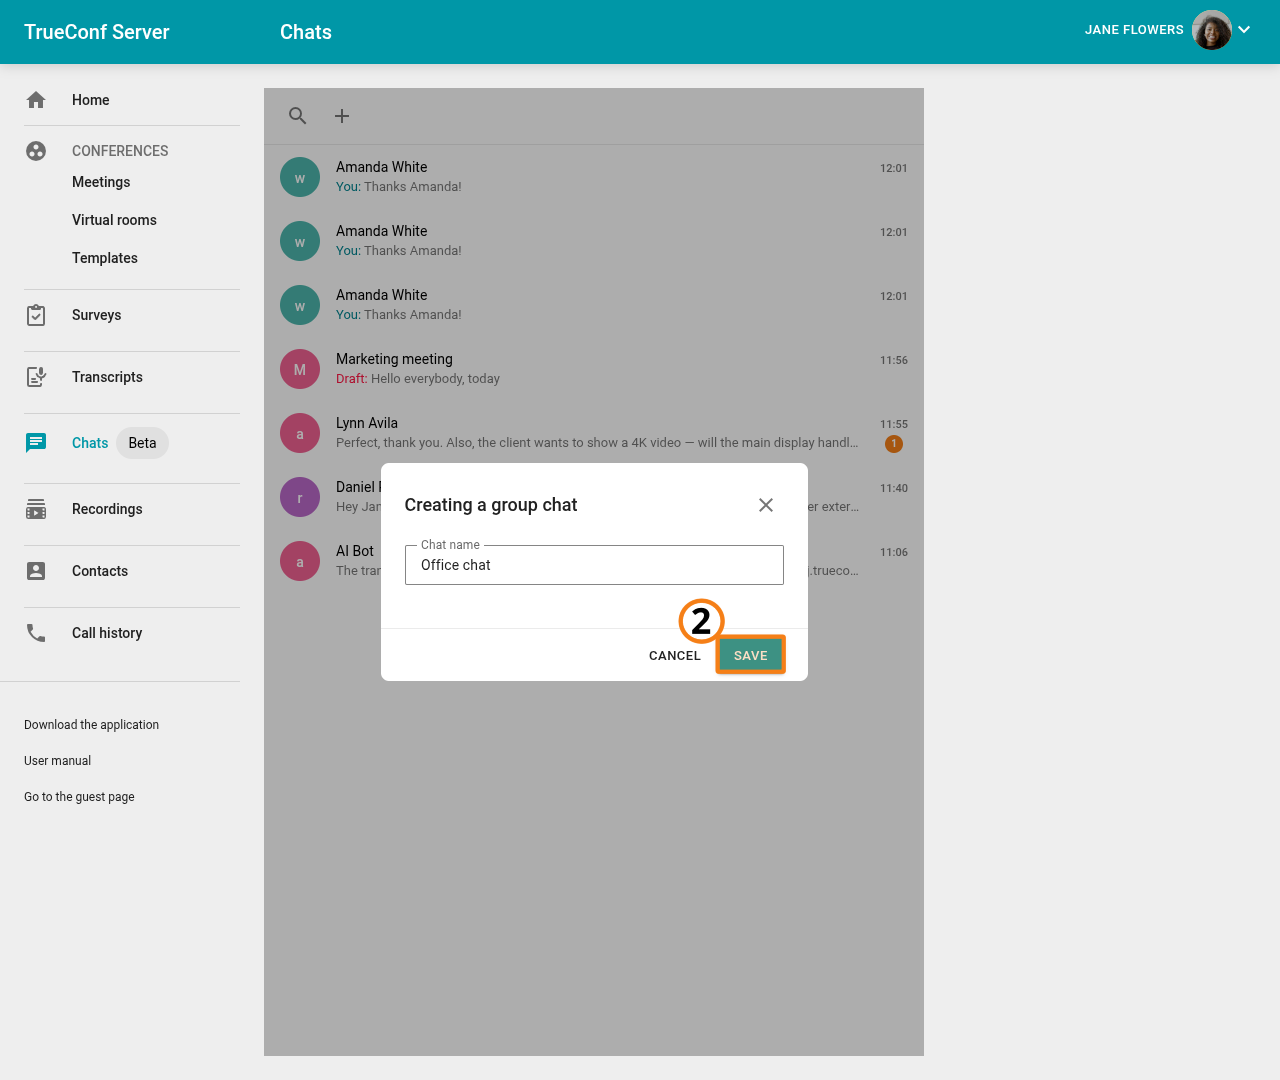
Specify the name of the group chat and click Save, then add new participants.
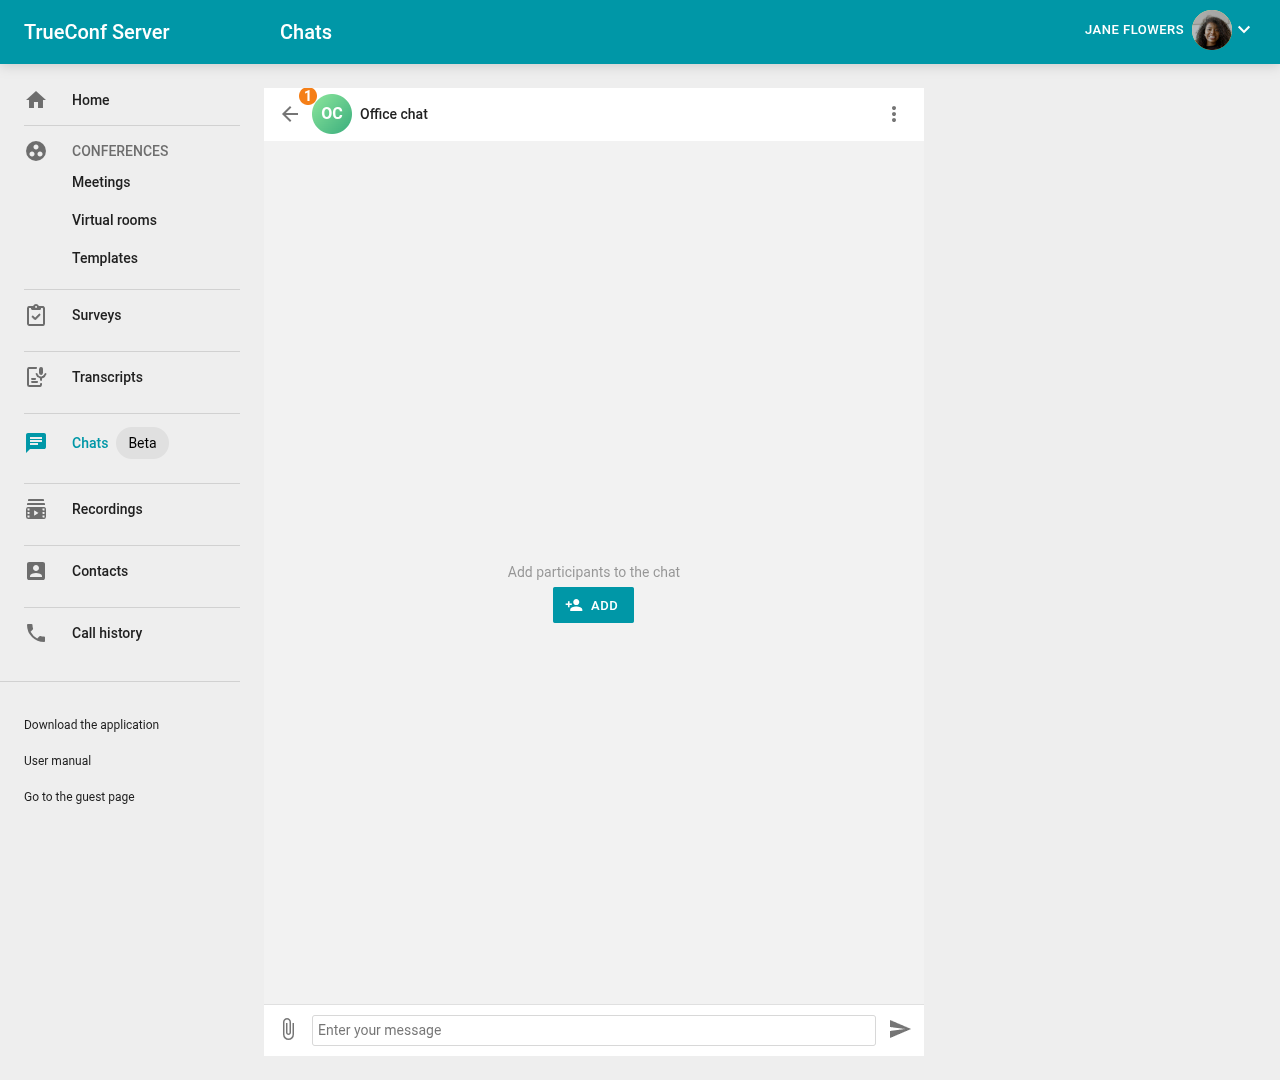
To do this, you can click the Add button in the chat field, or click ![]() and select the Add participants to the chat option.
and select the Add participants to the chat option.
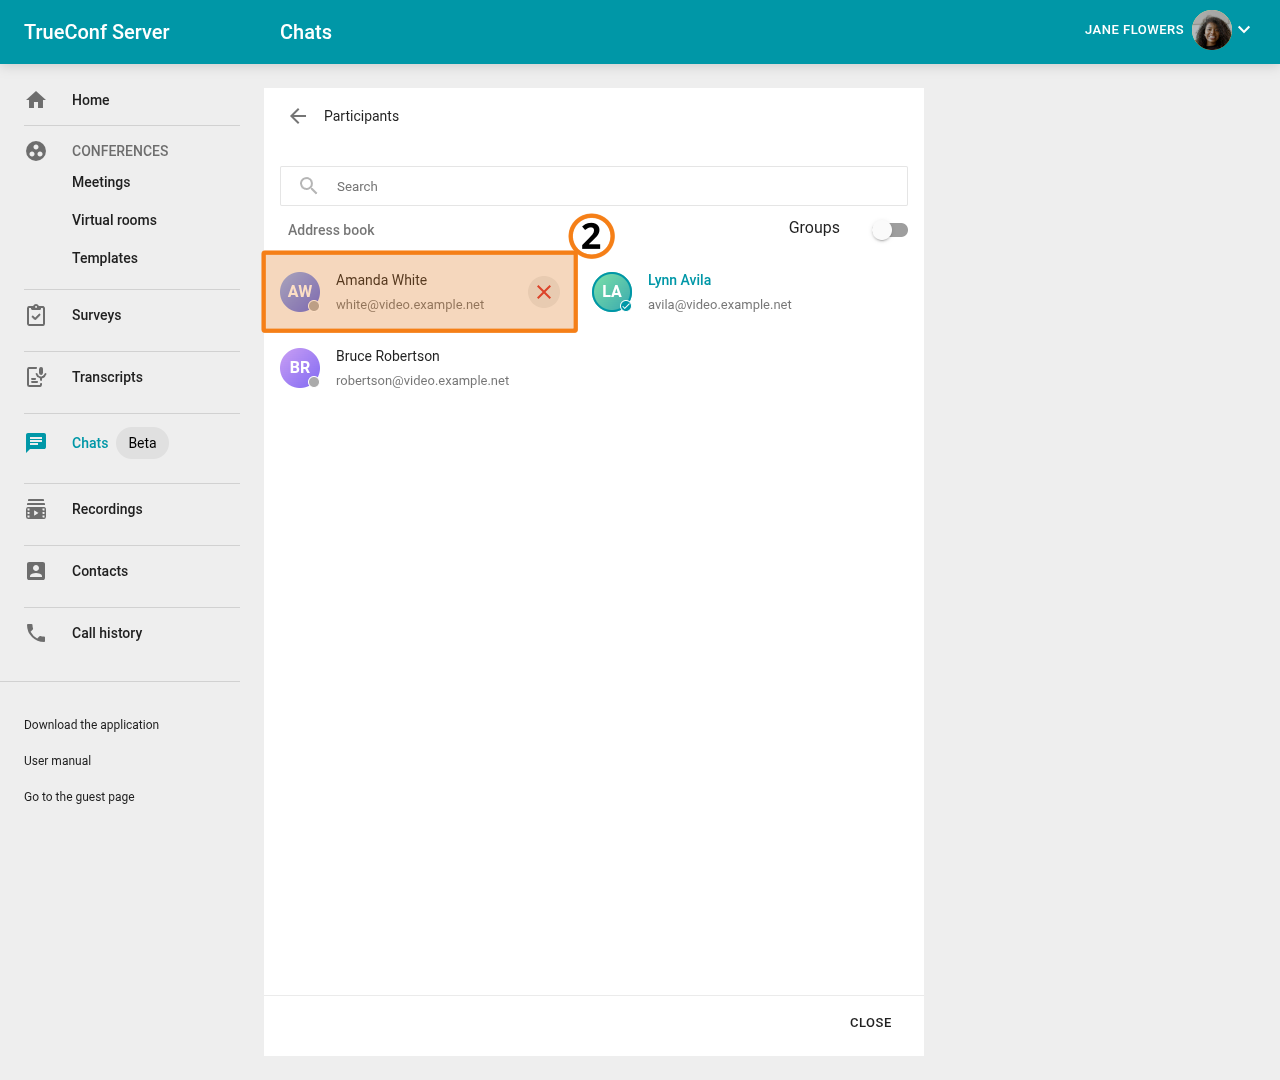
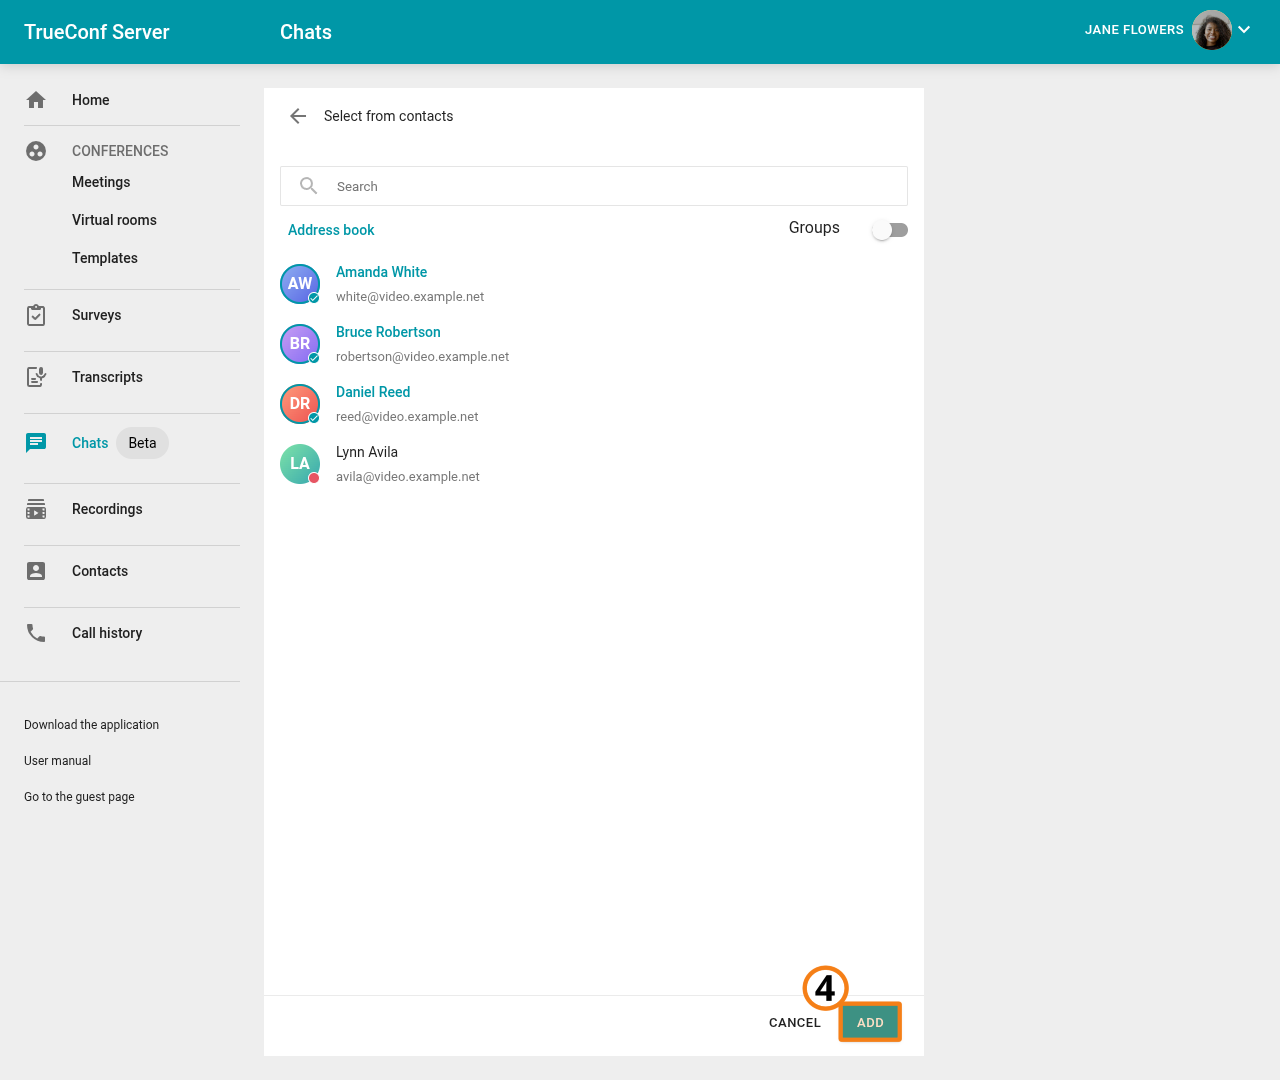
In the opened contact list, select users to add to the group chat and click Add.
In the opened group chat, you can send messages and files to all participants.
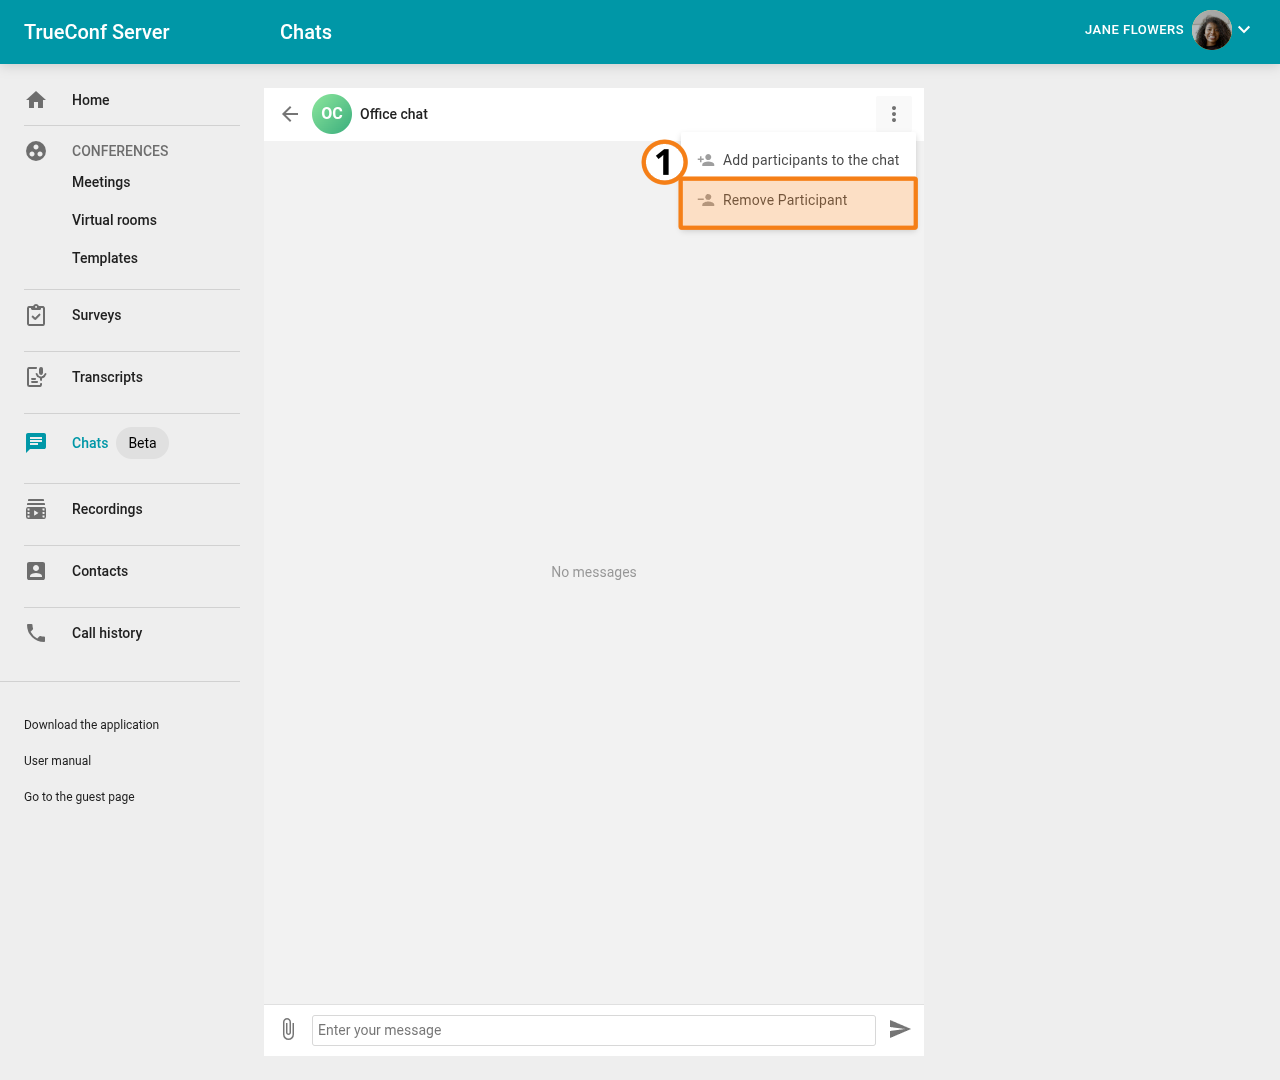
If you need to remove a participant from a group chat, click on ![]() and select Remove participant.
and select Remove participant.
Next, select the participant you want to remove from the group chat and click ![]() next to their name.
next to their name.