Call management via web interface
Call management via web interface
To access the call log and active video conferencing session settings, go to the Conference tab.
Depending on the parameters of the network that is used to connect the endpoint to your device, the video from your camera, as well as conference feed may be delayed.
If the image from the PTZ camera displayed on the control panel moves jerkily or the layout changes with a delay, it doesn't necessarily indicate a system malfunction. Most likely, everything is functioning correctly on the screens of the devices participating in the conference.
Previews in the web interface are displayed at no more than 5 frames per second to reduce the load on network resources.
Changing Devices
During a session, you can switch the device that sends video to the video layout from TrueConf Group "on the fly." To do this, go to the Conference → My camera tab and select a video capture device from the Primary camera drop-down list. You can choose another webcam connected to the terminal or one of the capture card inputs. It is also possible to change the device by switching angles.
To change the microphone or speakers used by the terminal, go to section Settings → Devices → Audio and select the desired devices.
Screen Remote Control
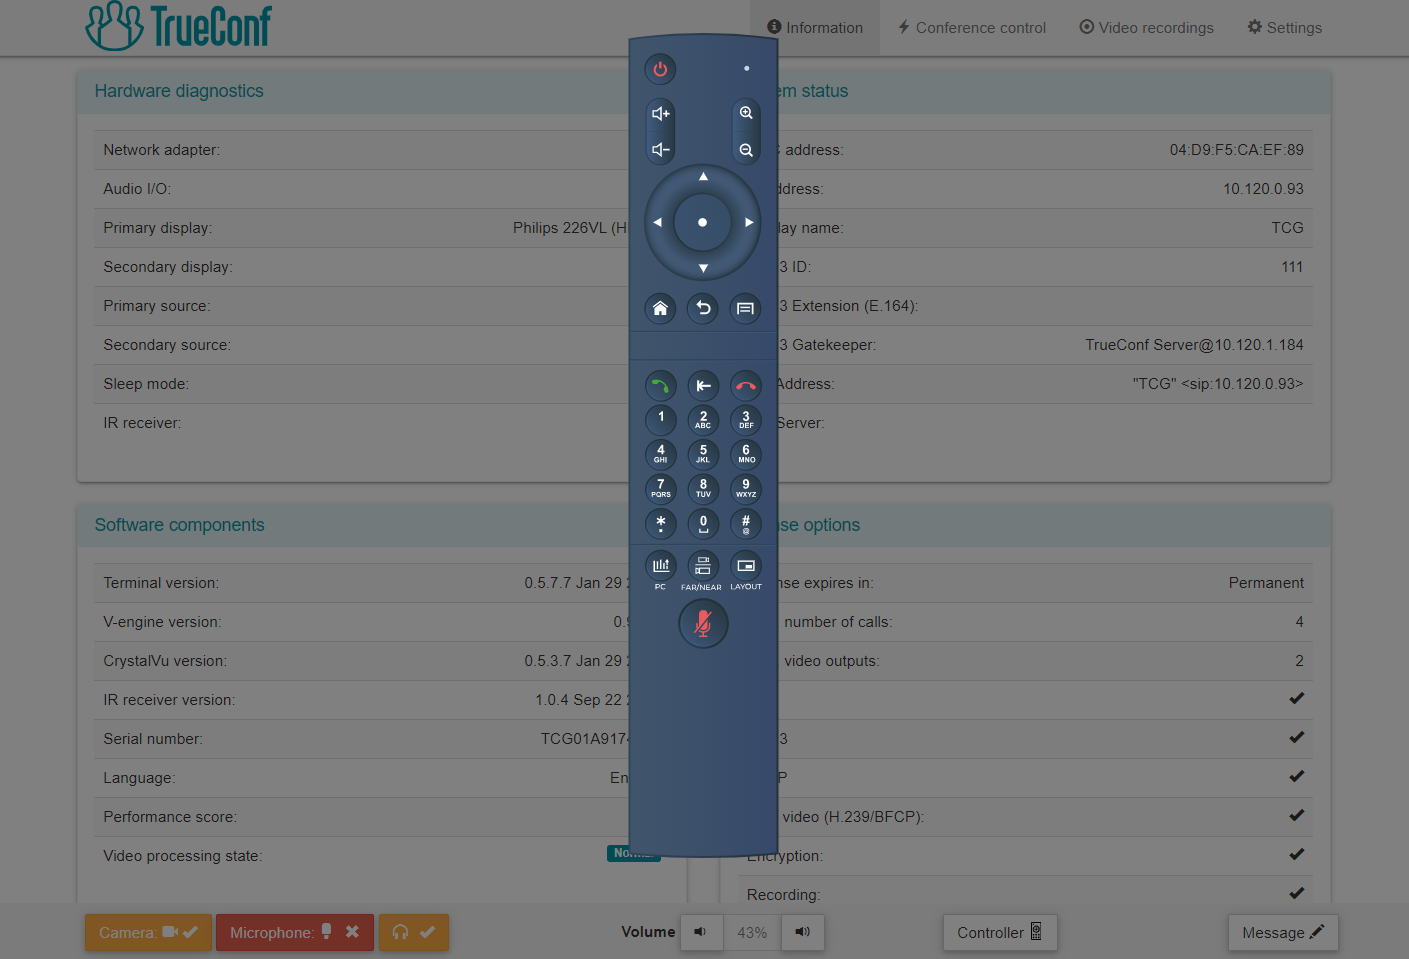
You can find a remote control emulation in the control panel, which can be useful (e.g. when entering the control panel from the mobile device).
To open the on-screen control panel, press the  button on the conference equipment control panel in the Conference section. Manage all functions similar to the actual control panel as described in the section "Managing TrueConf Group Terminal":
Camera Settings
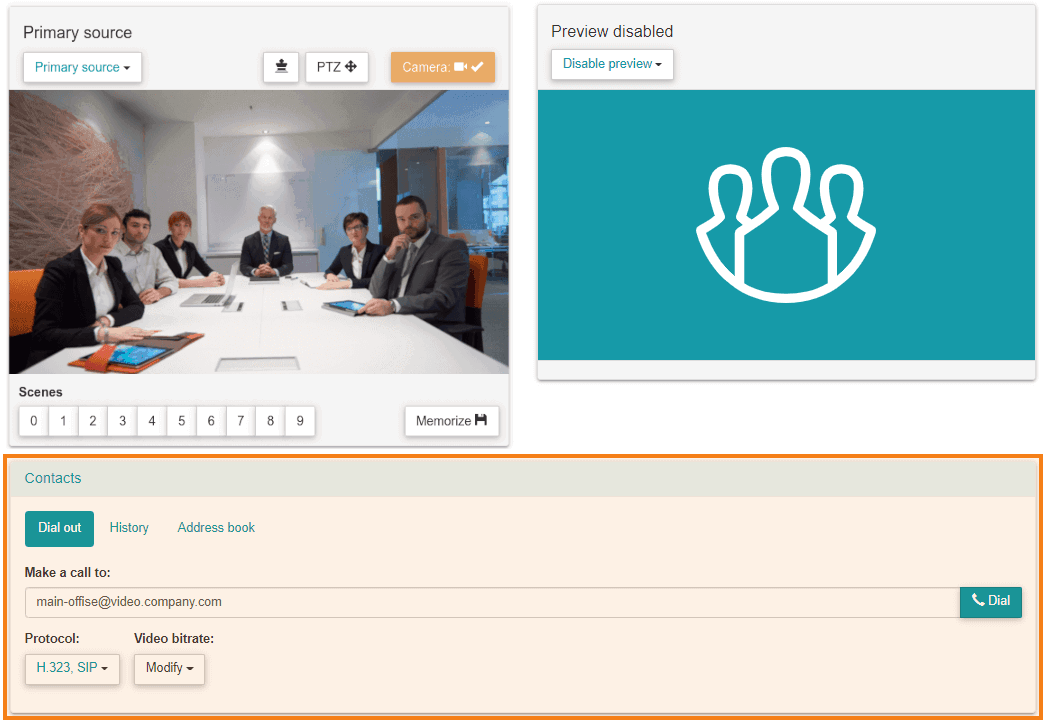
There are two blocks for displaying feeds at the top of the page:
In each of them, you can select the type of content to display:
- My camera - View the image from the camera connected to TrueConf Group (self-view). Control of the camera will be available (for compatible PTZ cameras). You can select your camera as the priority window in the video layout by clicking
 ;
; - Content – preview of the content prepared for demonstration. The presentation can be set as a priority window in the video layout by clicking ;
- Primary display - display of the video layout on the terminal's connected display and control of video transmission from the terminal's camera;
- Conference layout – choose the current video layout and manage mixing settings for a group conference (available only when the MCU feature is activated; if MCU is not used, the conference layout will display video from the connected camera);
- Participant – display video from the selected participant and control their PTZ camera.
If necessary, you can hide the video window in the web interface by clicking on  . However, the window will still appear in the video layout.
PTZ Camera Control
Connected to the terminal camera
Additionally, in this section, you can control the PTZ camera connected to the terminal and set presets for it.
Select the PTZ camera from the dropdown list Primary camera.
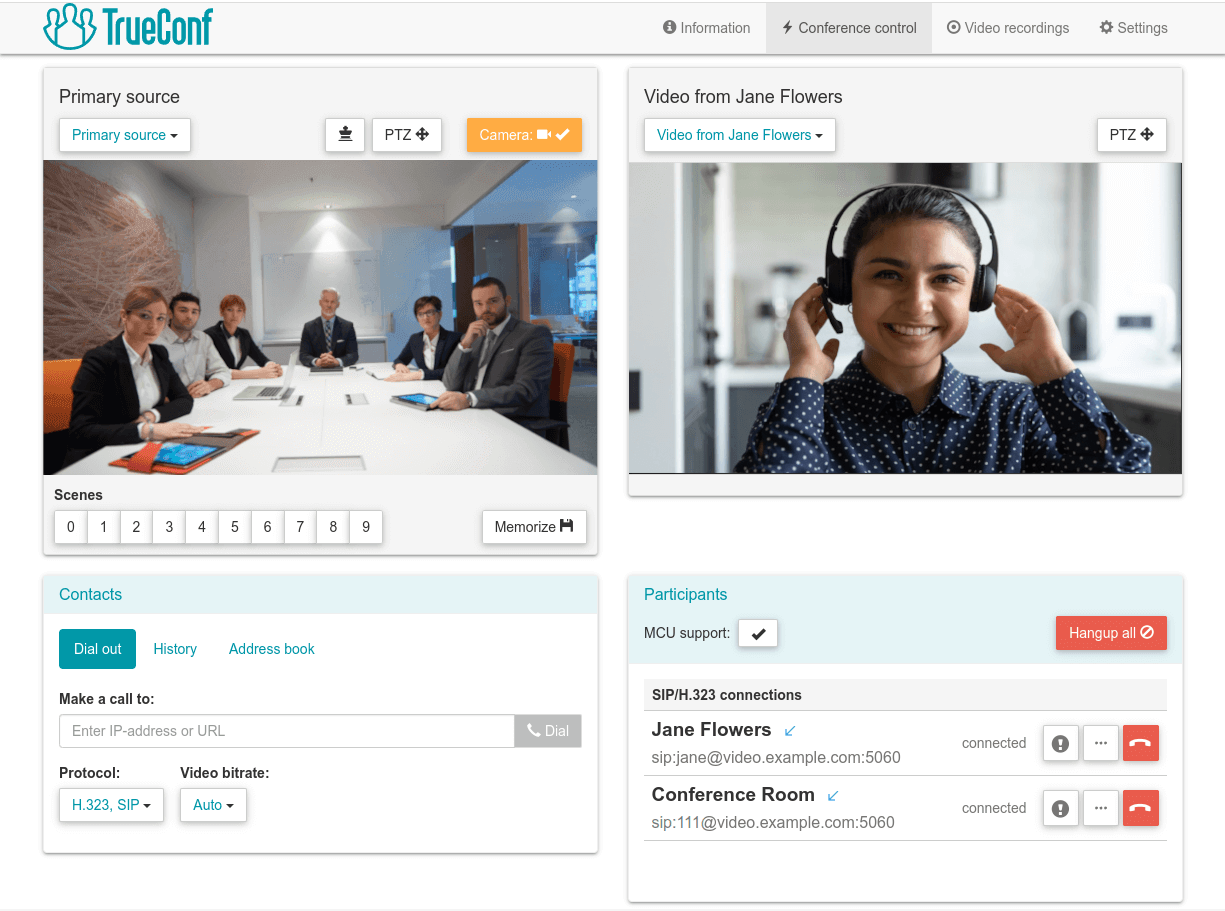
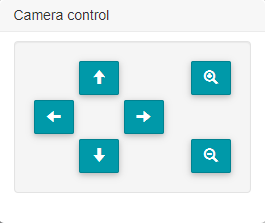
Press the camera control button
 .
.The control panel will open, where you can use the appropriate buttons to adjust the camera position and zoom, for example:
To control the PTZ camera, make sure to select the correct method in the Settings → Devices → Camera menu of the terminal or its web interface.
To use saved camera positions during a video session, do the following:
In this section, to the right of the dropdown list Primary camera, click Select
In the newly opened window, select a view by clicking on it.
To learn how to set numbered presets for PTZ cameras, refer to the "Preparing for Conferences" section.
Remote participant's camera
In the Conference tab, navigate to the Participant screen, select a user from the dropdown list, and click . After that, manage it as described above. Saving presets for remote PTZ cameras is not available.
Calling a subscriber
To call a subscriber, including adding them to an ongoing group conference, enter their IP address and URL in block Connect a participant, select the protocol, and click the Call button. In block Participants, you can add participants from the address book.
Calls via https-links in the format https://server_address/c/conference_id are supported, for example, https://video.example.com/c/65184454.
On the right is an area with contact lists from the address book. Select the desired contact and click  . You can also call a contact by dragging them from the contact list into the Participants section using Drag-n-Drop.
Content Sharing
The terminal allows you to view presentation materials outside of a video communication session. During a video communication session, you can choose from two behavior options:
Transmit via button - a new video window with a preview of the selected content will appear on the terminal screen for confirmation;
Transmit upon connection - the content demonstration in the conference starts immediately.
- transmitting content from devices connected via HDMI cable (available in select configurations);
display from an external USB drive and internal storage of images in PNG, JPG, TIFF formats, PDF documents, MKV, MP4, TS videos;
displaying content from a second webcam connected to the terminal. For example, if a USB PTZ camera is used to stream video from a meeting room, and you have connected a laptop via an HDMI capture card for content capture;
transmitting an NDI stream available on the local network (automatically detected);
RTSP or VNC stream demonstration - configured streams are displayed in the list.
To transmit RTSP or VNC streams, you must first add them to the address book as demonstrated in the operator's guide, and then create a device in section Settings → Devices → Device management.
To stream a PDF document, image, video file or HDMI content to the conference:
In the list, above one of the image display blocks, select the option Content.
In the list that appears Content source, specify the content source:
To select a file previously uploaded to the terminal, choose item Uploaded files from the list.
To upload a new file, click the Upload button.
To stream content from a source connected to the capture card, select one of the HDMI inputs.
to transmit an RTSP or VNC stream, select the appropriate option from the drop-down list Content source (it is generated from the list of allowed devices);
To transmit an available NDI stream over the network, select it from the list that will be generated automatically.
To display content from an additional camera, select it from the list.
If multiple cameras are connected, you can specify which one to use for video transmission during configuring capture devices. You will then be able to select any of the remaining cameras for content sharing.
Now you can start sharing the selected content with your participants by clicking the Start sharing button. If the option to send the presentation upon connecting a source was selected in the call settings, the sharing will begin immediately after selecting the content.
To zoom in on the transmitted image or document and navigate through it, click the button in the preview window. In the opened control panel, you will be able to zoom and move the image using the respective buttons.
Switching video layouts
In group conference mode, you can manage the video layout of its participants. To do this, in the output block, select the Primary display or Conference layout tab, then choose the desired layout scheme from the Layout type dropdown list.
Managing Mixing Parameters
When using the MCU function, you can adjust video stream mixing parameters "on the fly" during a video call. To do this, select the Conference layout tab in one of the image output blocks. A MCU settings button will appear at the top of the block, allowing you to:
enable MCU usage;
manage the display of volume indicators in participants' video windows;
change mixing mode:
- Video lecture;
- All on screen;
- Voice activity detection.
Participants list
You can view the list of subscribers connected to the terminal in section Participants on the Conference tab. To end the call with all participants, use the End for all button. Here, you can also disable the MCU function if it was previously activated. In this case, the area for adding new users to the conference will become inactive.
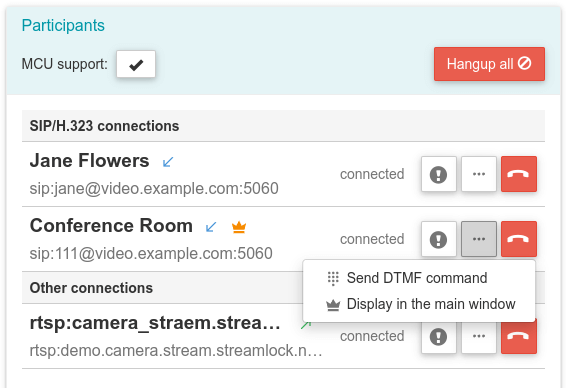
You will see the following information about each video call participant:
its display name;
Call direction (arrows are used to indicate incoming and outgoing calls)
Address (may be SIP, H.323, RTSP, VNC, NDI)
button to disconnect a participant from the conference.
icon
 if the participant is displayed in the priority video window in the video layout;
By pressing
 , a button panel for participant management will open:
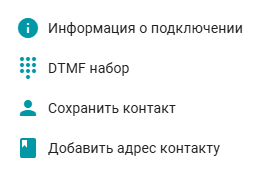
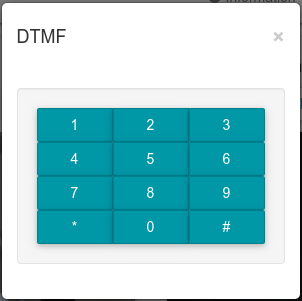
DTMF dialing
After clicking  DTMF dialing, a window will open where you can enter a command using the on-screen numeric keyboard:
To view detailed information about the connection with a subscriber, click the Connection information button in the same menu. A Connection information window will open with detailed data on the protocols used in the connection, as well as on the incoming and outgoing video and audio streams.
At any time during the conference, you can manually assign a priority video window layout to a specific participant. To do this, click on ![]() .
.
To disconnect a specific participant from the video call, press the  button.
Recording and Streaming
At the top of the Conference page, there is a button panel for managing recordings and broadcasts:

With their help, you can start or stop video recording or broadcasting via RTMP, NDI, SAP protocols. Only those streaming methods that have been previously configured from the control panel or in the Settings → Recording and streaming web interface menu will be active.
You can start recording or broadcasting not only during a video session but also outside a call. Additionally, there is an option to stream video from a camera connected to the terminal, for example, for preliminary testing of video and audio quality.