Description of the control panel
Description of the control panel
The settings available in the control panel are almost identical to the settings that can be configured directly on the endpoint. To review all features and check the recommended order of configuration, read the corresponding documentation sections:
To access the control panel, enter the IP address displayed in the lower-left corner of the main screen into your browser.
To manage the terminal via the web interface, you must first configure HTTPS access.
For the sake of better user experiences, the control panel offers an adaptive UI which is optimized for mobile devices (smartphones and tablets).
When answering a call from the TV interface, a pop-up area with the text Started the call with user_name. Go to conference will appear at the bottom of the screen in all tabs of the web panel (except the Conference tab). By clicking on Go to conference, you will be redirected to the Conference tab.
Information
In this section you can check the current settings of the endpoint and test if it is ready for work:
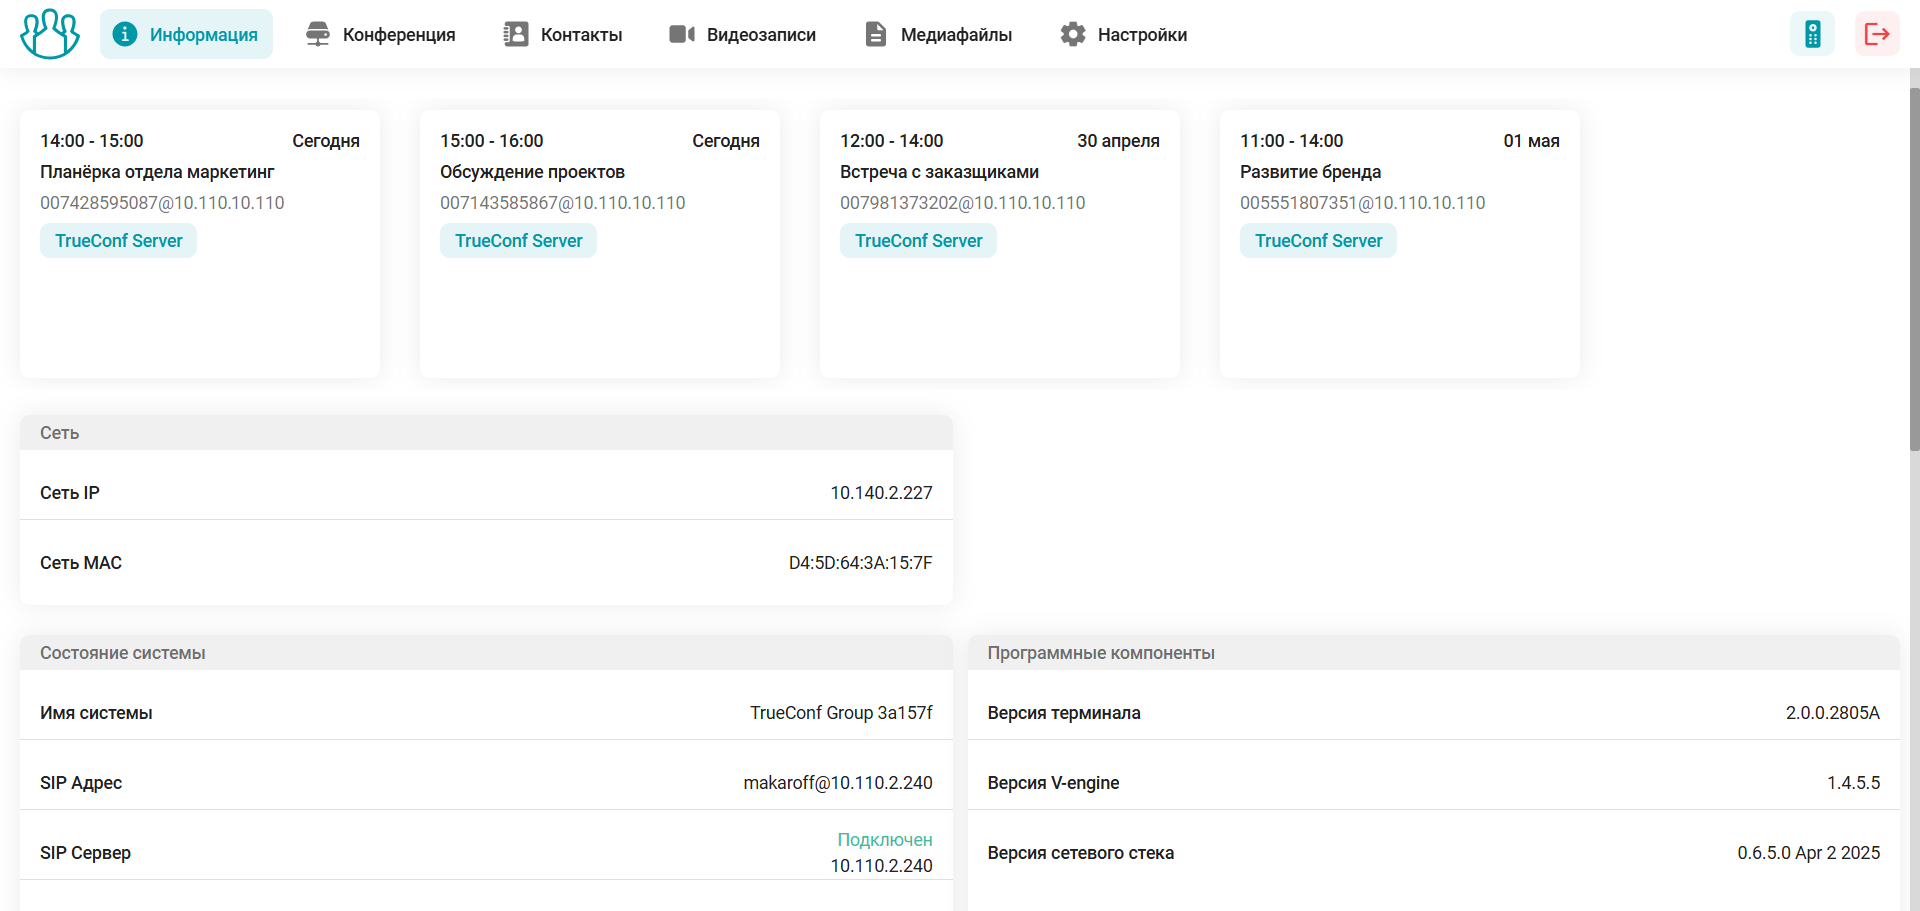
upcoming scheduled conferences, with the following details displayed for each: time, platform (TrueConf Server or TrueConf MCU), name, and connection address. If the event has started, simply click the Connect button to join. To display event cards, you need to set up integration.
in section Network – network connection status, IP address, and MAC address of the network interface;
in section System status – system name, SIP server, and address (if configured), H.323 name and gatekeeper (if configured).
in block Software components – technical data about the terminal software;
In section License information, you'll find information about the license and available features.
The bottom of the screen displays the connection status to services when integration is configured with: TrueConf MCU, TrueConf Server, LDAP directory, and E-mail.
Conference
For quick access to managing the equipment connected to the terminal, go to the Conference tab, where you will find buttons at the top of the screen:
 – turning the camera off and on;
 – muting and unmuting the microphone;
 - disabling and enabling speakers.
Audio device management for the terminal is also available in the web panel section Settings → Devices → Audio.
Contacts
This section of the control panel features the TrueConf Group address book. A detailed description of how to use it is provided in the user documentation TrueConf Group.
Video recordings
Go to the Video recordings section to work with conference recordings stored on the built-in SSD. At the top of the menu, you can select the display period for the recordings, Start recording, Stop recording (if active), and Delete all the recordings saved in TrueConf Group. Clicking on a video preview opens the video player.
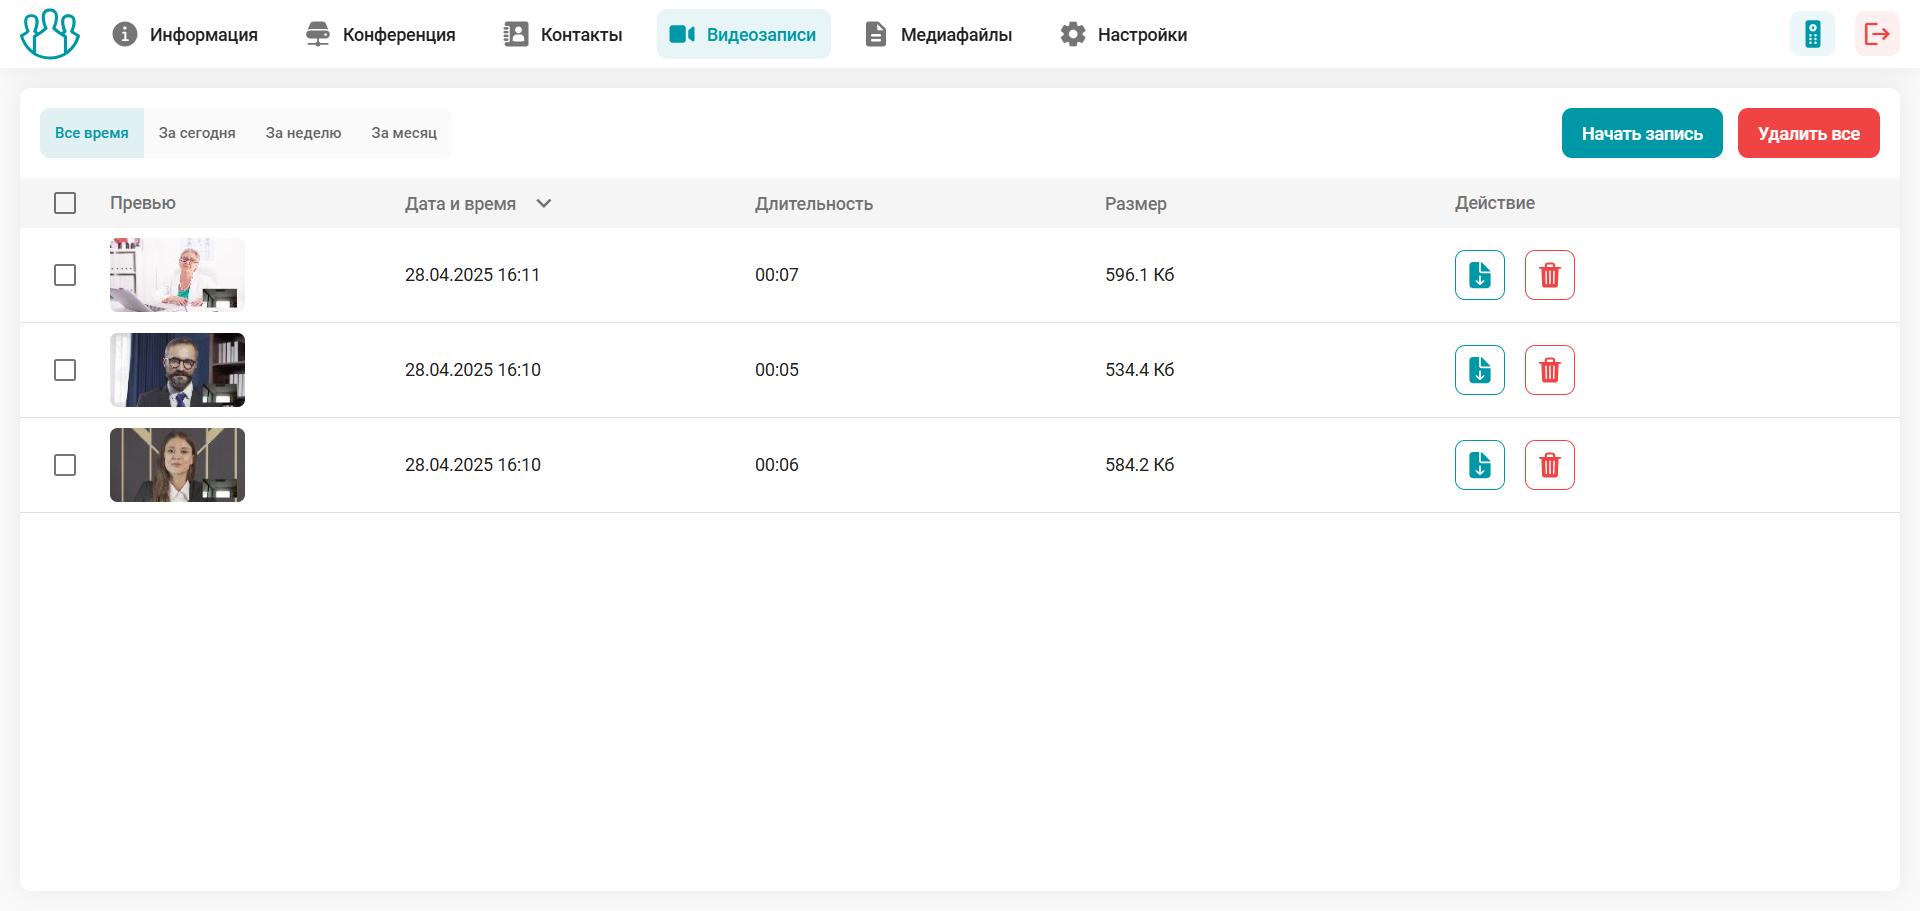
Once you start recording, you can view it in real time; however, the download and delete buttons will be unavailable until the recording is complete.
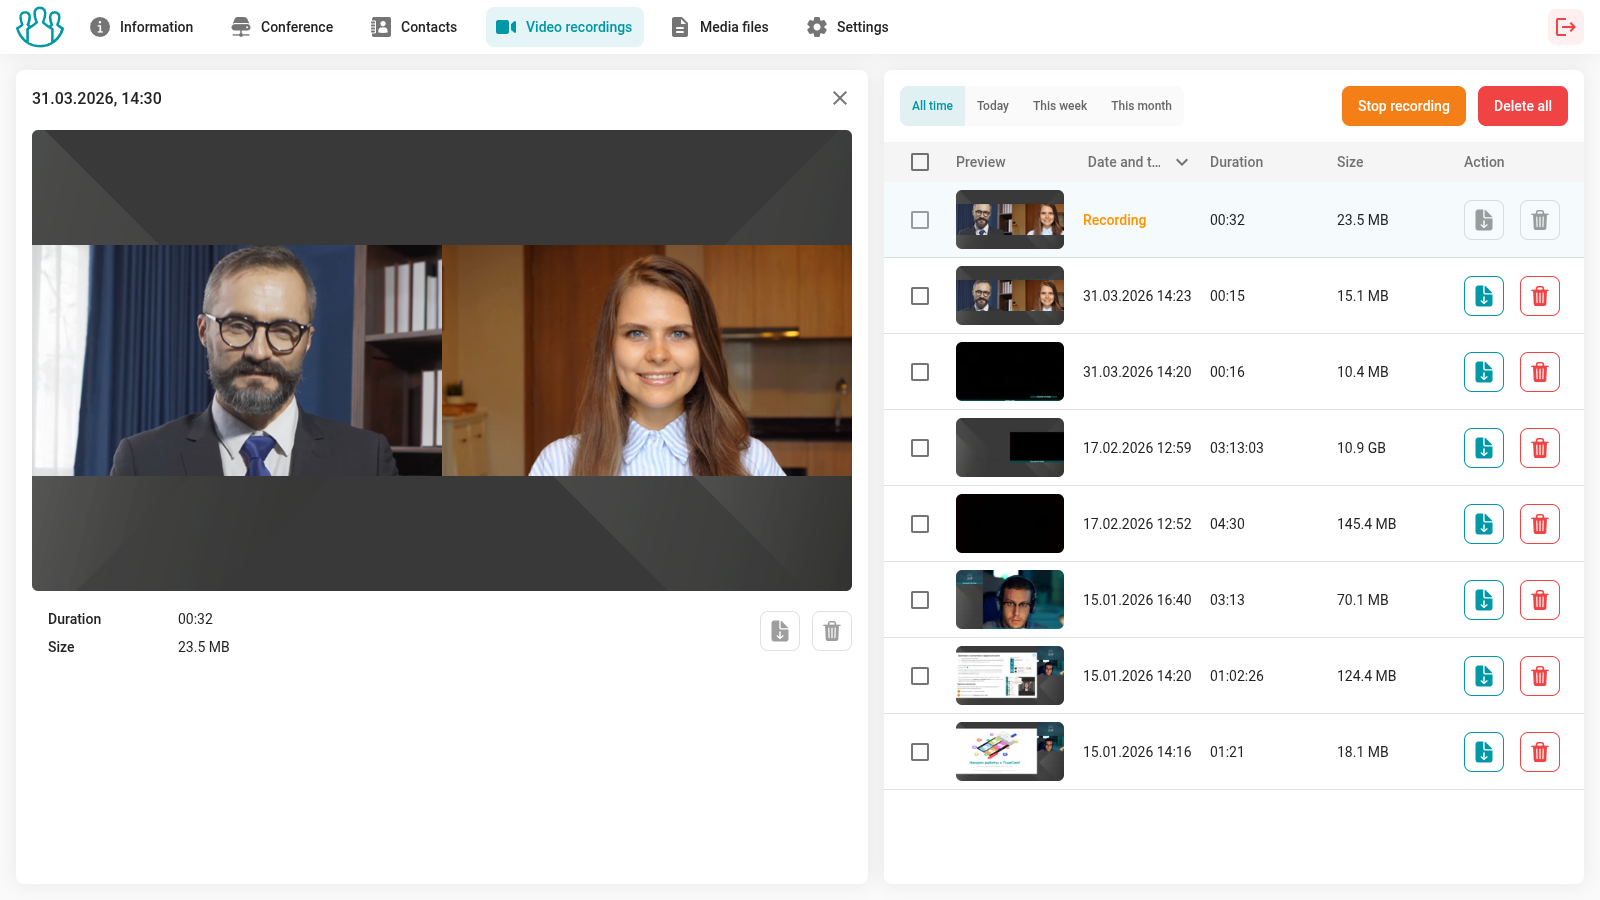
Working with video recordings:
 – download the local recording from TrueConf Group;
 - delete the local record from TrueConf Group.
Media Files
Section Media files displays a list of media files uploaded to the terminal. These files are used as presentations in calls and conferences. To add new presentation material to the built-in SSD TrueConf Group, click Upload files. If there is an error during file upload, the interface will show which file failed to upload. If necessary, you can cancel the file upload.
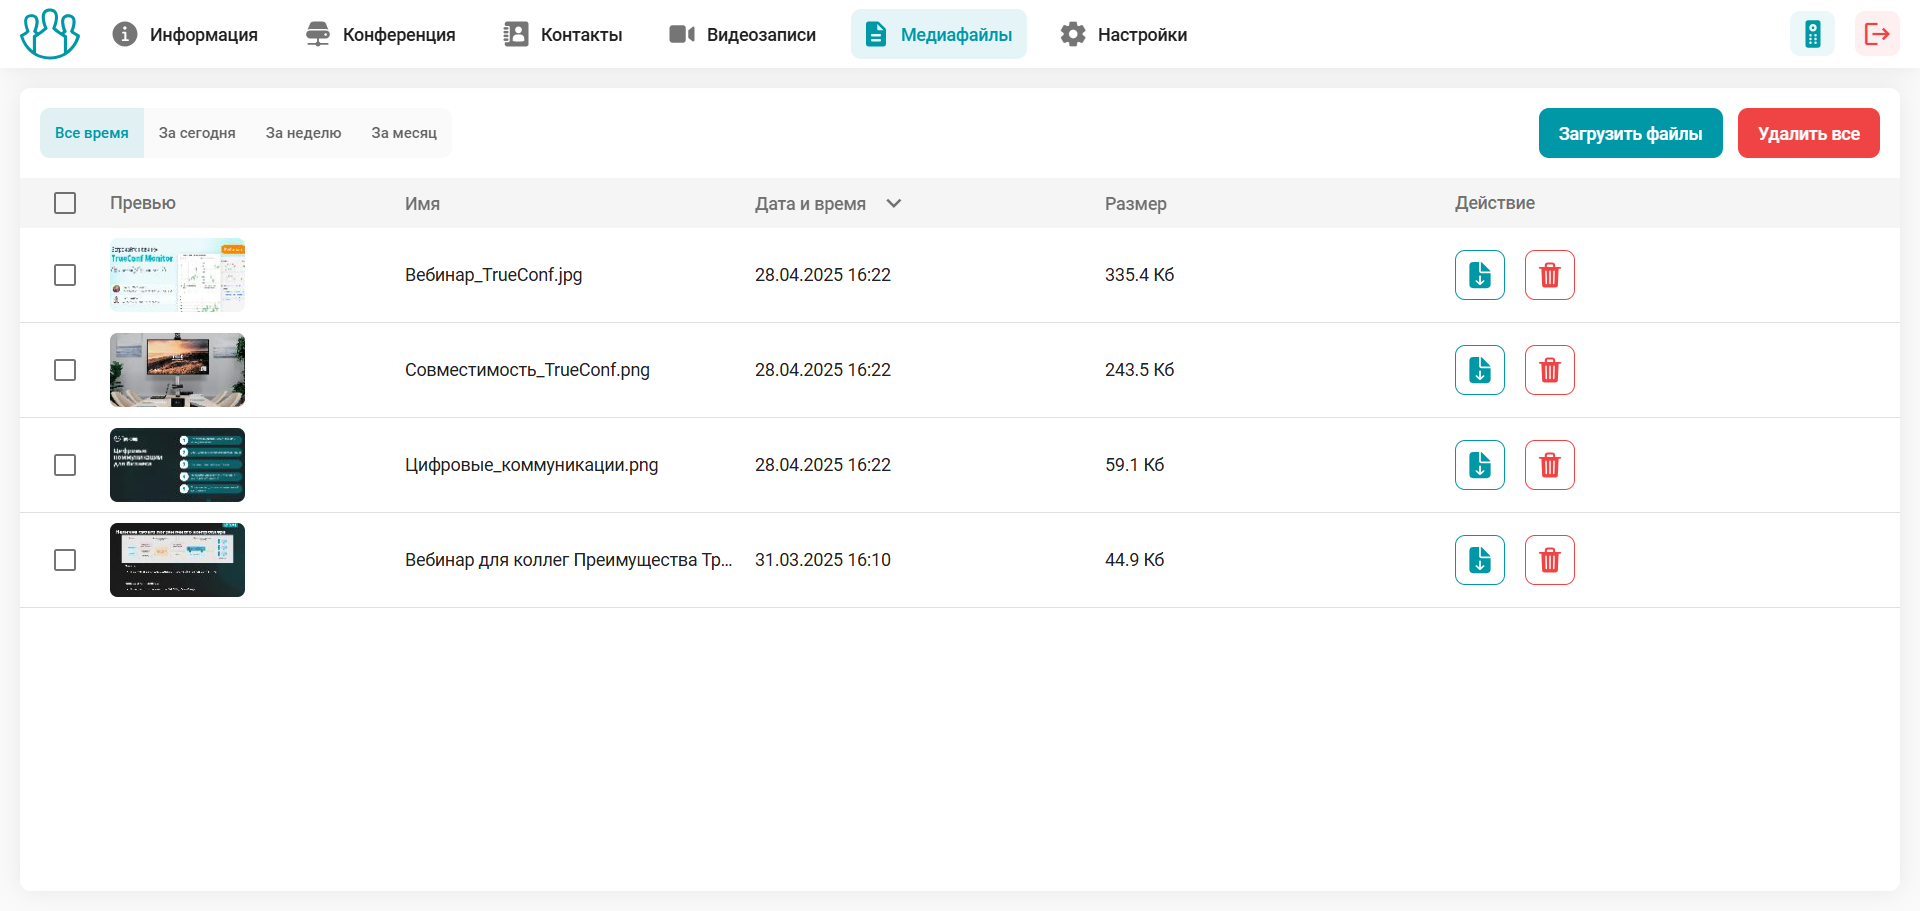
Interacting with media files stored in the terminal's memory:
- – download the file from TrueConf Group;
- – delete the file from TrueConf Group memory.