# Calls
# Actions for an incoming call
When you receive an incoming call or invitation to a conference, a push notification with the username or event name will be displayed.
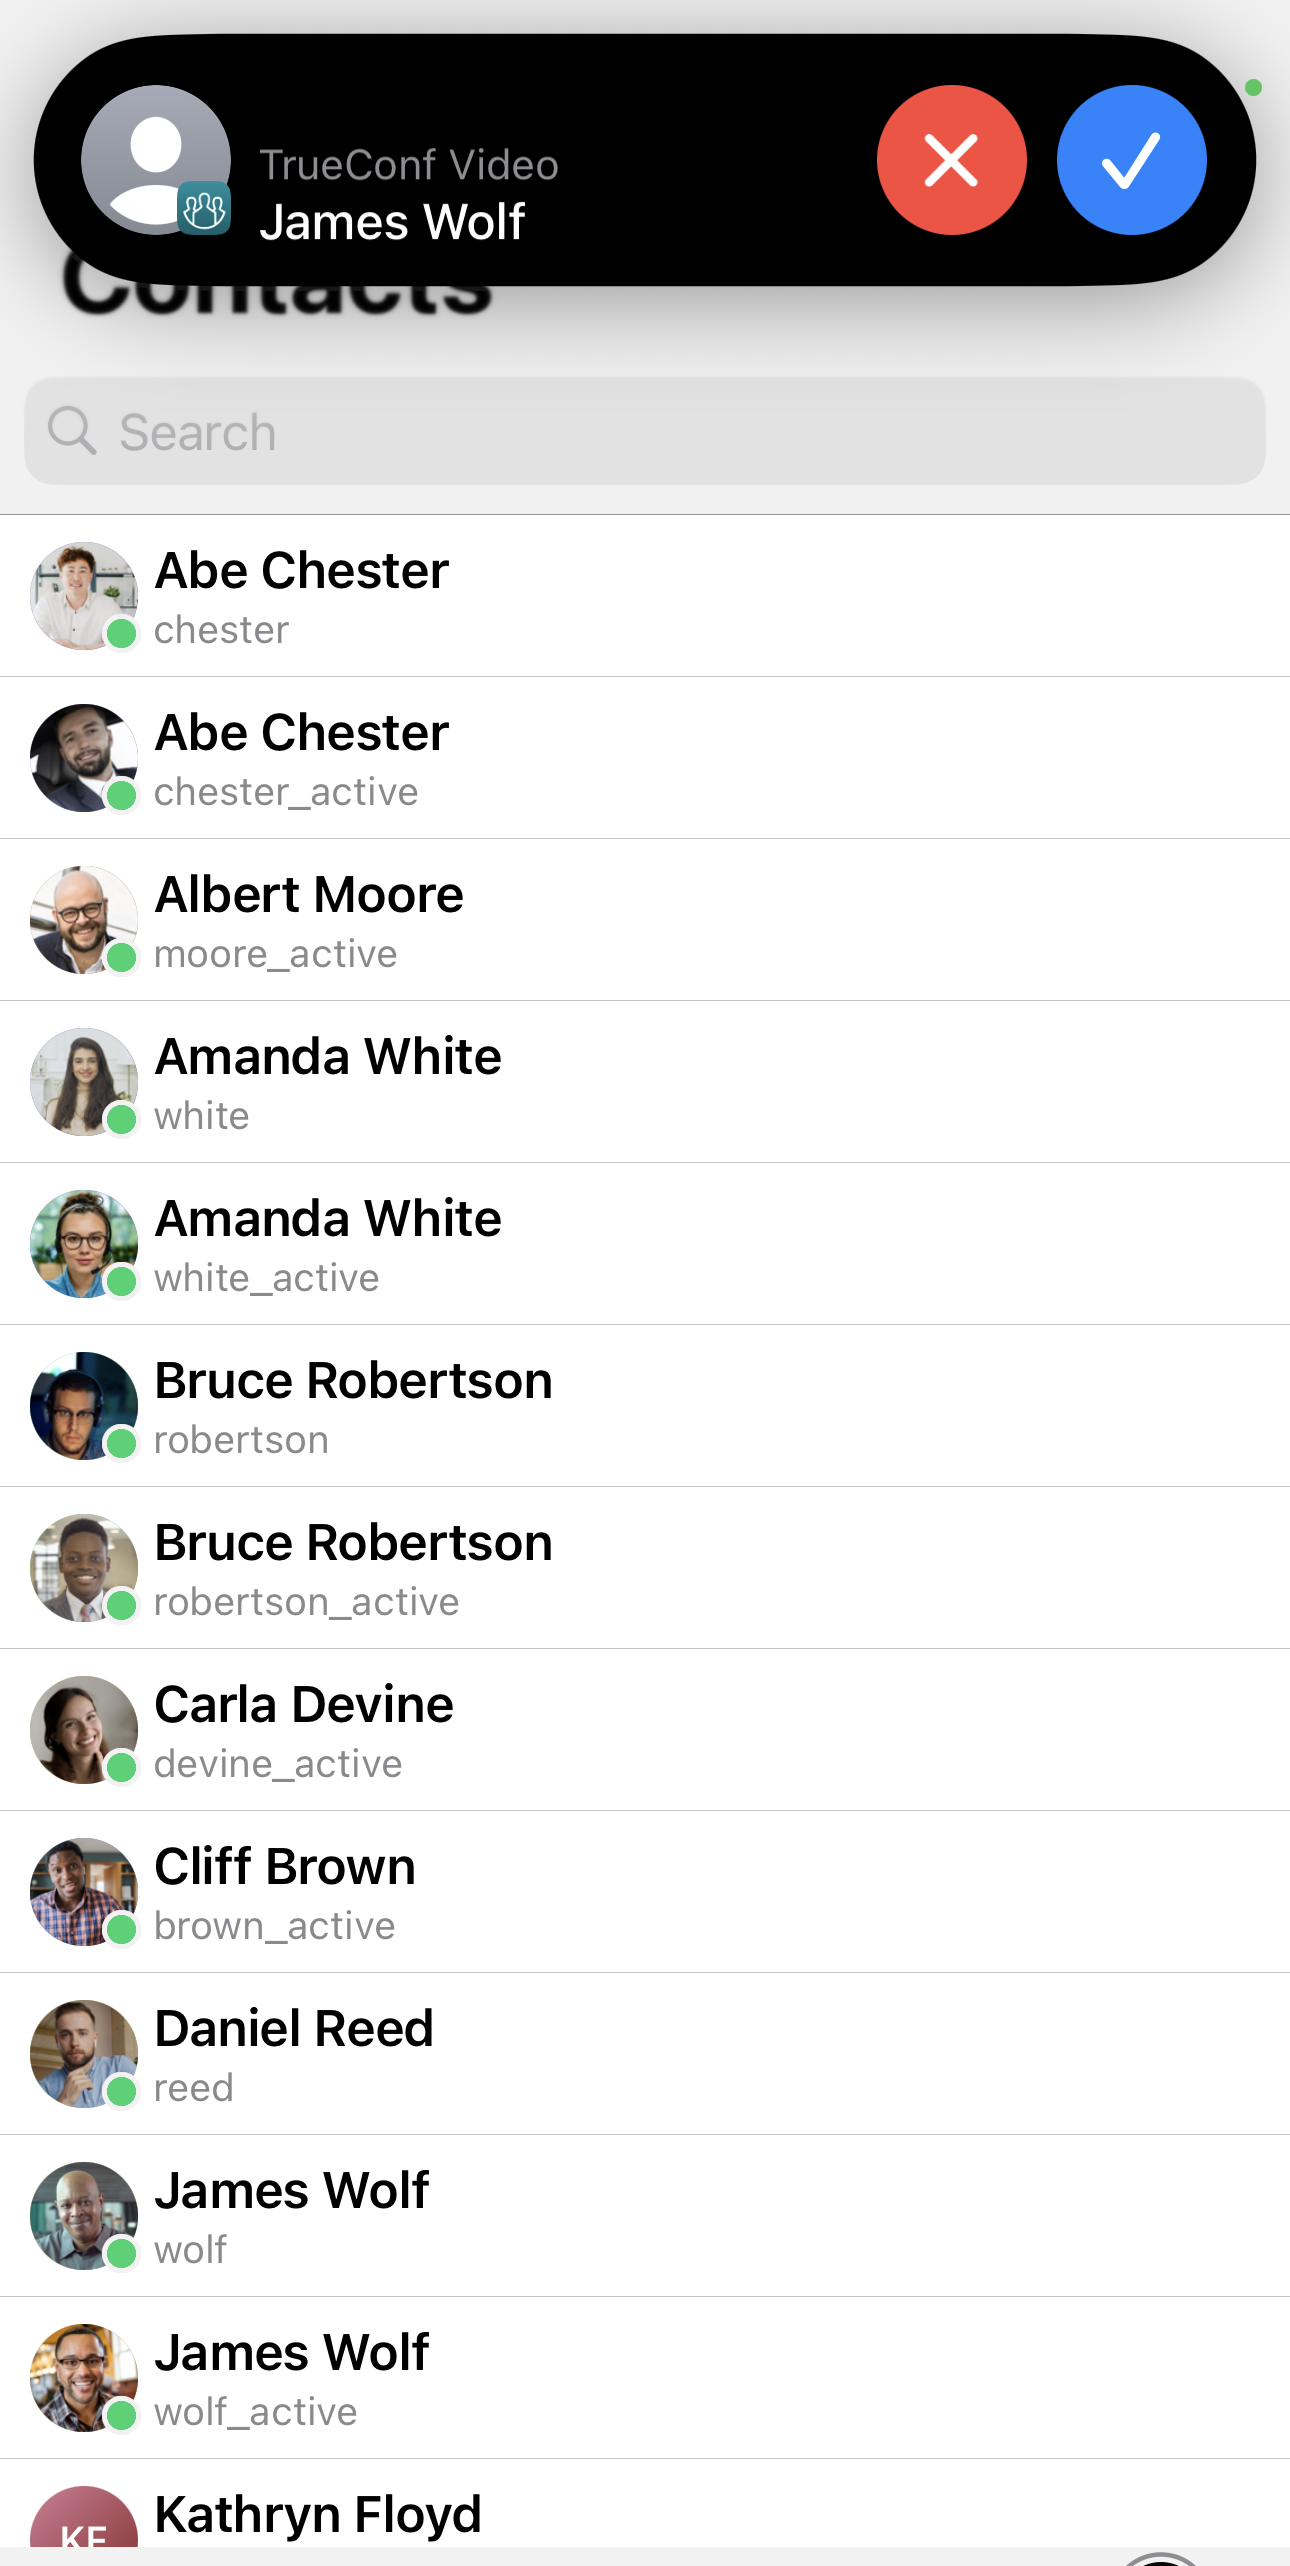

You can Accept  or Decline
  a call with the help of respective buttons.
# How to make a call
# Call to a user
To call a user, go to the Contacts section. Tap on the user's name, and you will see the following buttons:

 – audio call
 – video call
 – chat with a user.
If you have previously talked to the user, go to the Calls section.

Here you can see the history of your calls, including the conferences  you took part in.
During a call, you can use the built-in iOS/iPadOS features to enhance your voice and video. Please check the detailed description for audio and video provided below.
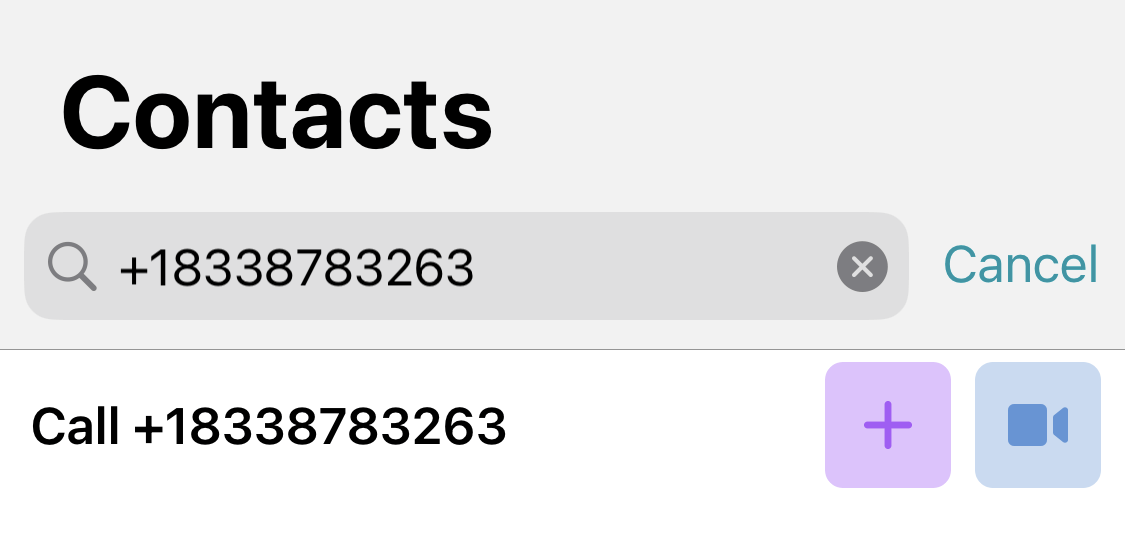
# Call to a phone number
To enable calls to a phone number, the server administrator must set up integration with the corporate PBX gateway.
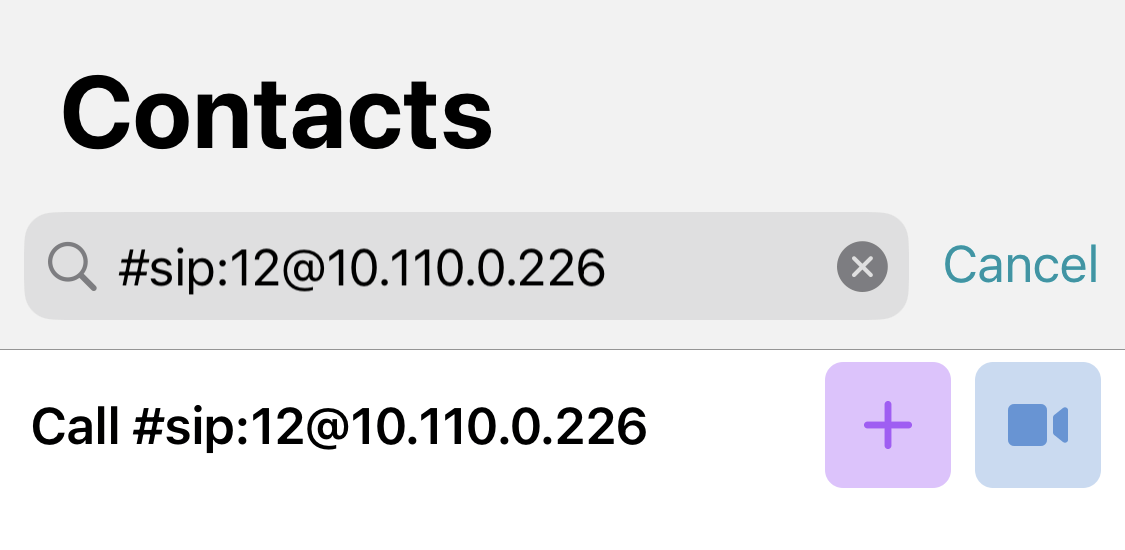
# From the address book search field
Enter the phone number in the input field in the international format and tap on the call button in the menu that will be displayed below. For example, to make a call to our sales department, enter +1 833 878-32-63 and tap on the call button.
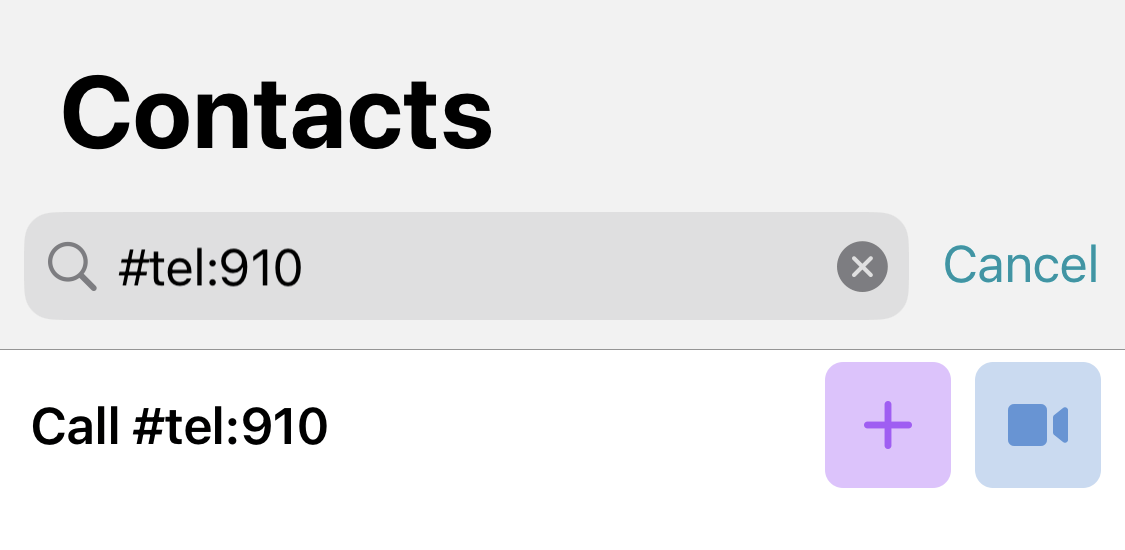
You can also make calls to the extension numbers connected to your PBX. For example, if a contact has the extension number 910, to call this user in the search field of the application address book, type #tel:910.
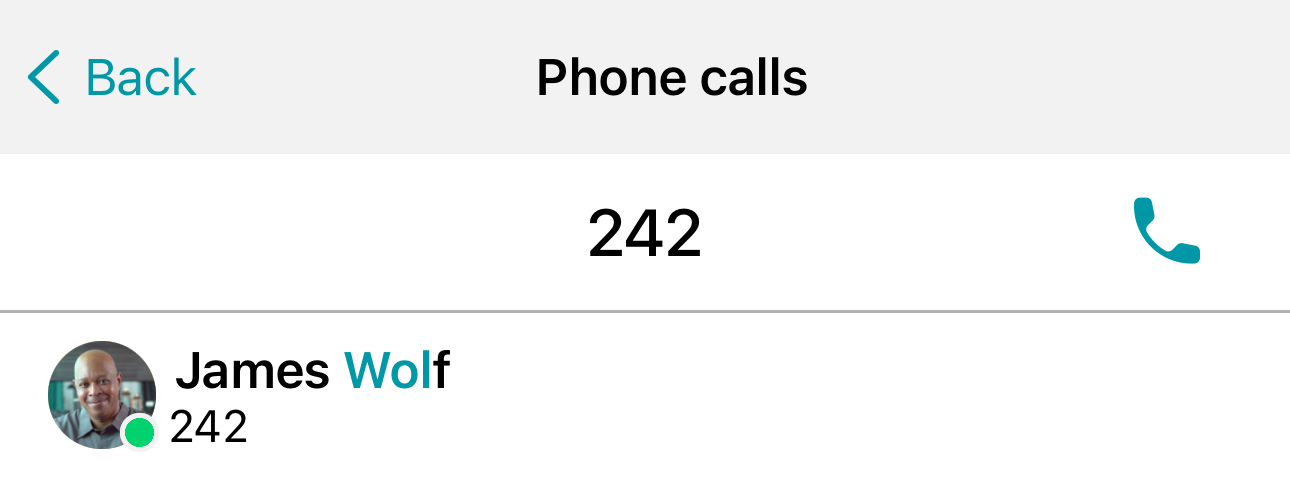
# Calls made in the dialer
You can call a phone number from TrueConf applications by using the dialer. Go to the Calls section and tap the button  . Enter the user's phone number and tap the call button.
# Call via SIP/H.323
To call a third-party device or server, use the call string format that corresponds to the type of the call destination.
Supported devices and call string formats:
- SIP endpoints (including DTMF commands)
- H.323 devices
- RTSP devices.
# Use of built-in iOS/iPadOS features for enhancing video and audio
To use video and audio enhancement features built into iOS/iPadOS:
- During a call, swipe down from the top right corner of the screen to open the Control Center.
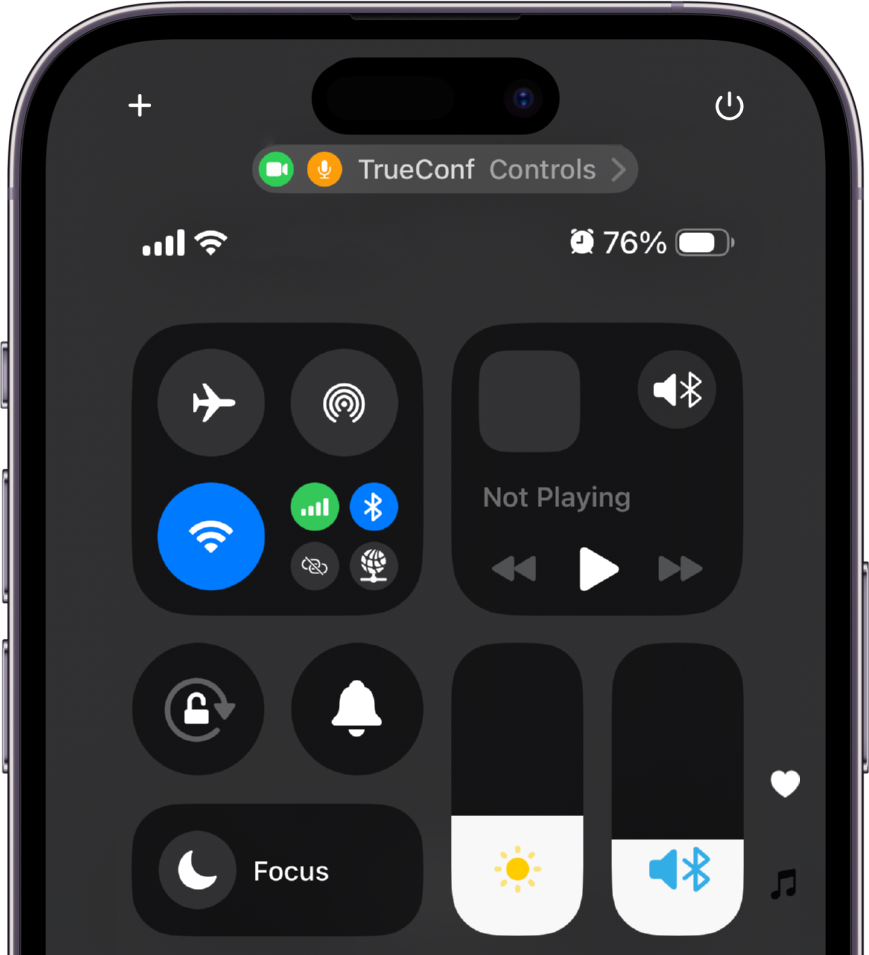
To enable all features, you need to have iOS 18+ on devices powered by A12 Bionic chip or above.
# Audio settings
The following audio modes are supported:
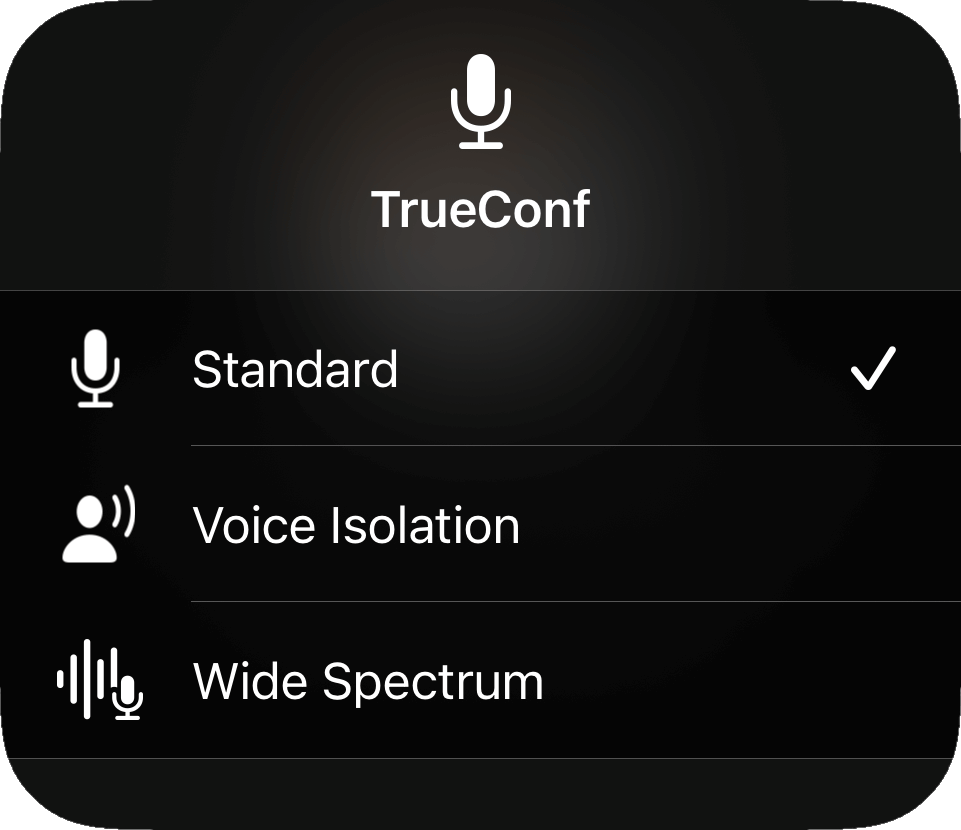
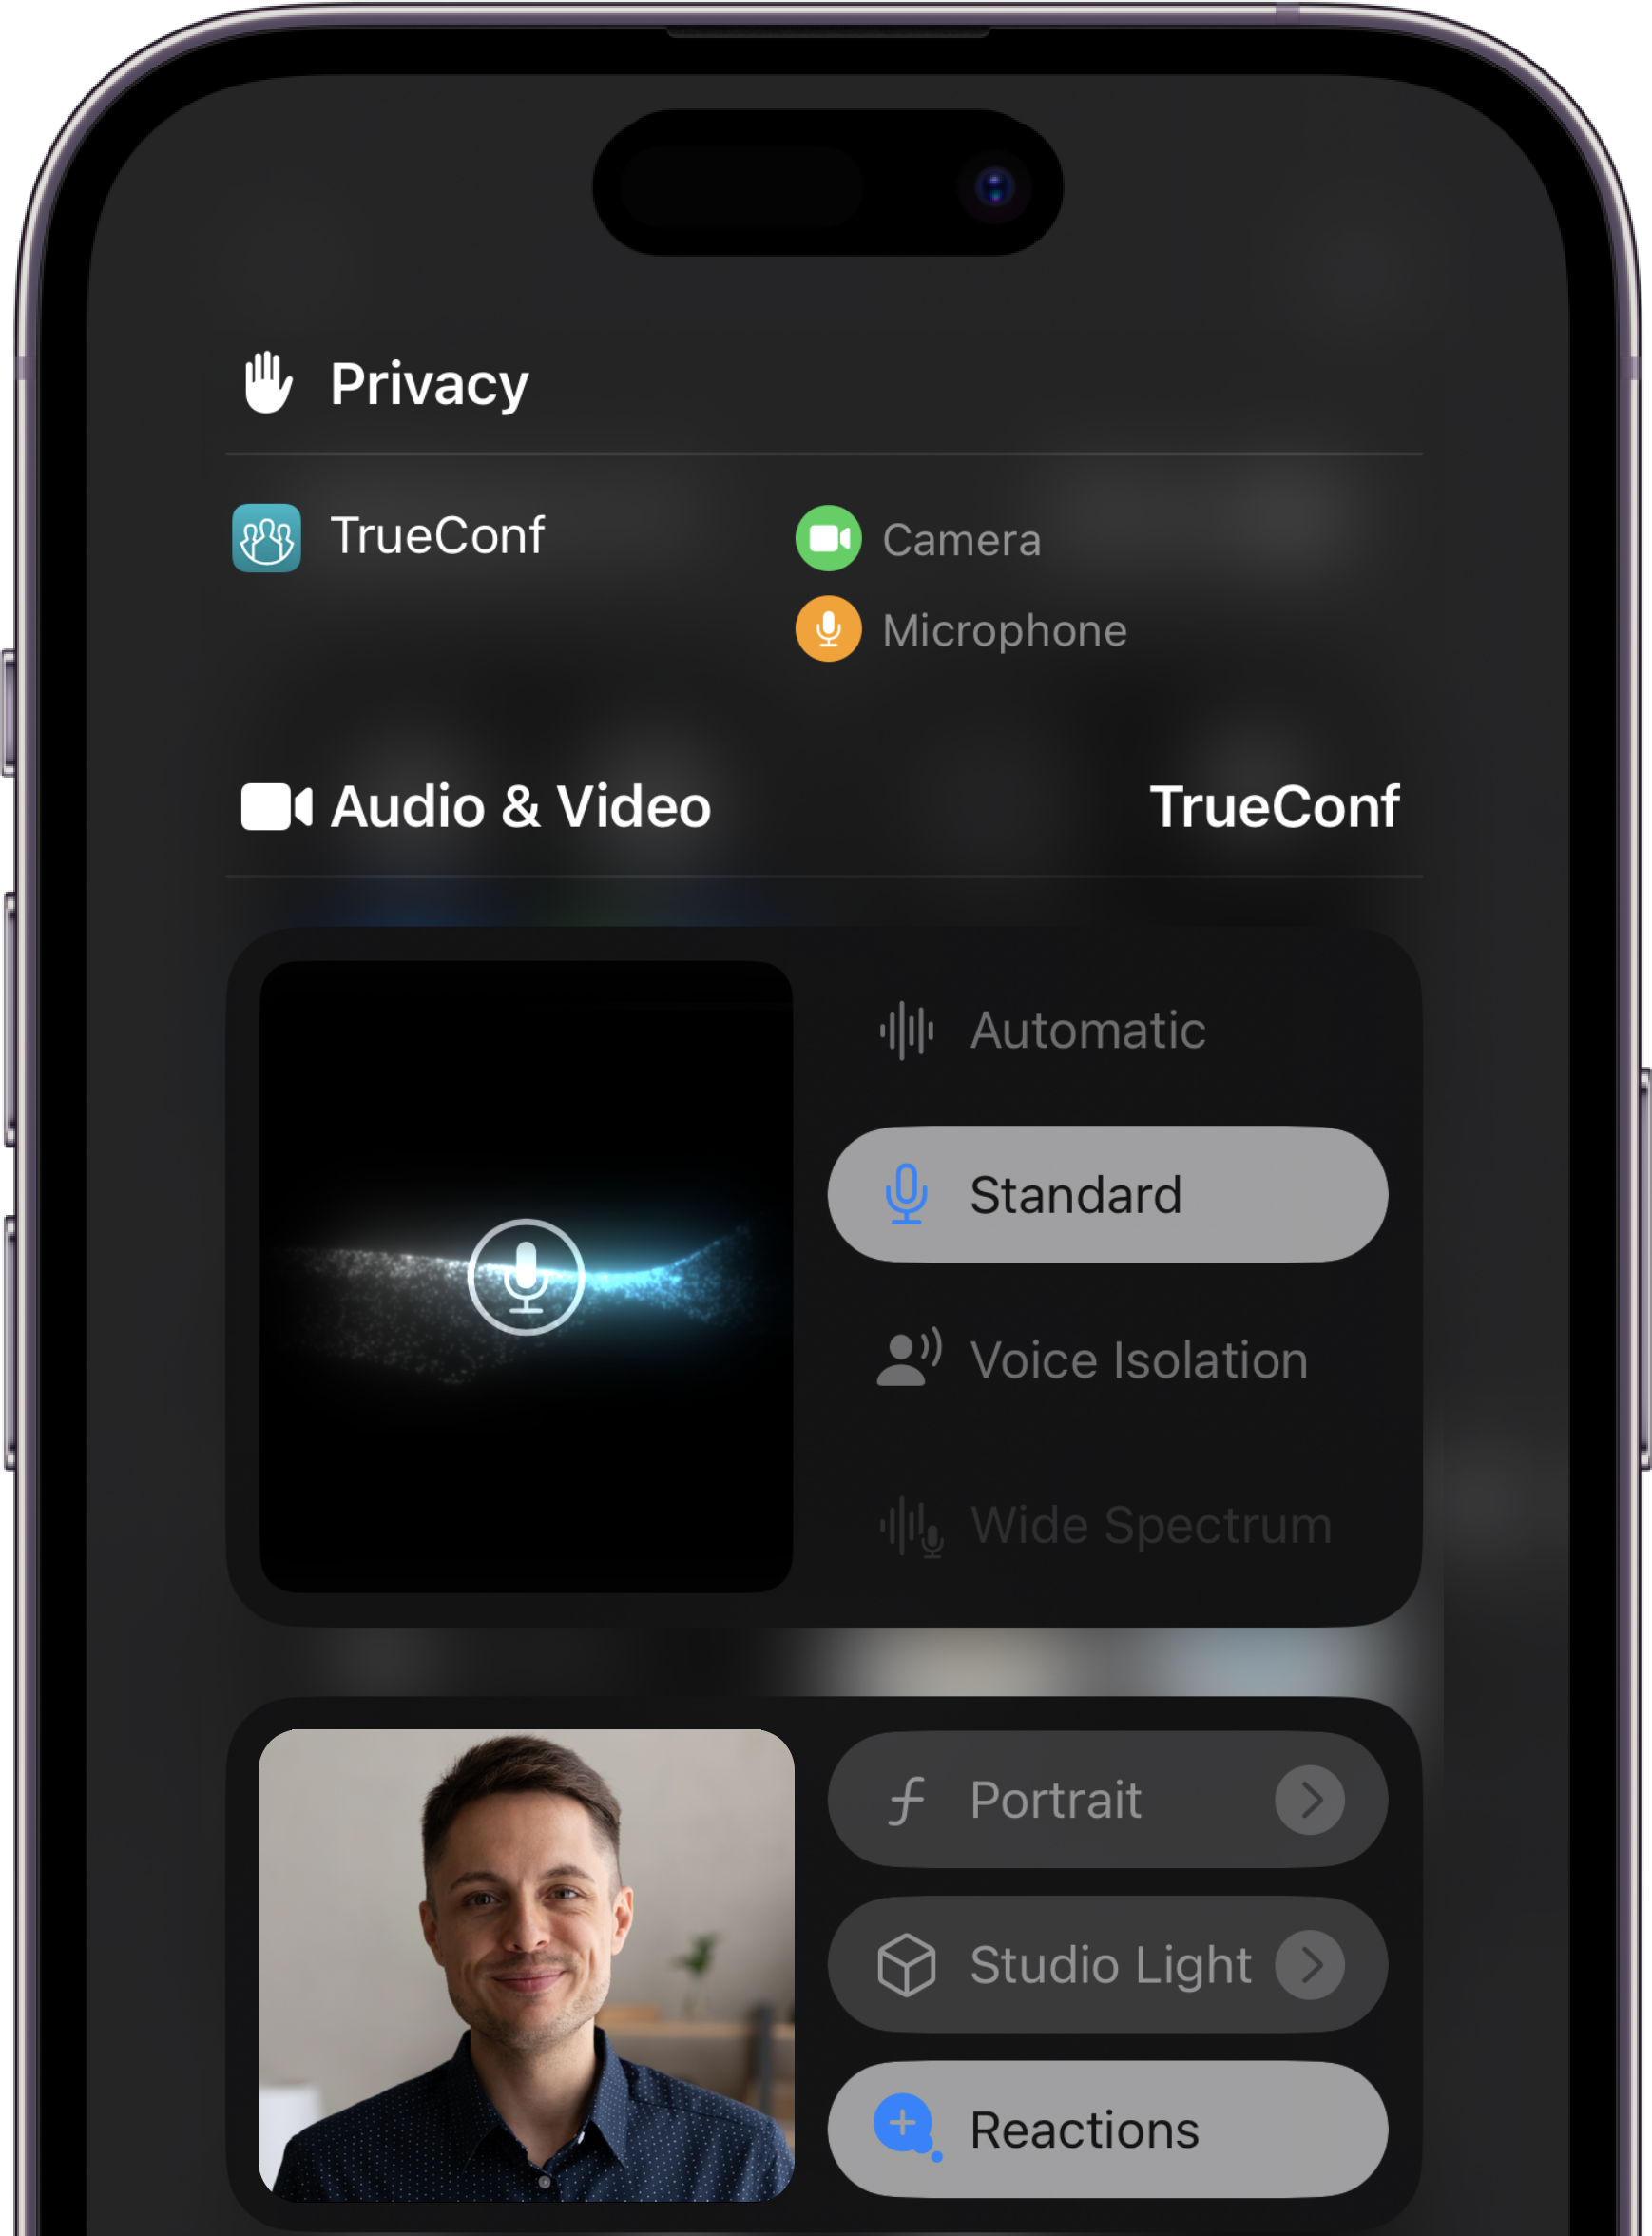
Automatic — this option is needed for automatically selecting the optimal microphone settings for various communication scenarios. For example, when you are using a headset, Voice Isolation mode is activated; however, the standard configuration for capturing audio stream will be selected, when you are using the built-in microphone.
Standard — standard voice processing is used.
Voice Isolation Mode — this microphone operation mode uses machine learning to separate your voice and remove background noise. For example, engine noises outside the window or a dog barking nearby will not interfere with your communication.
Wide Spectrum Mode — this microphone operation mode allows capturing and transmitting all outside sounds. This feature can be useful for immersive online lectures and other use cases when you need to transmit all sounds around you to meeting participants.
# Video settings
The following modes are available for configuring your video:
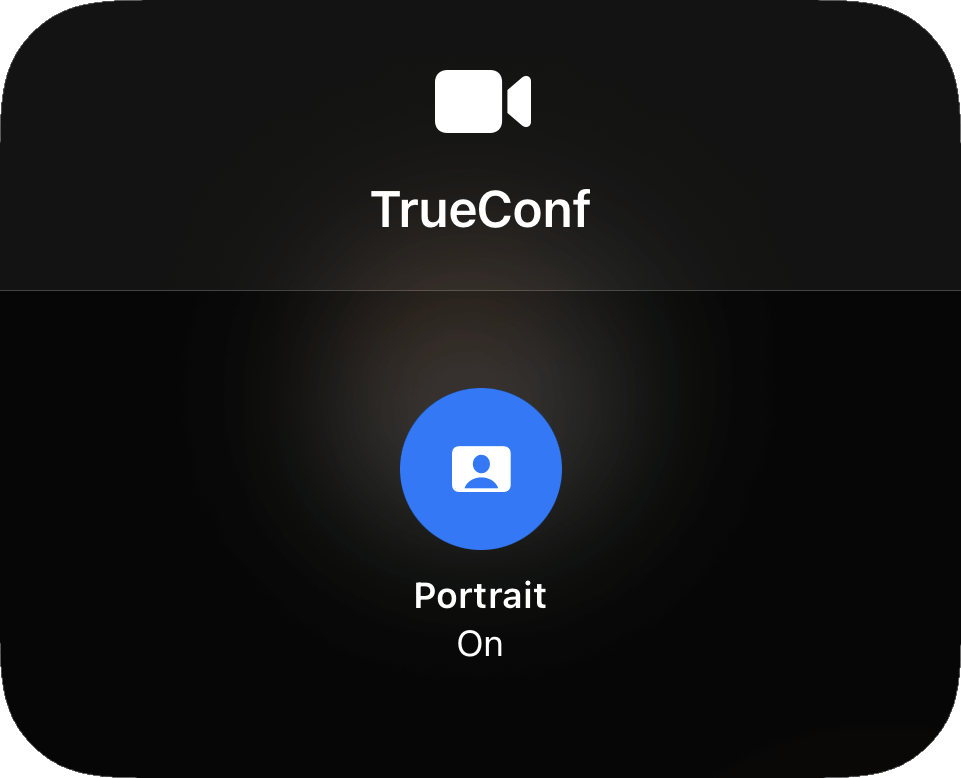
Portrait — ability to blur the background. This feature can be used for both one-on-one calls and group conferences. By tapping
 , you will open the menu where the blurring effect can be increased or decreased.
Studio Light — this effect allows you to darken the background and illuminate the face without using additional equipment. It is especially useful when shooting in low-light conditions, such as with backlighting when the subject is positioned in front of a window. Tap
to adjust the intensity of the studio light.Reactions — during video conferences, you can use full-screen video effects and add reactions with hand gestures that fill the frame with 3D effects. Learn more about all reactions in the Apple documentation.
← Contacts Conferences →