
Installation
Installation and configuration
This guide is suitable for users of Windows, macOS, and Linux operating systems, as the TrueConf client applications for these OSs have similar functionality and user interfaces.
TrueConf desktop client application features
Enjoy 4K (Ultra HD) video calls and conferences with a frame rate of 60 fps
Run meetings with up to 1000 participants (up to 1600 using UDP Multicast mode)
Try different video conferencing modes: video call (point-to-point or one-on-one video conferencing session), video lecture, all-on-screen, and role-based conference
Private meetings for registered users and public webinars with guest connections
Participation in conferences is available for both authorized users TrueConf and guests when joining webinars.
Schedule conferences, create virtual rooms, and send email invitations to meeting participants
Point-to-point video calls can be run directly between the users bypassing the server
Quick call-to-conference escalation
Attendees can push to talk or send a request to become a speaker in role-based conferences, while moderators can appoint or remove speakers from the podium
Take polls or share reactions in conferences
Call VoIP users, landline and mobile phone numbers and send DTMF commands
Call SIP/H.323 and RTSP devices
Automatically enlarge speakers in a meeting
Highlight active speakers in the video window layout with a customizable color frame and set up microphone sensitivity level
Remote desktop control
Show slides and images in a separate media stream to all participants, including in-browser connections and SIP/H.323 endpoints over H.239/BFCP protocols
Share your entire screen or separate windows. Both your video and content will be visible in recordings, streaming and on devices that do not support H.239/BFCP protocols
Exchange messages and share files in personal and group chats. Your messages will be delivered even if your partner is currently offline
Chat history, including group chats of the meetings that have already finished
Control PTZ cameras, both your own and participants’ devices
Record video calls and conferences, choose a suitable video format and storage location
Configure your own video layout
Сonference moderators can lock video layout for all participants or set individual layouts for each user, including SIP/H.323 endpoints and browser participants
Control participants’ cameras and microphones, change devices or adjust microphone sensitivity
Add and remove participants while the conference is in progress
Use virtual backgrounds
Full address book support (adding and deleting contacts and groups, editing contact information, searching and blocking contacts)
Automatic discovery of available servers
Optional network speed limitation templates or manual settings
Built-in tools for testing the quality of server connection
Built-in algorithms of echo cancellation and automatic gain control (AGC)
Application installation
To start using the TrueConf client application, download it from the guest page of your TrueConf Server (you can confirm its address with your administrator) or from the official website page:
Before starting to use the client application, ensure that all operating system updates are installed and the video driver for the graphics adapter is updated to the latest version. Drivers should only be downloaded from the official manufacturer’s website: (Intel, Nvidia, AMD).
The following demonstrates how to use the TrueConf client applications, using TrueConf for Windows as an example.
Connecting the application to the server
Upon the first launch, the application will automatically detect TrueConf Server on the local network and display a window for connecting to it.
Only TrueConf Server 4.5 + instances can be automatically detected.
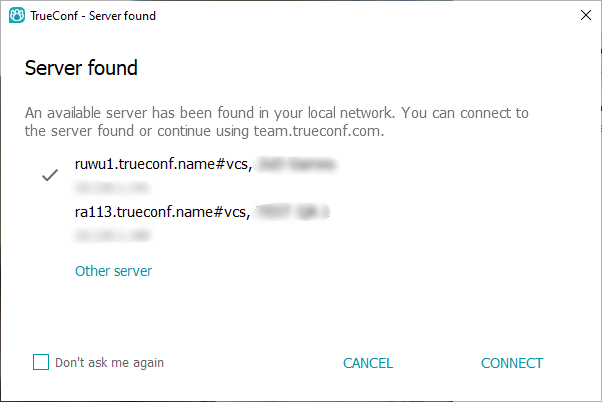
By default, the application connects to the TrueConf Online cloud service.
To switch to the corporate TrueConf Server, press the Change Server button.
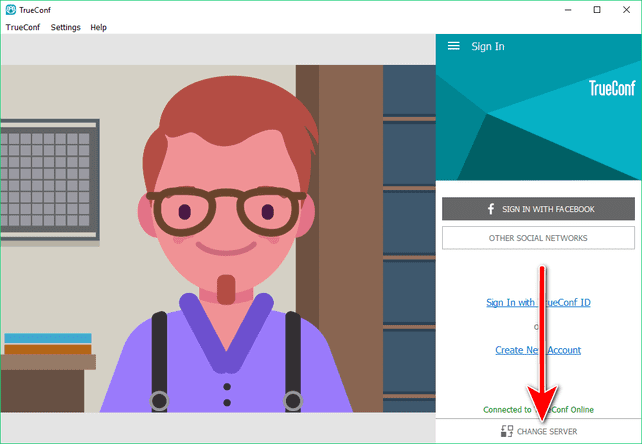
Next, in the window that opens, switch to option TrueConf Server in the Connect to the Server field and enter the IP address or FQDN of your server. Click the Connect button.
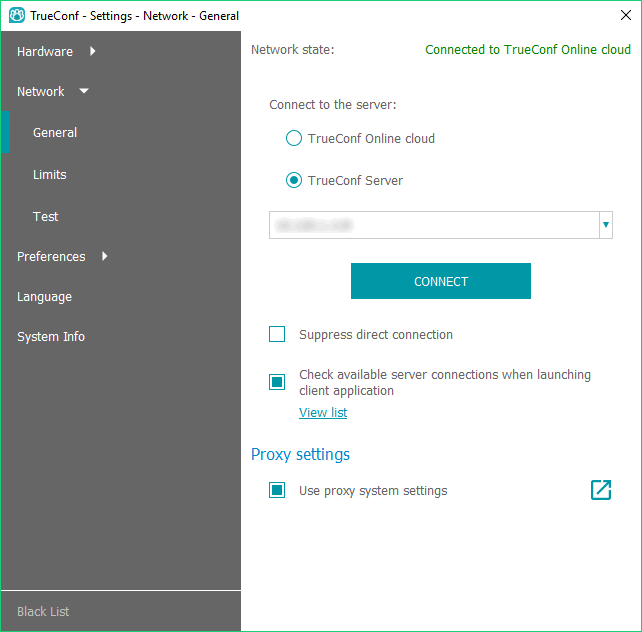
If the connection is successful, a message like Connected to server.company.com will be displayed at the top in the Network State line.
Signing in
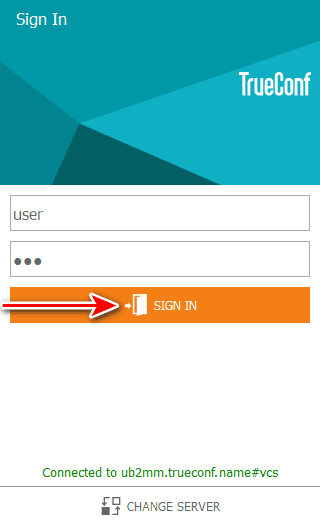
In the authorization window, enter your TrueConf ID (username) and Password, which you registered with. You can verify these details with your server administrator.
Then click Sign in
Application settings
Video and audio
Go to the Settings → Hardware menu in the application window. Then, under the General tab, select the camera, speakers, and microphone.
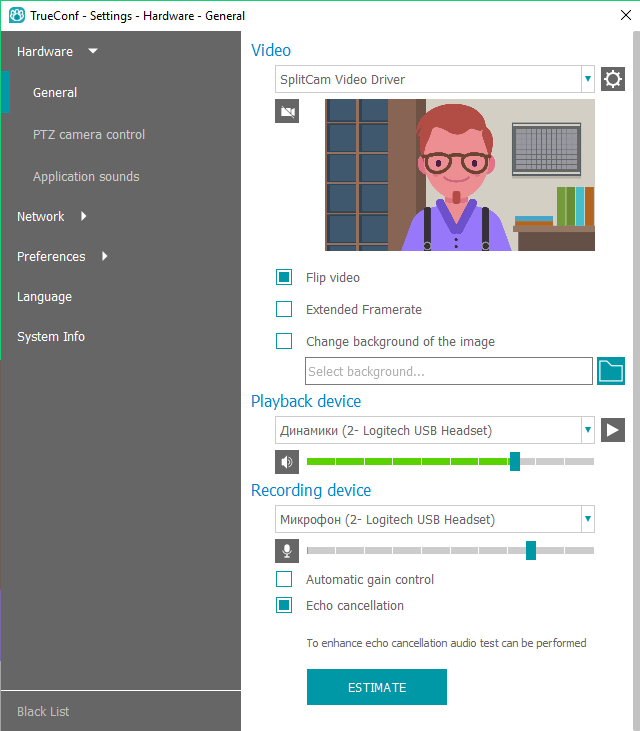
In section Recording Device (below the microphone selection), there are two checkboxes related to audio processing:
- Echo cancellation;
- Automatic gain control.
These checkboxes are marked by default, and it is helpful in most cases. However, if you use a recording device with integrated echo cancellation/AGC mechanisms, we recommend disabling these options in the application to avoid conflicts between algorithms.
For the echo cancellation algorithm to function properly, you can conduct an audio test to measure your device's latency. To do this, click the Estimate button at the bottom of the window.
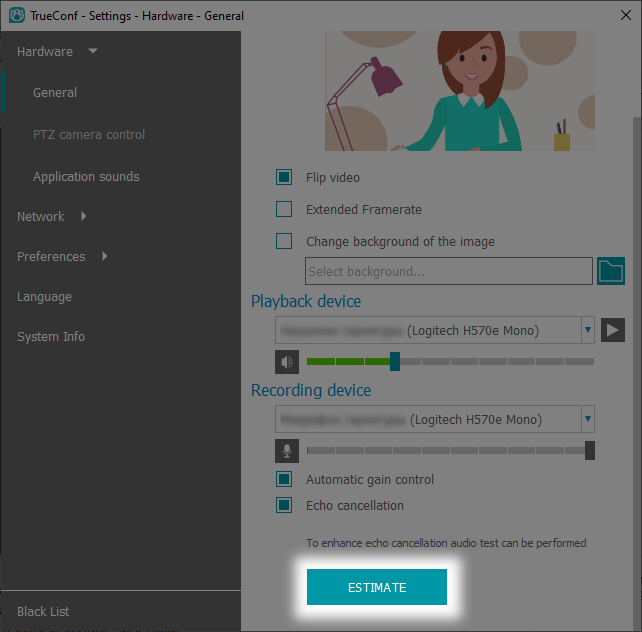
During the testing, you will hear several audio signals from the selected playback device. When the test is successfully completed, the time of delay will be displayed.
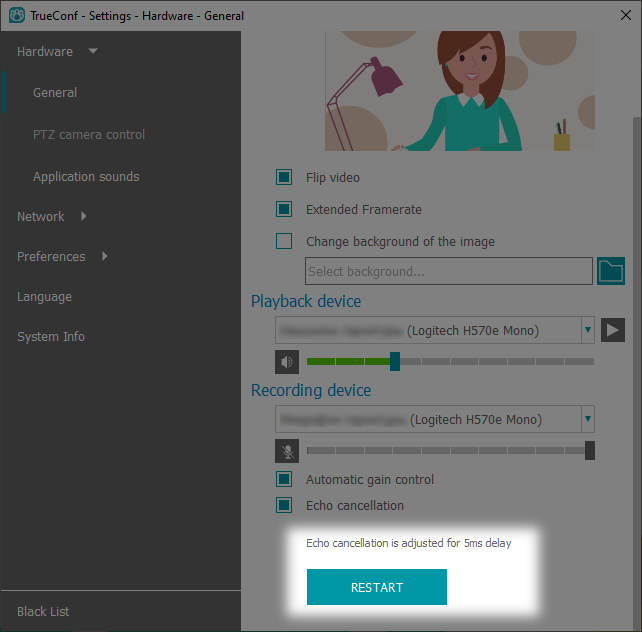
You can retake the audio test by clicking the Restart button, which will appear after the first successful test instead of the Estimate button.
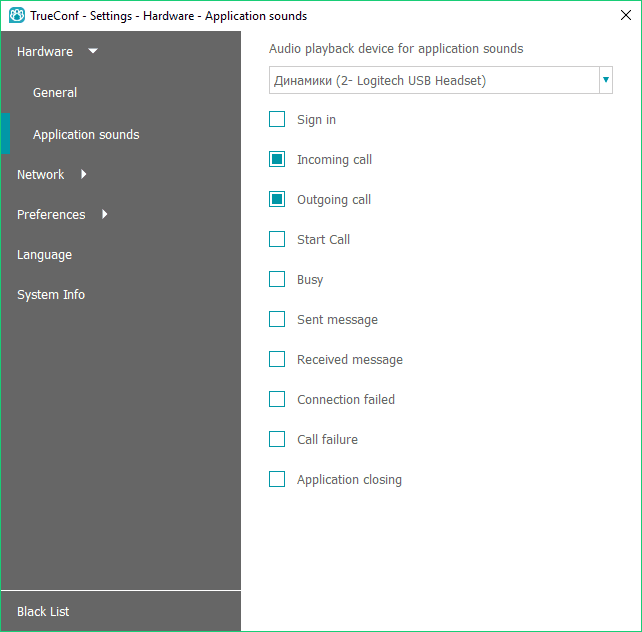
To select the desired sound notifications from the application and the device for their playback, go to the Application Sounds tab.
Virtual backgrounds
Let's specifically highlight the additional feature of replacing the background in the image captured from the webcam. This feature is available for any computer that meets the general system requirements and can be used for both one-on-one video calls and group video conferences. It utilizes chroma key image compositing technology.
Background replacement can be useful in various cases. For instance, during a webinar, you might want to display a corporate logo in the background, or use a related image during a video lecture.
You can achieve a better result if you are using a solid background of classic colors for chromakey: blue, green, purple. Small color gradients and variations are acceptable if they are shades of the main background color, i.e. close to it.
To change the background, take the following steps:
Go to the Settings → Hardware → General section.
Use the
 button to select an image to change your background. It will be scaled to the width of your video window, so if you want to avoid cropping, choose an image that matches the aspect ratio of your webcam.
Check the box Change background of the image. Immediately after, you will see the result in the video preview window.
Network
In section Settings → Network → General, you can change your TrueConf server or connect to TrueConf Online.
When the checkbox in field Suppress direct connection is selected (default is unchecked), the connection during a one-on-one video call will be routed through the server.
You can check the list of available servers for connection using the link View list.
Sections Limits and Test will allow for more advanced network configuration.
Preferences
By navigating to section Settings → Preferences → General, you can configure the application to start automatically when the operating system launches (enabled by default).
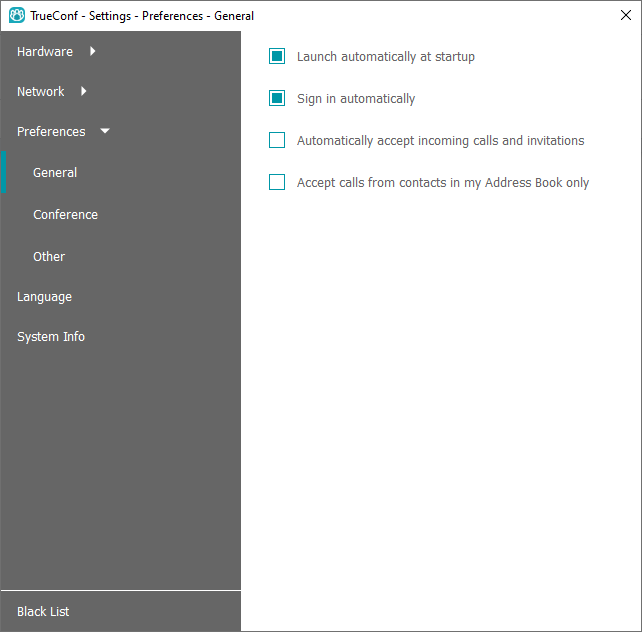
The checkbox Sign in automatically (checked by default) allows you to connect to the server without having to enter your login and password each time. The application will remember the login settings for different servers and automatically authorize you when connecting to one of them.
If you want to change the server, go to the menu Settings → Network → General, specify the desired server in the Connect to the server: section, and click Connect. It is not necessary to disconnect from the current server using the TrueConf → Sign out menu item beforehand; otherwise, automatic authorization will not be available the next time you connect to this server.