
Address Book
Address book
After logging in, the address book will be displayed on the right side of the application window:
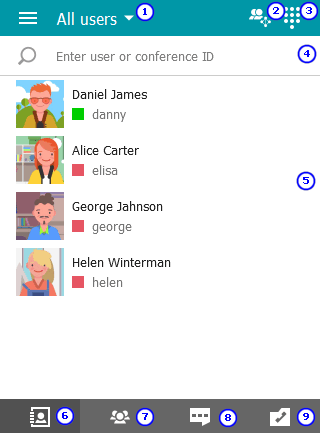
List of users and their statuses
Address book
Call History.
Adding a new contact
Enter the user TrueConf ID in the search field and click the  button.
Similarly, you can add third-party SIP/H.323 and RTSP devices to the address book by specifying the call string in the appropriate format instead of the user ID.
After that, you can create a new group with it or add it to an existing one:
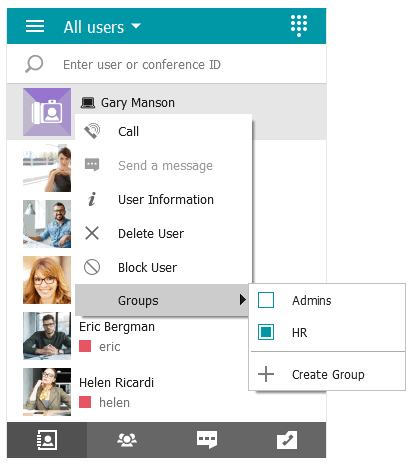
So that you don't have to add users manually, the administrator of your TrueConf server can automatically generate an address book and configure the display of groups within it.
How to find a user
Enter the beginning of the TrueConf ID or name of the user you are looking for in the search field located above the address book. The application will filter the list according to the entered text, making it easier for you to find the user.
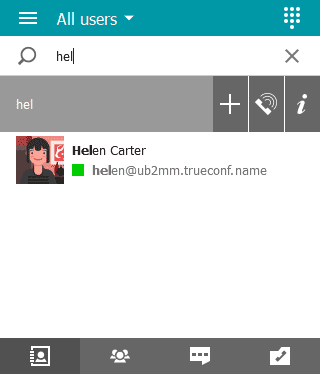
How to delete a user
Find the user/device by its display name in the address book. In its context menu, select the item Delete user.
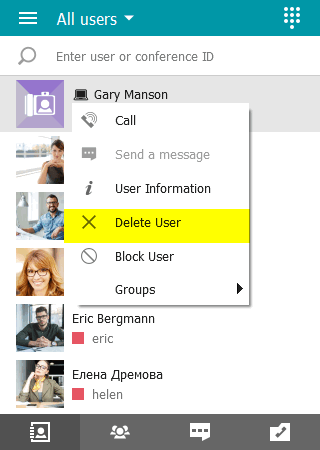
This button is available only for users and devices you have manually added.
How to block users
You can block any user through their context menu.
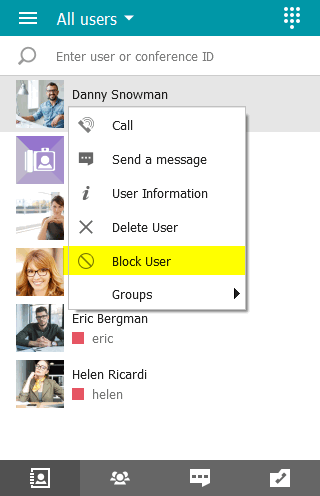
You can cancel your actions in the same way.
When you block a user, they will not be able to:
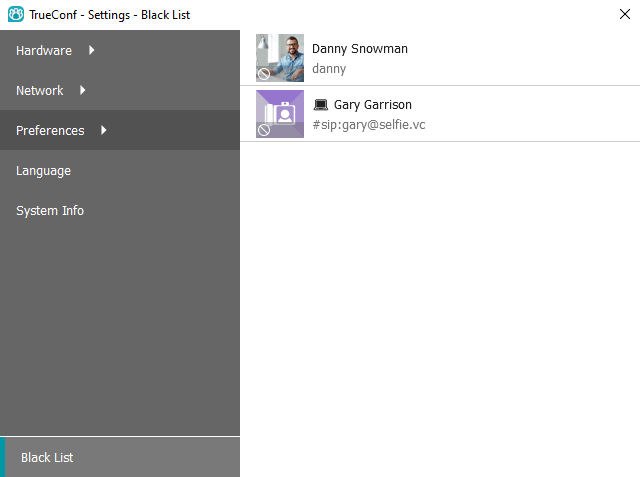
The list of blocked users is displayed in section Settings → Black list of the client application:
Viewing and editing users' personal information
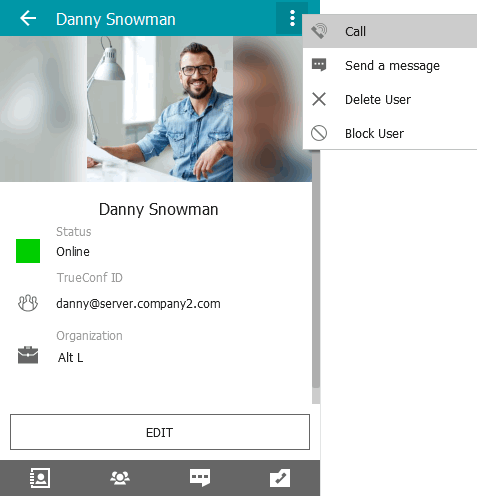
To view the user's profile:
a pop-up panel that appears when you left-click on their name — there is a
 button;
context menu. To do this, select User information.
The following options are available in the user's profile:
view/edit the information about the user.
call a user or send a personal message.
delete or block a user.
If a user was added by the administrator of your server TrueConf, you will not be able to delete the subscriber or edit their profile.
Organizing your address book
Creating user groups
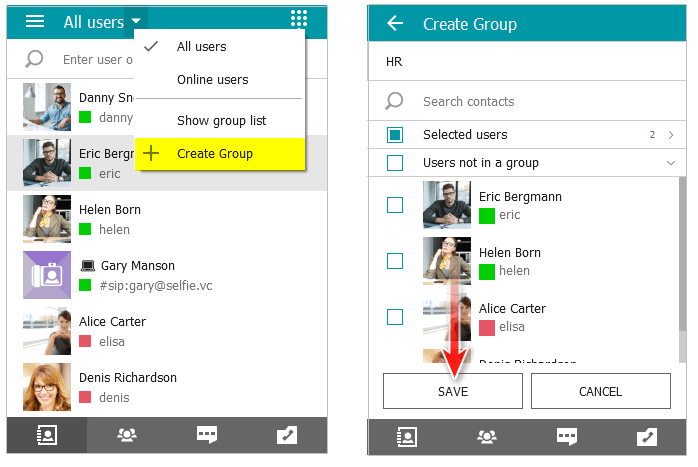
Click the triangular button (down arrow) next to All users and select Create group from the dropdown menu.
The group creation menu will open. Enter the group name and select users.
After that, click the Save button at the bottom.
Setting up the address book view
The buttons for changing the address book view are located in the same menu as the Create group button from the previous section. Here, you can specify which users to display: all, online, or a specific group.
To display only the users from a specific group in the address book, click Show group members only and select the desired group from the dropdown list.
The list of all your groups will be displayed when you select Show group list.
Editing or deleting groups
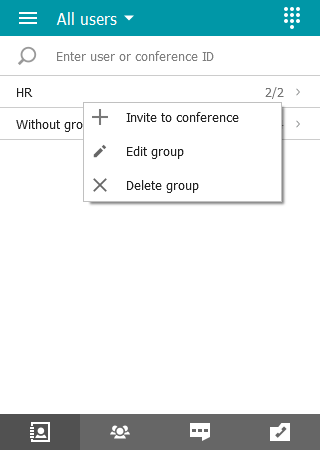
To delete or edit a group:
Go to the list of groups in the address book.
Find the desired group and select either Edit group or Delete group from its context menu:
[View the external user directory]{1}.
By clicking the  icon at the top of the address book, you will access the directory of users from TrueConf Server servers synchronized with yours.
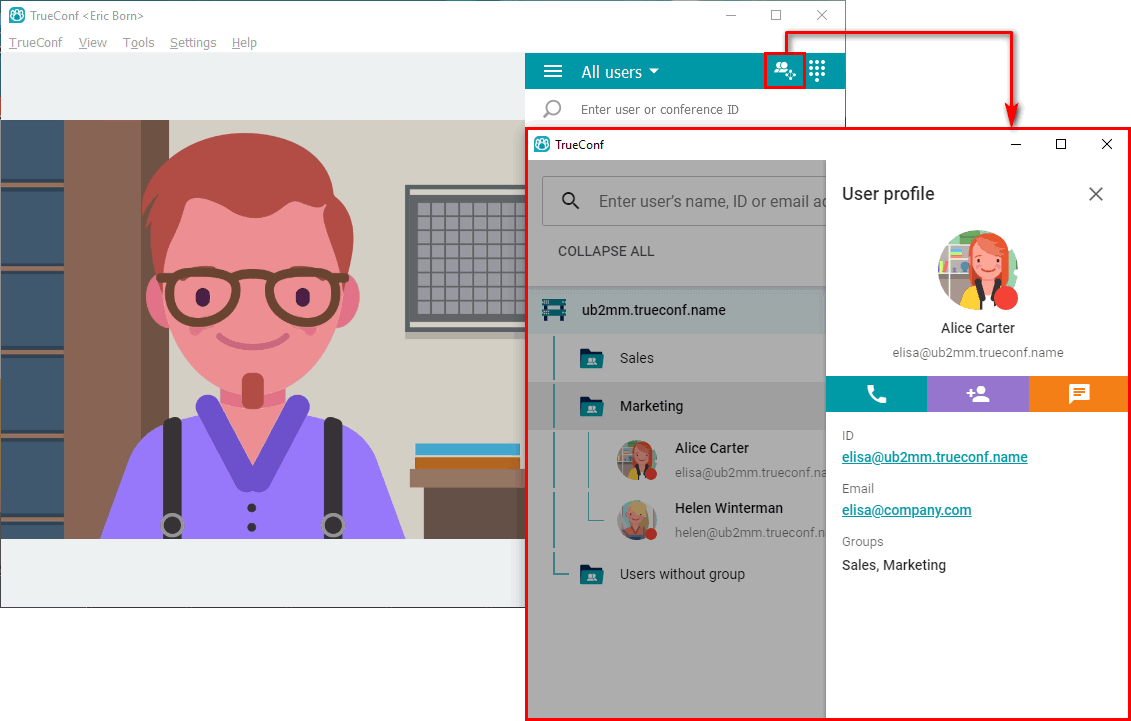
This icon may be absent if integration with TrueConf Directory is not configured on the server.