# Integration with video communication servers
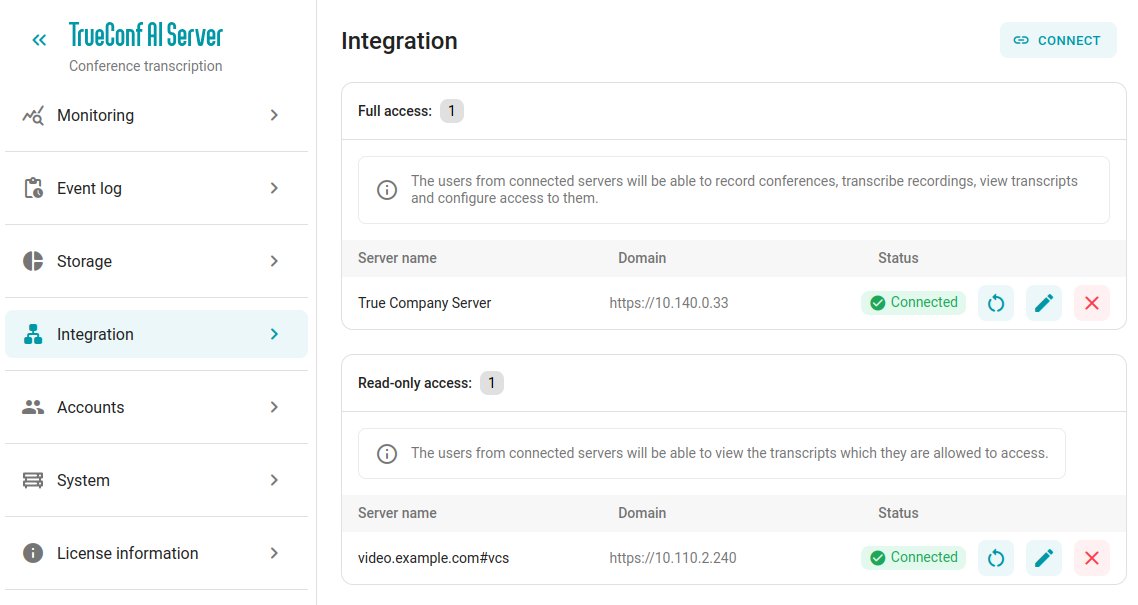
In the Integration section, you can configure the connection with all TrueConf Servers that will transmit audio recordings for recognition. You'll see two lists of servers here: one with full access and another with read-only access.
Requirements for successful integration:
The AI server and the video conferencing server must be able to resolve each other's domain names (FQDN). If this is not the case, you must create the corresponding IP address mappings in the
hostsfile on both machines;HTTPS is configured on the TrueConf Server and TrueConf AI Server sides;
appropriate license entitlements are available for both products, the number of permitted integrations in full-access mode is licensed.
After integration, you will gain a certain level of fault tolerance: in the event of a brief loss of connection between the AI server and the video communication core, all audio tracks will still be transmitted and recognized after network connectivity is restored. Also, when the AI server is restarted, all processes will automatically start, and recognition tasks will continue.
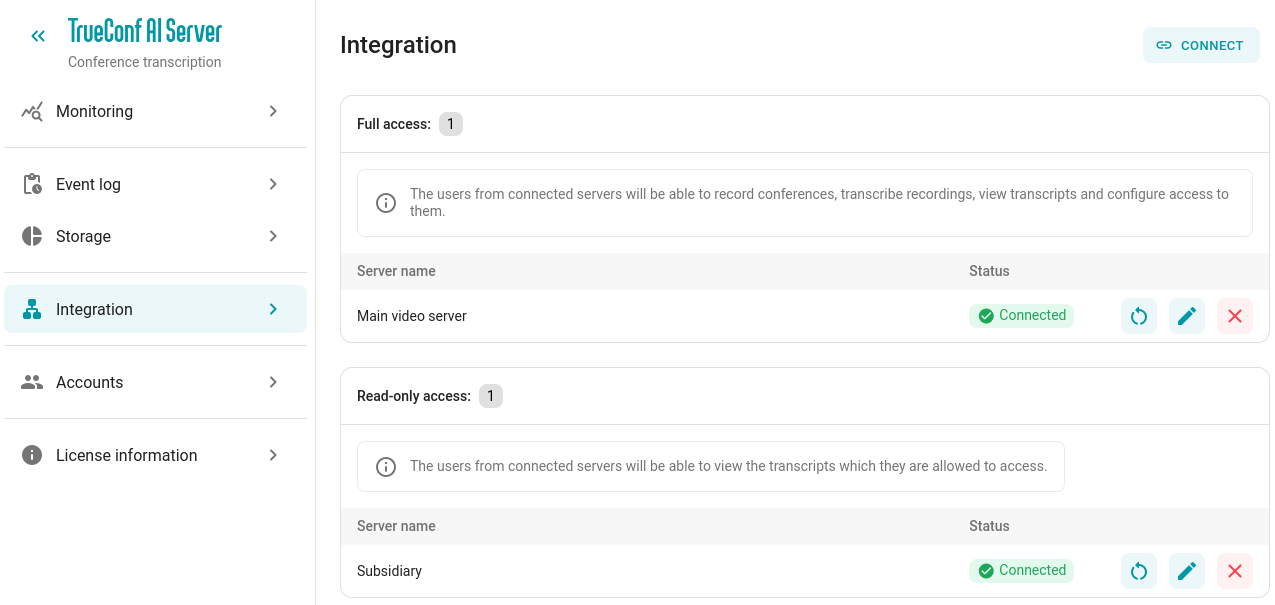
# Access levels
There are two types of access available for video conferencing server connections: full access and read-only access.
If the server is connected with full access level, users will be able to:
host conferences with transcriptions;
send the recording for decryption in your personal account on the AI server side;
configure transcription viewing rights;
view transcription results;
download decryption results (logs).
If the server is connected with read-only access level, users will be able to:
log in to your personal account to view transcripts;
view the results of transcripts they have access to;
download decryption results (logs).
# Adding a video communication server
A pre-generated integration key is required on the TrueConf Server side. To do this, open its control panel and go to the section Extebnsions → TrueConf AI Server, then generate the key as shown in the documentation.
To add TrueConf Server, click the Connect button. A window for entering the generated integration key will open:
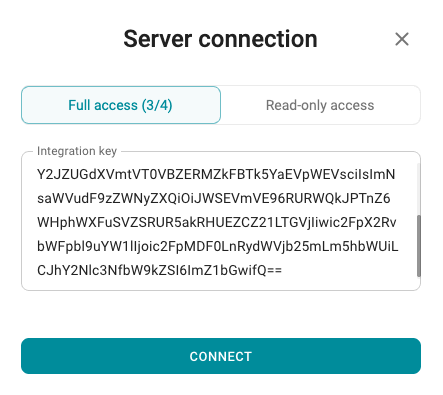
You can select the access level for users of this server. A hint will be displayed showing how many full access slots are already occupied out of those available according to the license. If the full access slots are exhausted, only read-only mode will be available.
Enter the key and click Connect to complete the setup.
# Editing a previously added server
To edit any previously added server (for example, change the access level), click the  button next to its name. The same window as when adding a server will open.
You can remove a previously added server using the  button.
If there was a disconnection from TrueConf Server and you need to try to manually restore it, press the  button.
# Keyless integration
Connecting to a video conferencing server with an integration key is supported only for TrueConf Server 5.5.0+, as it is from version 5.5.0 that this key can be generated. However, it is still possible to connect to an older VC server (version 5.4.5 and below) but only in read-only mode.
Pre-configuration on the TrueConf Server side will be required. Open the control panel and create an OAuth application:
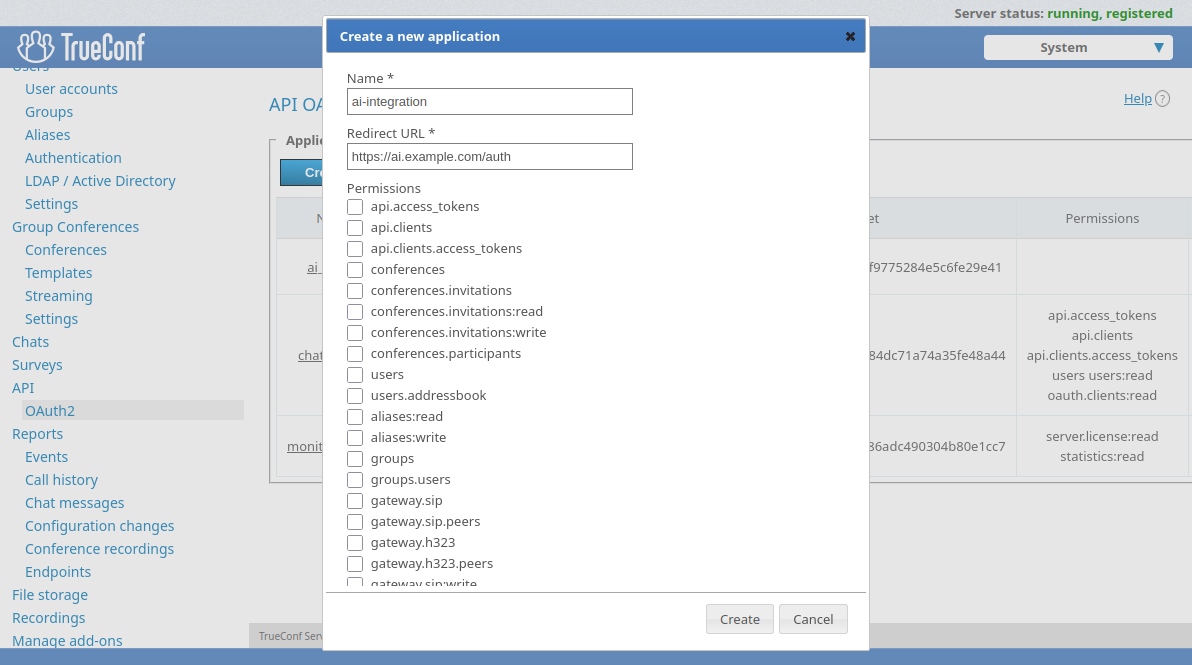
Go to the API → OAuth2 section of your TrueConf Server's control panel.
Click Create a new application.
Enter its identifier in the Name field. It is used only for display in the list of applications.
In the Redirect URL field, enter
https://ai_server/auth, whereai_serveris the IP address or FQDN (fully qualified domain name) of the server with TrueConf AI Server.Do not check any boxes in the permissions list and click the Create button.
For more information on creating OAuth applications, see the TrueConf Server documentation.
In the TrueConf AI Server control panel, perform the following steps:
In the Integration section, click the Connect button.
In the pop-up window, click on Connect without key:
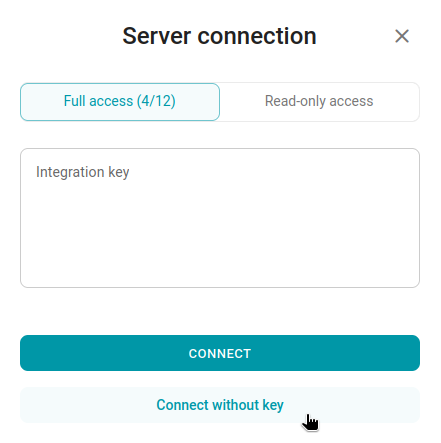
The window for entering information about the connected video communication server will open, and in the field Name you need to specify the name from the field Web → Settings → Name and in the field Domain specify the address TrueConf Server with the
https://prefix: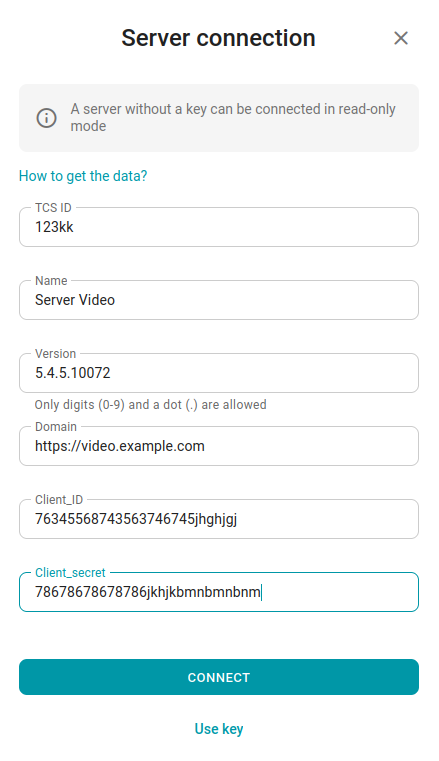
Fill in all the fields with data about the video communication server. After that, click the Connect button. If everything was successful, you will see the added server in the Read-only access list:
# Does the administrator have access to transcripts or summaries?
No. The AI server administrator does not have access to transcripts and summaries of conferences. This ensures that multiple TrueConf Server instances can be connected to a single AI server without the risk of confidential data leaks through the AI server administrator.
Access to transcripts can be configured only by:
The administrator of the video conferencing server (and only if he/she was given such permissions in the settings)
The user who already has this permission.
# How to disable user authentication via the AI server address
For the sake of convenience, the user personal area in TrueConf Server includes the list of transcripts (and related summaries). This allows users to work with texts within a unified interface without going to the AI server address. To enhance information protection, the security department may insist that user authentication via the TrueConf AI Server address should be disabled, for instance, if the AI server interacts with different video conferencing servers, and the list of such servers should be hidden.
In this case users will not lose anything because they will still be able to work with AI texts in their TrueConf Server personal area. The admin login link for TrueConf AI Server will remain available.
To disable user authentication on the TrueConf AI Server webpage, you need to change one parameter in the following way:
- Open the terminal in the OS where TrueConf AI Server is installed, and run the following command:
sudo nano /opt/trueconf/ai-server/etc/manager/config.toml
Find the
[auth]block in the opened file.Set the parameter
authentication_available = false(or change the value tofalseif it already exists).Save your changes by pressing CTRL+X, then Y and Enter.
Restart the API service (daemon) with the command:
sudo systemctl restart trueconf-ai-manager