Configuring kiosk operation
Configuring kiosk operation
To perform the basic configuration of TrueConf Kiosk, you need to specify:
your TrueConf Server's address;
- TrueConf ID The user's login and password, on whose behalf TrueConf Kiosk will make the call to the server;
Media capture and output devices (camera, microphone, headphones)
the user (or multiple users) whom TrueConf Kiosk will call when the call button is pressed.
Let us examine the sections (elements) of the settings window that are related to these parameters.
Connecting to the video conferencing server
In the first section of Server connection, the fields are located:
- Server address – the address of your TrueConf Server;
- TrueConf IDPassword, Confirm password – the username and the password repeated twice for server user authorization by the kiosk; the kiosk will make calls on behalf of this user.
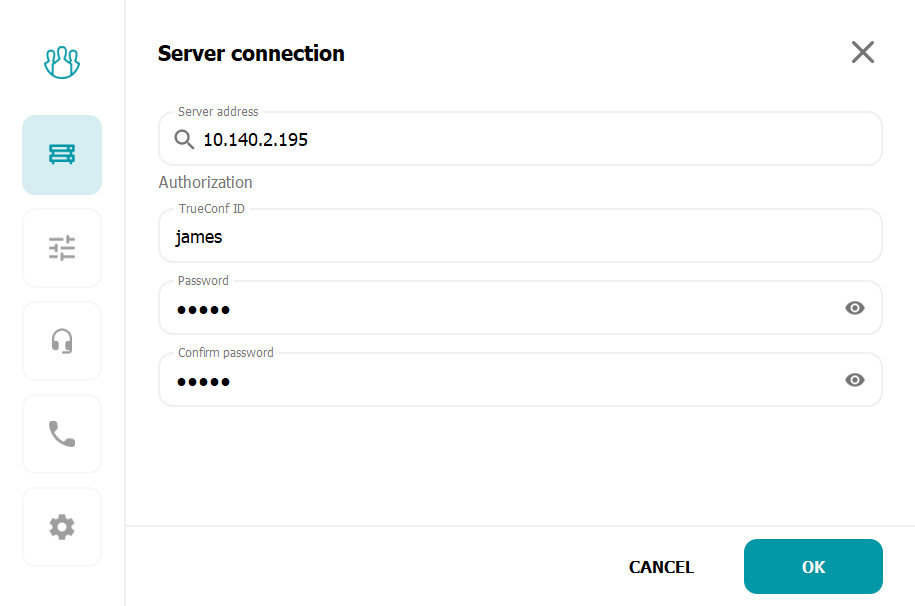
To save the settings, use the Save button (it can be pressed once after specifying all the parameters).
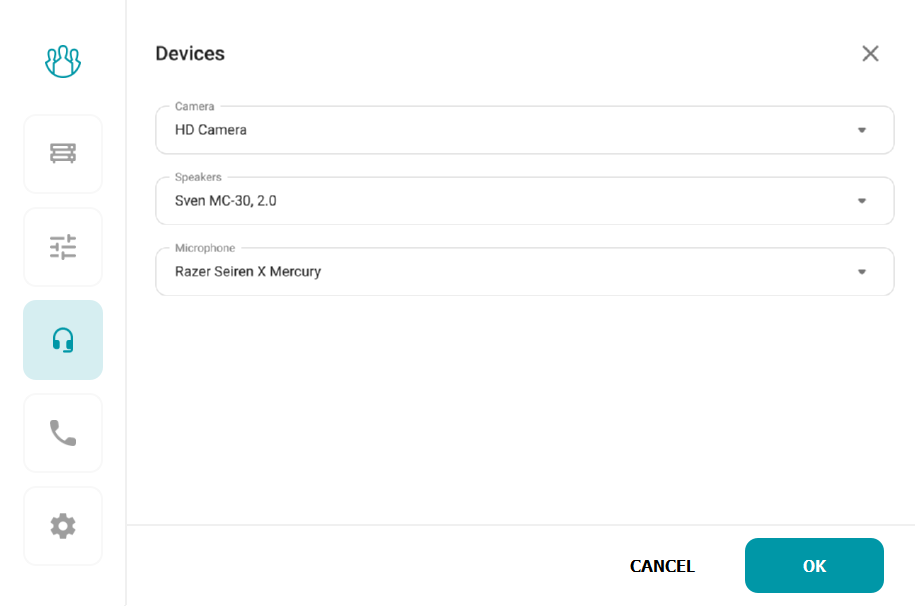
How to select the equipment to use?
To select the equipment that the kiosk will use during the call, go to section Devices in the configurator window.
Configuring buttons for calls
In the Calls section, you can add buttons to call operators using the ADD button.
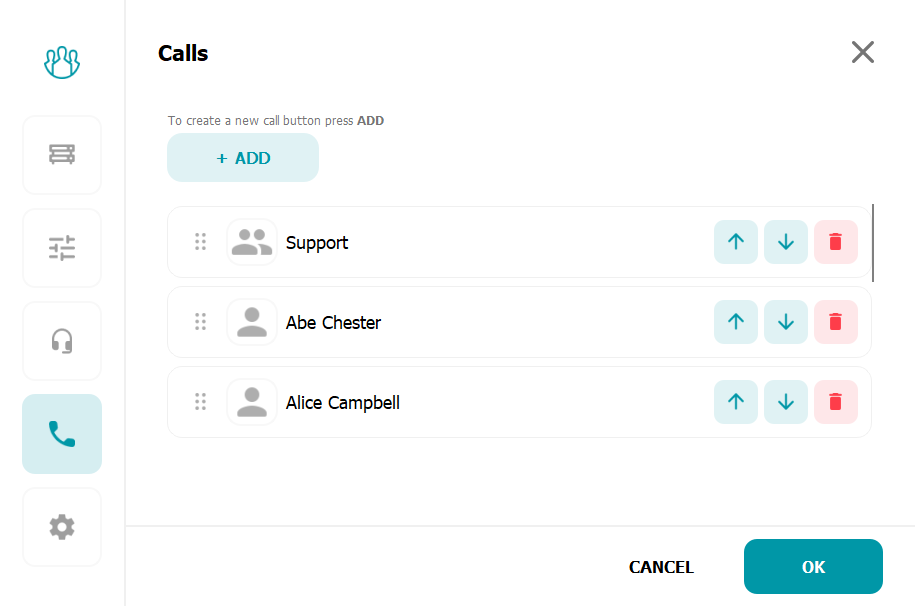
Call buttons can be of several types:
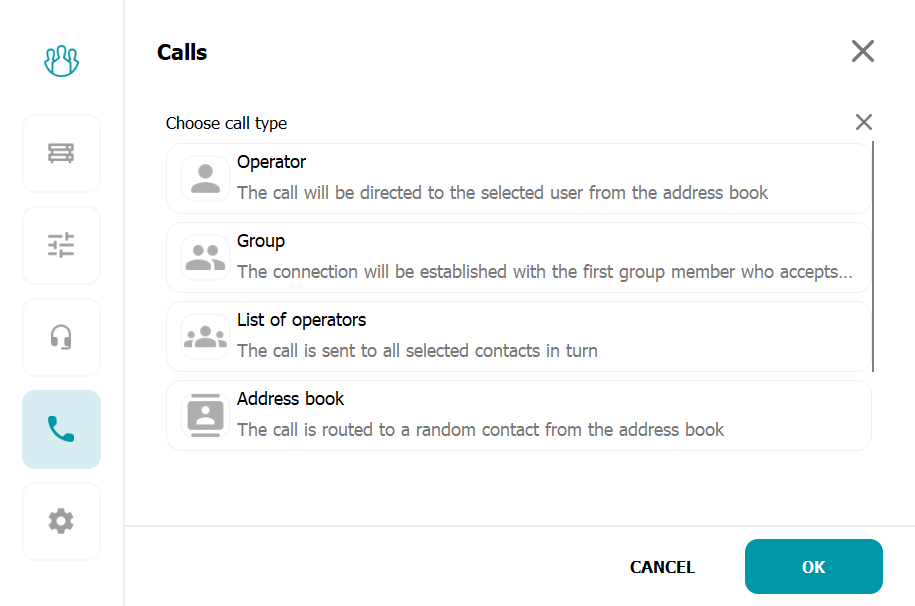
- Operator - one operator, specify TrueConf ID and the display name for it;
- Group - Operator group: specify the ID of the required group and assign it a name. You can find the group ID using an API request in the relevant documentation.
- List of operators - List of operators: manually add all necessary users and specify the display name;
- Address book - Address book TrueConf Kiosk, specify the display name of the button and configure callback parameters. By pressing this type of button, you will sequentially call all users in the address book in a random order.
The role of an operator allowed to receive a call can be given to:
a user of your video conferencing server or another one with which federation is configured;
- the conference identifier (ID) to which you want to direct the call (for example, to a virtual room with a duty operator);
SIP or H.323 device, RTSP camera, etc. – any device that TrueConf Server supports a connection with. You can find a detailed description of the call string format for each of these cases in the documentation TrueConf Server.
For example:
<user>– calling the<user>of your TrueConf Server.<user>@<server>[:<port>]– call the user<user>from the server TrueConf Server, located at<server>[:<port>]. The server address can also be an IP address. For the call to be successful, federation must be configured on both servers.#sip:<user>[@<server>[:<port>]]– call the user<user>on the server<server>[:<port>]using the SIP protocol. If the server is not specified, the call will be directed to the server set as the default SIP Proxy in the SIP gateway settings of your server;#h323:@<ip>– calling H.323 device via IP.
To save the TrueConf Kiosk Configurator settings, you must add at least one contact of type Operator.
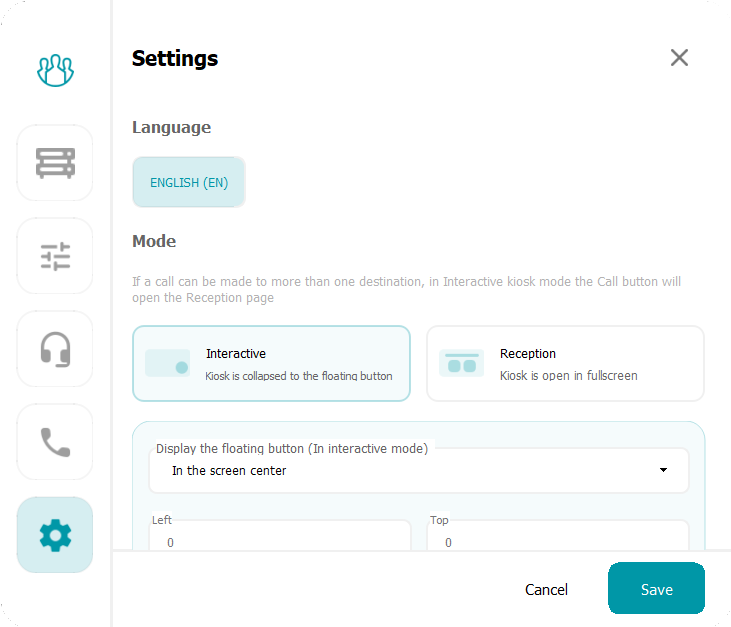
Kiosk Mode Configuration
TrueConf Kiosk can operate in two different modes:constantly display the main window with call buttons on the device screen (PC, interactive terminal, etc.) – Reception;
Do not cover the device screen content, but display a floating call button in the bottom right corner on top of all windows – Interactive.
The reception mode is useful when TrueConf Kiosk is the sole application on the device and serves as the main point of interaction. However, if another application is running on the device, and the user needs to access a service or contact, the interactive kiosk mode with a floating button is convenient.
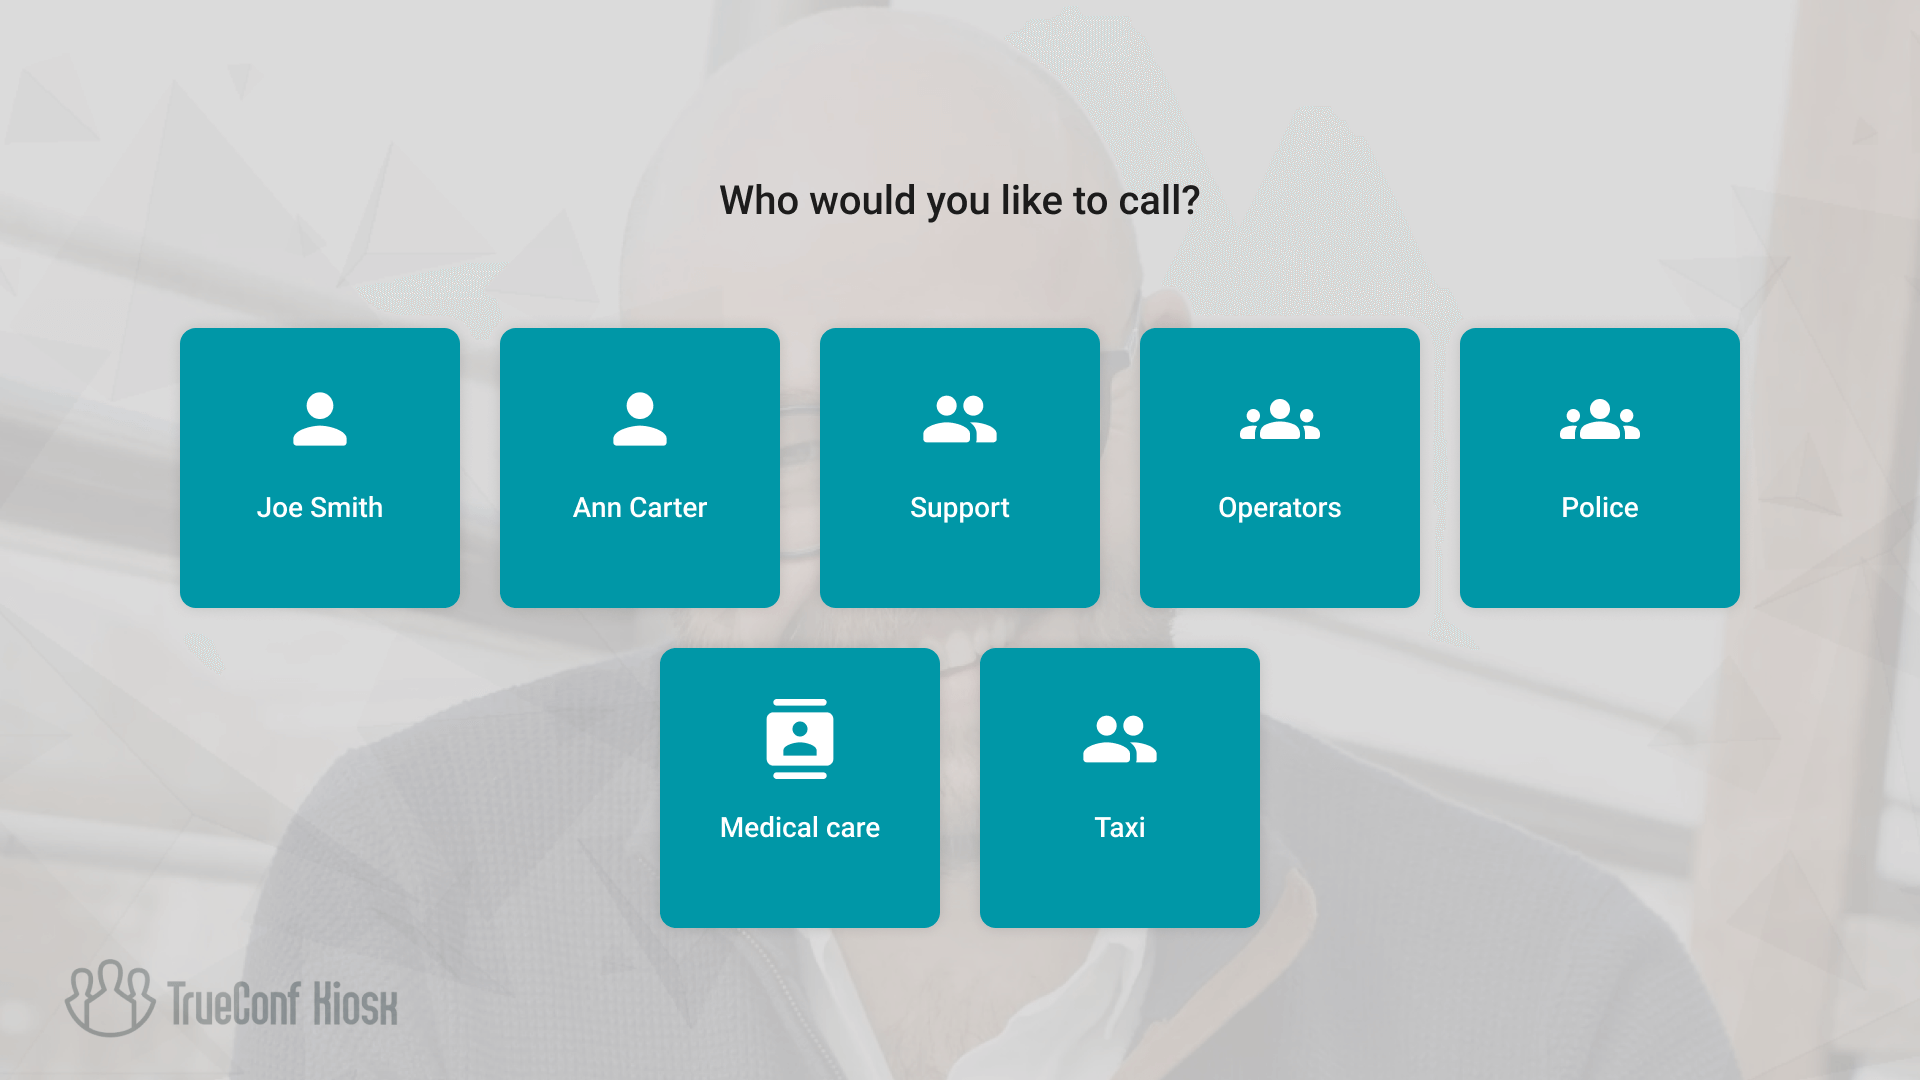
Example of the main screen in reception mode:
Using the interactive mode, you can select the position of the floating button from the dropdown list Display the floating button (In interactive mode). When you select the Fixed coordinates option below, two input fields Left and Top are activated.
If only one address is configured for calling in interactive kiosk mode, pressing the floating button will immediately initiate a call. Otherwise, a window with a list of buttons will appear and will collapse after a few seconds if the user does not choose a recipient to call.
To select the kiosk operating mode, go to section Settings. Here, you can also specify the label that will be displayed above the call buttons and set the duration for waiting for a response from the recipient on an outgoing call.
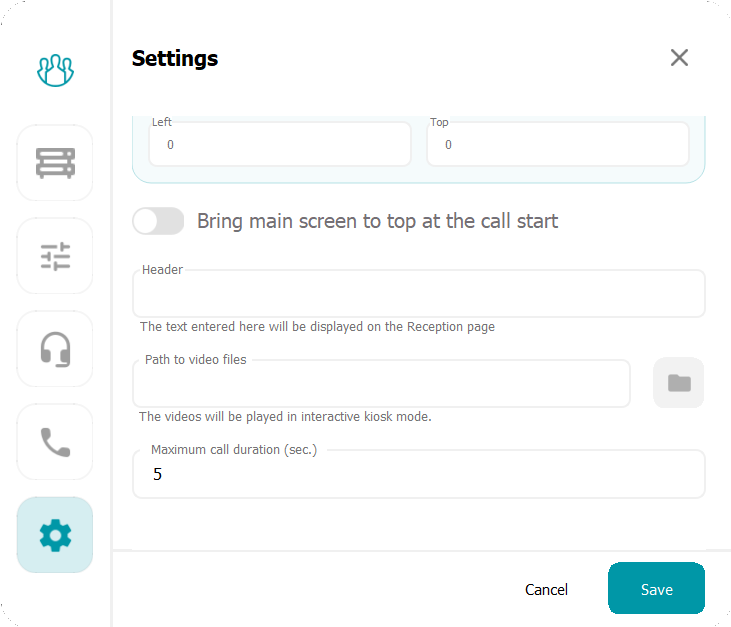
Activate the Bring main screen to top at the call start toggle to bring the TrueConf Kiosk window to the foreground during the conference. The Path to video files field displays the path to the directory containing the videos to be shown in interactive kiosk mode on the device screen. You can specify the desired path using the  button:
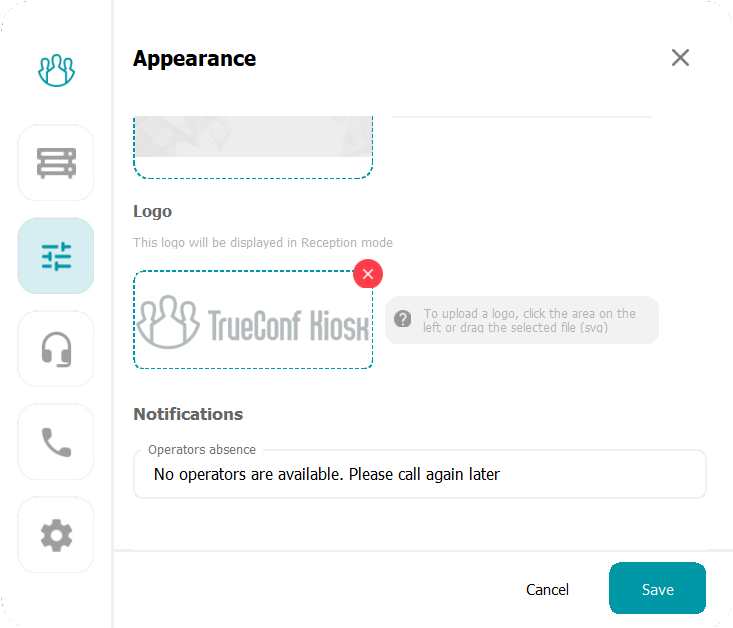
Background and Logo Setup
By default, an image from the camera selected in the device list is used as the translucent background for the buttons. If you need to set a custom background for application branding, you can do so in the Appearance section. You can also specify a logo to be displayed in the bottom left corner there.
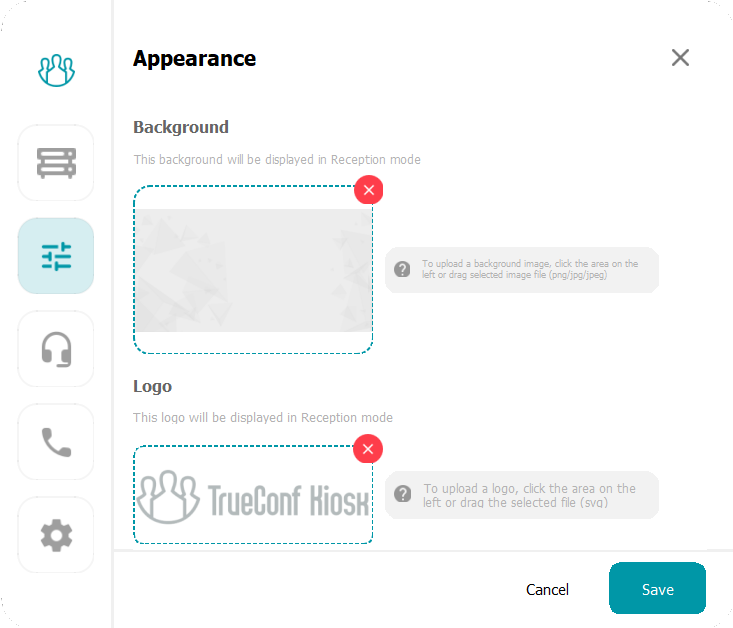
To remove the background image or logo, use the  button in the corresponding block.
In section Notifications, there is a customizable field No operators are available responsible for displaying a notification to the user in two situations: when no operators are available at the time of the call and when a call is rejected. By default, the notification text is: No operators are available. Please call again later.