# System requirements and installation
Before installing TrueConf Calendar Connector make sure that:
You have created an impersonation account on the Microsoft Exchange server.
The machine where it will be installed can access the corporate Microsoft Exchange server via the HTTPS port
443(check the operation scheme).TrueConf Server has been installed and registered in advance.
Integration with Active Directory is already configured on TrueConf Server.
The machine, where TrueConf Calendar Connector will be installed, has an HTTPS connection to the computer with TrueConf Server.
# System requirements
TrueConf Calendar Connector can be installed on the same physical or virtual machine where TrueConf Server is installed, or on a separate machine. If you choose to install TrueConf Calendar Connector separately, take into account minimum requirements:
| Parameter | Value |
|---|---|
| Supported mail server | Microsoft Exchange 2016+ |
| OS | Dedicated or virtual 64-bit operating system:
|
| CPU | • Intel Core i3-8100 (3.6 GHz) • Intel Core i5-7400 (3.0 GHz) • Intel Xeon E-2234 (3.6 GHz) |
| RAM | 8 GB DDR4 |
| Storage | 32 GB |
| TrueConf Server | version 5.5.0 |
For an accurate estimation of system requirements, contact our technical support.
Events are displayed in the calendar of all client applications (TrueConf for Windows, Linux, macOS, Android, iOS/iPadOS).
# Installation on Windows
Download the installer by following this link: TrueConf Calendar Connector for Windows Server 2012+.
Run the installer, enter the administrator password if prompted, and follow the on-screen installation instructions.
# Installation on Linux
To run the following commands as an administrator, you will need to use the sudo program. Please note that by default sudo may not be available in the OS. Execute the command sudo -V to check if this program is available. If it is not available, you will need to follow the installation instructions for your OS.
Installation:
Download the TrueConf Calendar Connector installation package for your OS:
2. Open the terminal in the directory with the downloaded package and execute the following command:
On Debian
sudo dpkg -i <path>
- where <path> is the path to the .deb package.
On CentOS
sudo rpm -i <path>
- where <path> is the path to the .rpm package.
Activate the solution to launch the calendar service (daemon).
# Product registration
Before you start using TrueConf Calendar Connector, you will need to register it according to the instructions below.
# How to get the registration key
To register this software, you will need your registration key, received after filling out the form which is available via the following link:
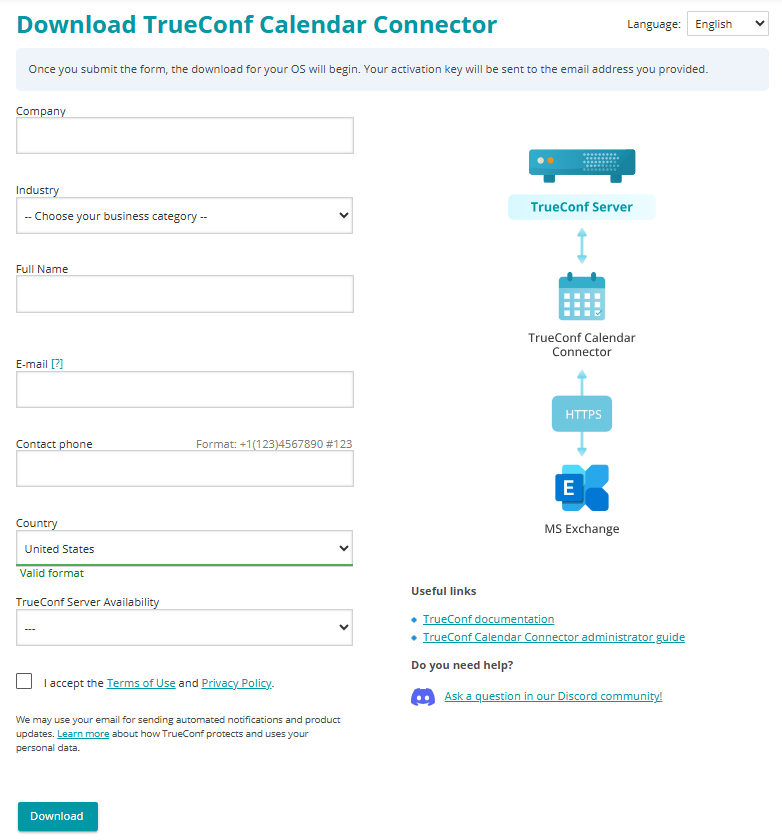
The registration key will be sent to the email address you provided when filling out the form.
The key should be sent within 15 minutes
If there is no key, please contact us or check the SPAM folder of your email client.
# Online registration
Access to the registration server reg.trueconf.com via the port 443 (TCP) is required when the software has to be registered online and the free version of the product is used.
# Windows
Open the command line (cmd) as an administrator and activate the software using the registration key:
C:\Program Files\TrueConf\Calendar\tc_calendar.exe --register MY-REG-KEY
- where MY-REG-KEY is the activation key received after filling out the registration form.
After successful registration, you will see:
Your product successfully registered. Now you can run tc_calendar
# Linux
Run the command:
sudo /opt/trueconf/calendar/bin/calendar/tc_calendar --register MY-REG-KEY
- where MY-REG-KEY is the activation key received after filling out the registration form.
After successful registration, you will see:
Your product successfully registered. Now you can run tc_calendar
# Offline registration
A free license cannot be registered offline. This form of registration is available only for paid licenses.
The product is activated in offline mode in the networks that have no access to the registration server reg.trueconf.com via the port 443 (TCP).
Run the following command to make sure that the installation file does not have access to reg.trueconf.com:
ping reg.trueconf.com
For offline activation:
If there is no connection with the registration server when the registration command is executed, the
regoffline.crgfile will be generated. The path to this file will be displayed in the terminal.Send the
regoffline.crgfile to your manager in any convenient way.In response, the manager will send you a valid registration file. Copy this file to the TrueConf Calendar Connector directory.
# Windows
- Open the terminal (command line) as an administrator and activate the software with the help of the registration key:
C:\Program Files\TrueConf\Calendar\tc_calendar.exe --offline_reg regoffline2.crg
# Linux
- Open the terminal as an administrator and activate TrueConf Calendar Connector with the help of the registration key:
sudo /opt/trueconf/calendar/bin/calendar/tc_calendar --offline_reg regoffline2.crg
# Configuration
Before launching the calendar, you first have to set parameters in the configuration file. To learn how to do it, go to the Configuration section of this documentation.
# Configuration on the TrueConf Server side
Before launching the calendar, you need to set up integration on the side of TrueConf Server.
To do it, go to the TrueConf Server control panel and open the Manage add-ons → TrueConf Calendar Connector section. Here, you need to specify the address of the machine with TrueConf Calendar Connector in the Connection to TrueConf Calendar Connector block, check the Activate extension box, and then click Apply:
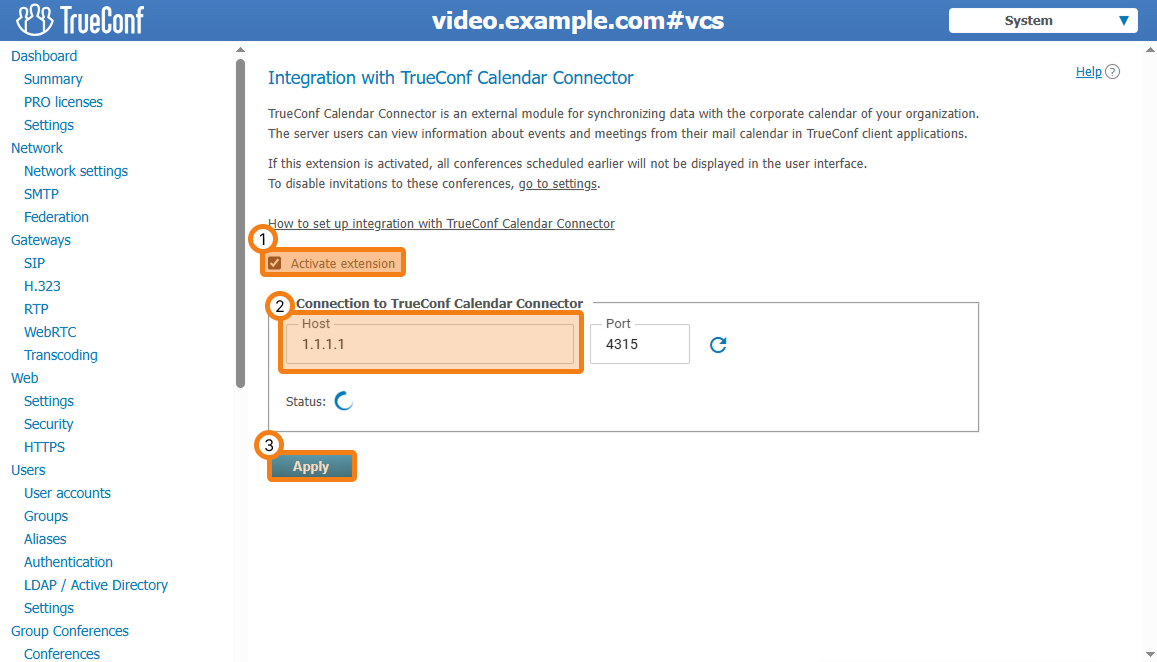
If a connection is successfully established with the server where TrueConf Calendar Connector is installed, the Status field will display Connection successful.
# How to start the calendar application
# Windows
Open the Task Manager (
Ctrl + Shift + Esc).Go to the section.
Locate the TrueConf Calendar service and restart it (or start it if it was stopped).
Set up integration on the TrueConf Server side.
In case of successful registration, the following message will be displayed:
Your product successfully registered offline. Now you can run tc_calendar
Later, to manage TrueConf Calendar Connector, you will need to use the task manager.
# Linux
After specifying the required parameters described above, start TrueConf Calendar Connector with this command:
sudo systemctl start trueconf-calendar.service
If the launch limit is exceeded, run this command:
sudo systemctl reset-failed trueconf-calendar.service
Now you can test the work of the TrueConf Calendar Connector service (daemon) by taking the following steps:
sudo systemctl status trueconf-calendar.service
You will receive one of the responses:
active (running) – TrueConf Calendar Connector is working normally.
failed – TrueConf Calendar Connector is NOT working. In this case, try restarting the service using the command described above.
Later, to manage TrueConf Calendar Connector, you will need to use the terminal.
In case of any issues, please contact our technical support.